

Virtuoso AMS Environment User Guide
Quick-Start Tutorial
9.If the Update Sync-up message appears, make sure that the amslib top config cellview is selected, then click OK.
Netlisting and Compiling
In AMS Designer, netlisting translates the design into equivalent Verilog-AMS modules. In the compiling step, those Verilog-AMS modules are then converted into internal representations of the design that are optimized for efficient processing.
You can automatically netlist and compile a cellview during a Check and Save operation.
You can also netlist and compile an entire design with AMS Design Prep. These procedures illustrate different ways of using the AMS environment.
In the tutorial sections that follow, you first netlist thetop schematic during a Check and Save operation, an exercise that illustrates automatic netlisting. Then you use AMS Design Prep to netlist the other blocks of the design.
Automatic Netlisting and Compiling
When you use automatic netlisting, you can focus on developing your schematics because the manual netlisting step is eliminated. To turn on automatic netlisting,
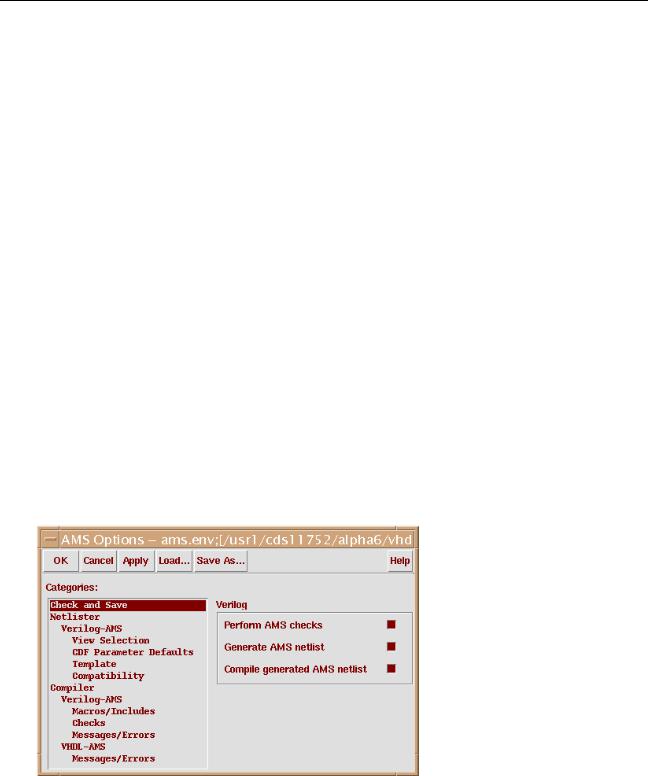
1.In the CIW, choose Tools – AMS – Options. The AMS Options form appears.
The defaults in the AMS Options form are defined in theams.env file.
2. If necessary, in the Categories field, chooseCheck and Save.
April 2004 |
33 |
Product Version 5.3 |

Virtuoso AMS Environment User Guide
Quick-Start Tutorial
3.Turn on Perform AMS checks, Generate AMS netlist, and Compile generated
AMS netlist, then click OK.
These choices ensure that cellviews are automatically checked, netlisted, and compiled when you click the Check and Save button in the Virtuoso Schematic Editing window.
4.Netlist the top schematic by clicking the Check and Save button in the Virtuoso Schematic Editing window:
AMS netlister messages are sent to the CIW.
The netlist for the top schematic is saved in
./AMS_lib/amsLib/top/schematic/verilog.vams
The netlist looks like this:
//Verilog-AMS netlist generated by the AMS netlister.
//Cadence Design Systems, Inc.
‘include "disciplines.vams" ‘include "constants.vams"
module top ( ); electrical dacOut; wire [0:7] b;
vsource #(.type("dc"), .dc(5)) (*
integer library_binding = "analogLib"; *) V0 ( cds_globals.\vdd! , cds_globals.\gnd! );
vsource #(.type("dc"), .dc(0)) (*
integer library_binding = "analogLib"; *) V1 ( cds_globals.\vss! , cds_globals.\gnd! );
vhdl_clock (* integer library_binding = "diglib"; *) I5 ( .out1( clkSig ) );
sareg (* integer library_binding = "diglib"; *) I3 ( .result(
compOut ), .clkSig( clkSig ), .b6( b[6] ), .b5( b[5] ), .b0( b[0] ), .trigger( endOfConv ), .b2( b[2] ), .endOfConv( endOfConv ), .b1( b[1] ), .b3(
b[3] ), .b4( b[4] ), .b7( b[7] ) );
daconv (* integer library_binding = "amslib"; *) I4 ( .b6( b[6] ), .b5( b[5] ), .b0( b[0] ), .compSig( dacOut ), .b2( b[2] ), .b1( b[1] ), .b3( b[3] ), .b4( b[4] ), .b7( b[7] ) );
signalSrc (* integer library_binding = "amslib"; *) I0 .sig( inSig ) );
comparator (* integer library_binding = "amslib"; *) I2 ( .inp( holdSig ), .inn( dacOut ), .out( compOut ) );
samplehold (* integer library_binding = "amslib"; *) I1 ( .holdSig( holdSig ), .trigger( endOfConv ), .inSig( inSig ) );
endmodule
April 2004 |
34 |
Product Version 5.3 |
Virtuoso AMS Environment User Guide
Quick-Start Tutorial
Netlisting and Compiling with AMS Design Prep
In the previous section, you netlisted the top schematic by doing a check and save of the schematic. In this section, you netlist and compile the rest of your design by using AMS
Design Prep. (In this tutorial, there is only one more schematic, the comparator, to netlist, but you can use AMS Design Prep to netlist many cellviews at once.)
Preparing to Run AMS Design Prep
Before you can use AMS Design Prep, you must first install theAMS menu entry and then specify a run directory and the location of two files used by AMS Designer.
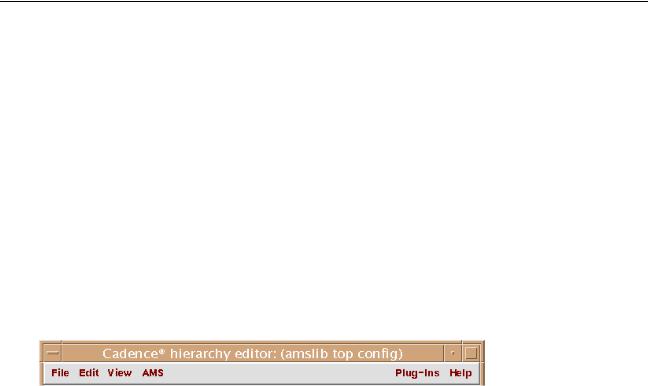
1.In the hierarchy editor, choose Plug-Ins – AMS.
The menu bar changes to include the AMS entry, as shown below. The AMS menu contains controls for the AMS environment and simulator.
2.Choose AMS – Run Directory.
April 2004 |
35 |
Product Version 5.3 |

Virtuoso AMS Environment User Guide
Quick-Start Tutorial
The AMS Run Directory form appears.
3.In the Run directory field, changetop_run to tutorial_run. (Leave the rest of the path intact.)
By default, the run directory for this design is named top_run, but, as illustrated here, you can give the directory any name you choose.
4.Click OK.
The other entries in the AMS menu become active.
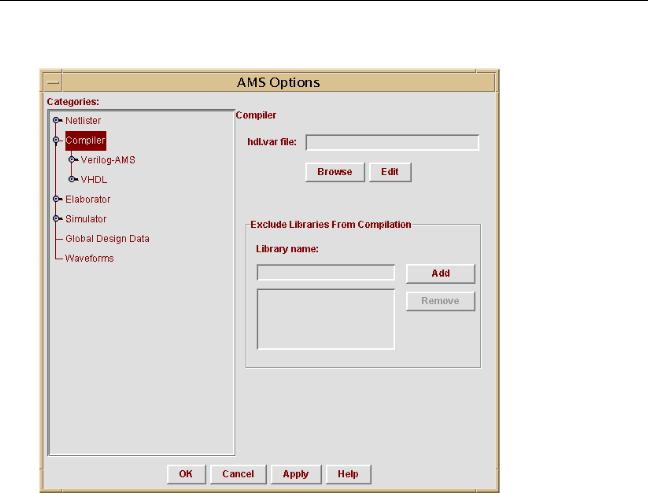
5.In the hierarchy editor, choose AMS – Options – Compiler.
April 2004 |
36 |
Product Version 5.3 |
Virtuoso AMS Environment User Guide
Quick-Start Tutorial
The AMS Options form appears, displaying the Compiler pane.
6. Click the Browse button.
April 2004 |
37 |
Product Version 5.3 |
Virtuoso AMS Environment User Guide
Quick-Start Tutorial
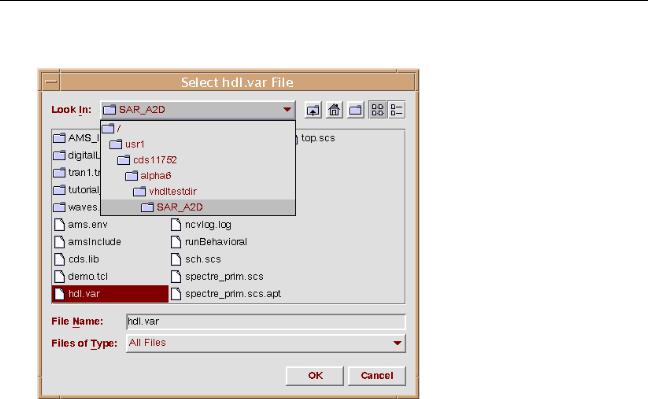
The Select hdl.var File browser appears.
7.Select the hdl.var file in the directory where you typed theicms command to open the CIW.
8.Click OK.
The browser closes. Your hdl.var selection appears in the hdl.var file field of the
Compiler pane.
9.Click OK.
Running AMS Design Prep
1. In the hierarchy editor, choose AMS – Design Prep.
April 2004 |
38 |
Product Version 5.3 |
Virtuoso AMS Environment User Guide
Quick-Start Tutorial
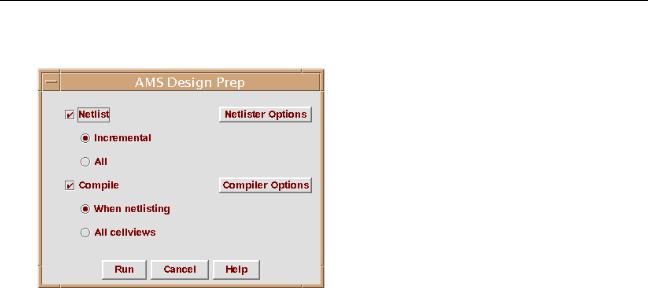
The AMS Design Prep form appears.
2.Turn on Netlist and Incremental.
These choices tell AMS Design Prep to netlist only cellviews that have changed or that have not been netlisted previously. This is an efficient way to use AMS Design Prep during the cycles of development because only blocks that need netlisting are netlisted.
3.Turn on Compile and When netlisting.
These choices tell AMS Design Prep to compile only cellviews that are being netlisted in the current AMS Design Prep run.
4.Click Run, which runs AMS Design Prep.
If the following message appears, click Yes.
The cds_globals module appears to have been modified outside of AMS Prep.... Continue processing and overwrite the cds_globals module?
If the following message appears, click Yes.
The configuration has been modified.
Do you want to update and save the configuration before running Design Prep?
April 2004 |
39 |
Product Version 5.3 |
Virtuoso AMS Environment User Guide
Quick-Start Tutorial
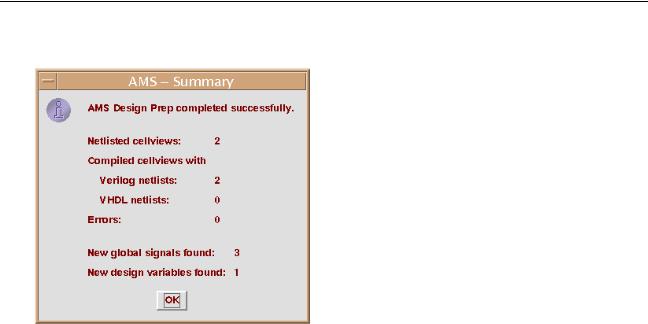
After AMS Design Prep finishes running, the Summary window appears.
5.Read the Summary window and click OK.
Depending on the version of AMS Designer that you are running, the number of netlisted and compiled cellviews might differ from that shown above. This variation reflects different approaches to handling the files used by AMS Designer.
Viewing the Netlist
To view the newly created netlist for the comparator schematic,
1.In the Cadence hierarchy editor Cell Bindings section, find the row for thecomparator cell.
April 2004 |
40 |
Product Version 5.3 |
Virtuoso AMS Environment User Guide
Quick-Start Tutorial
2. Right-click on the row, to display the pop-up menu.
3.Choose View AMS Netlist.
The netlist appears in a window.
4.When you are done viewing the netlist, quit from the netlist without saving.
Setting the Value of a Design Variable
You might have noted in the AMS Design Prep - Summary window the line saying that one new design variable was found in the design. In this section of the tutorial, you assign a value to that variable.
1.In the hierarchy editor, choose AMS – Design Variables. The AMS Design Variables form appears.
April 2004 |
41 |
Product Version 5.3 |
Virtuoso AMS Environment User Guide
Quick-Start Tutorial
2.In the Value cell for the idc variable, type 5u.
This value helps characterize a power supply for the design.
3.Click OK.
AMS Designer recreates and recompiles the cds_globals module so that the idc value is available to the design.
Setting Up the Analog Model File
You might have noted in the hierarchy editor that the configuration for this design includes cells called nmos4 and pmos4. In this section of the tutorial, you specify the location of the model file that characterizes those components.
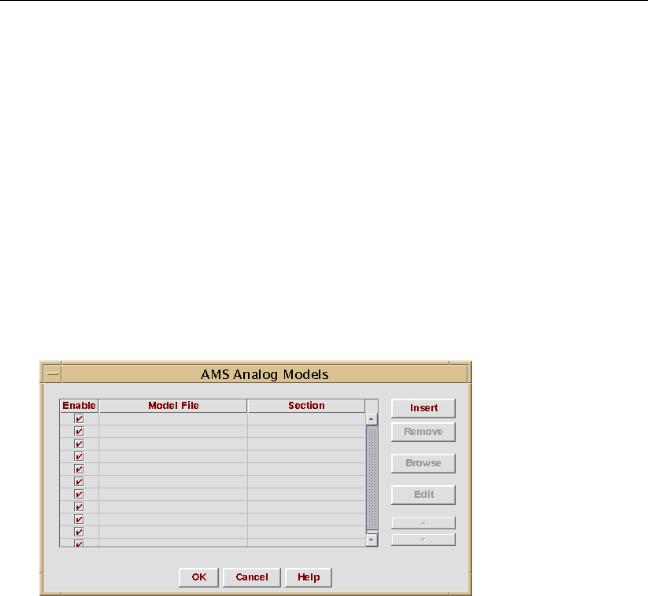
1.In the hierarchy editor, choose AMS – Analog Models. The AMS Analog Models form appears.
2.Highlight the top row, then click Browse.
The Select Analog Model File browser appears.
3.Select the spectre_prim.scs file in the directory where you typed theicms command to open the CIW.
4.Click OK to close the browser.
Your selection appears in the Model File column of the AMS Analog Models form.
5.With the same row highlighted, click Edit.
April 2004 |
42 |
Product Version 5.3 |