


Virtuoso AMS Environment User Guide
Elaborating, Simulating, and Plotting Results
The following table describes the information in each column.
Field |
Effect |
|
|
Name |
The name of the database. |
Compress |
Specifies whether the database is compressed to reduce |
|
its size. |
Maximum Size (bytes) The maximum size of the database. |
|
Statements |
Specifies whether statement trace data is written to the |
|
database. If Statements is checked, all value change |
|
events are also written to the database, whether Events is |
|
checked or not. |
Events |
Specifies whether all value change events are written to |
|
the database. If Events is not checked, the simulator |
|
discards multiple value changes for an object during one |
|
simulation time and writes only the final value at the end of |
|
that simulation time. |
|
|
3.Highlight a row to change an existing definition or to add a new one.
You can also copy and paste rows. For guidance, see “Copying and Pasting Within Tables” on page 285.
4.Click Close when you are done defining databases.
The AMS Databases form closes and the databases you defined become available as choices for the Database column of the AMS Save/Plot form.
Selecting Instances from the Virtuoso Schematic Editing Window
The Virtuoso Schematic Editing window presents a schematic view of the design. From that view, you can select objects for which you want to create probes. The precise probes created for each object depend on the options specified in theWaveforms pane of the AMS Options window. For guidance on setting those options, see “Creating Probes” on page 277.
To select objects from the Schematic Editing window,
1. Click Schematic on the AMS Save/Plot window.
The Virtuoso Schematic Editing window appears with this message:
Select objects from schematic to specify outputs to be saved. Press Esc to stop selections.
April 2004 |
282 |
Product Version 5.3 |

Virtuoso AMS Environment User Guide
Elaborating, Simulating, and Plotting Results
2.Select the objects you want to probe.
The names of the selected objects appear in the first column of the AMS Save/Plot table and the other columns are filled in according to the options specified in theWaveforms pane of the AMS Options window.
Selecting an object that is already in the AMS Save/Plot table removes the object from the table.
3.Press the Escape key when you are done selecting objects.
Selecting Buses
When you select a bus to save or plot, AMS Designer displays the AMS Select Members form, which gives you the opportunity to select the bus as a whole or to select from among the bits that compose the bus.
The following table describes the fields.
Field |
Effect |
|
|
Objects |
Lists the objects or buses you selected. |
April 2004 |
283 |
Product Version 5.3 |

Virtuoso AMS Environment User Guide
Elaborating, Simulating, and Plotting Results
Field |
Effect |
Expand member names
Preserve buses Specifies that buses are to be considered as wholes. As a result, the Save/Plot field lists each bus as a whole.
Individual bits Specifies that buses are to be considered as individual bits. As a result, the Save/Plot field displays the individual bits that compose each bus so that you can save or plot specific bits.
Members of
Expanded Net Name
Do not Save/Plot Contains the names of objects that are not to be saved or plotted.
Save/Plot |
Contains the names of objects to be saved or plotted. |
|
|
To select the buses or bits to be saved or plotted,
1.Turn on either Preserve buses or Individual bits.
2.Use the left and right arrows to move buses or bits as necessary between the Do not Save/Plot and the Save/Plot lists.
3.Click OK.
The AMS Select Members form closes and the buses or bits are added to the list in the AMS Save Plot window.
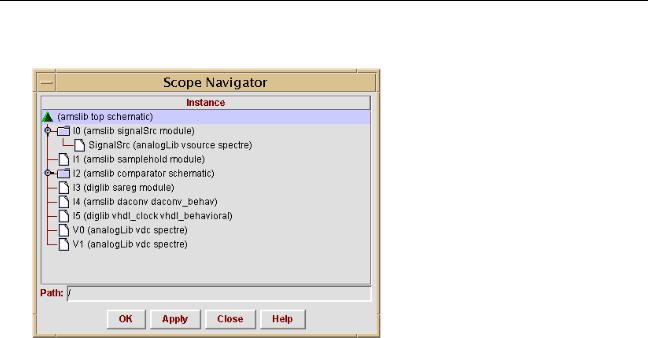
Selecting Instances from the Scope Navigator
The Scope Navigator window presents a tree view of the design hierarchy. From that view, you can select the instances for which you want to create probes. The precise probes created for each instance depend on the options specified in theWaveforms pane of the AMS
Options window. For guidance on setting those options, see “CreatingProbes” on page 277.
To select instances from the Scope Navigator,
1. Click Navigator on the AMS Save/Plot window.
April 2004 |
284 |
Product Version 5.3 |
Virtuoso AMS Environment User Guide
Elaborating, Simulating, and Plotting Results
The Scope Navigator window appears.
2.Expand branches as necessary to reveal the instances you want to probe.
3.Highlight one or more instances.
You can use the Shift key and the left mouse button to select a range of instances, or use the Control key and the left mouse button to highlight individual instances.
4.If only a single instance is highlighted, the hierarchical path of the instance appears in the Path field.
5.Click OK.
The names of the highlighted instances appear in the first column of the AMS Save/Plot table and the other columns are filled in according to the options specified in the
Waveforms pane of the AMS Options window.
Copying and Pasting Within Tables
You can create new rows in a table by copying one or more existing rows, pasting the copy into new rows, and then modifying the content of the new rows as necessary. This approach works for both the AMS Save/Plot table and the AMS Databases table.
■To copy complete rows,
a. Be sure that none of the type-in fields in the table, such asName, has focus.
April 2004 |
285 |
Product Version 5.3 |