


Chapter 7: Understanding Excel Files
Caution
Passwords are case sensitive. Be careful with this option because it is impossible to open the workbook (using normal methods) if you forget the password. Also, remember that Excel passwords can be cracked, so it’s not a perfect security measure. n
Organizing Your Files
If you have hundreds of Excel files, you might have a problem locating the workbook that you need. Using descriptive filenames can help, and using folders and subfolders (with descriptive names) also makes it easier to find the particular file you need. In some cases, though, that’s not enough.
Fortunately, Excel lets you assign a variety of descriptive information (sometimes known as metadata) to a workbook. These are known as document properties. This information includes such items as the author, title, subject, and so on.
When you choose File Info you can view (or modify) the document properties for the active workbook. This information is shown on the right side of the screen (see Figure 7.4).
Tip
If you aren’t seeing all the properties for your workbook, click the down-arrow on Properties and select Show All Properties Another option on the Document Properties drop-down list is Show Document Panel. Choosing this command displays the properties in a panel below the Ribbon. n
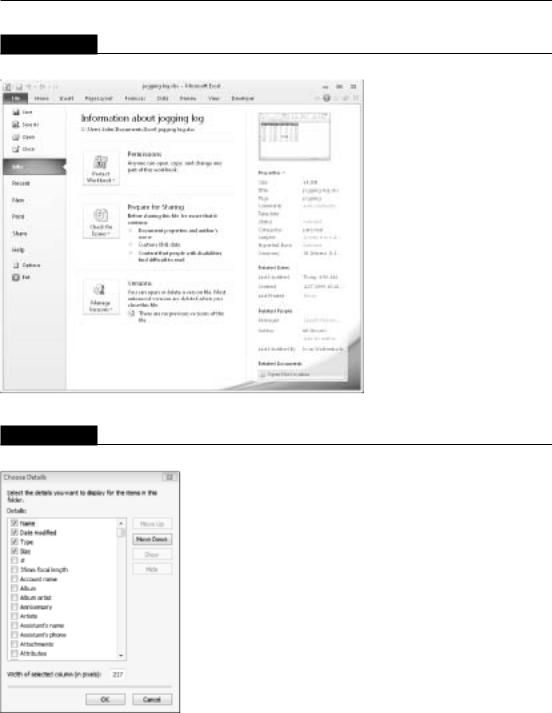
When you use the Open dialog box, you can specify additional columns to display. Start by clicking Views (at the top of the Open dialog box) and then choose Details. Right-click the column header to see a list of other properties to include. Click the More option for a longer list of properties (see Figure 7.5).
You can sort the file list in the Open dialog box by a particular column by clicking the column heading. Also, notice that each heading is actually a drop-down list. Click the drop-down arrow, and you can filter the list to show only files that match the selected properties.
Using document properties lets you work with files as if they were in a database. The key, of course, is taking the time to ensure that the document properties are actually assigned, and are accurate.
Tip
If you would like to be prompted to ensure that the document properties are correct, choose
Developer Modify Document Panel. In the Document Information Panel dialog box, select the Always
Show Document Information Panel on Document Open and Initial Save check box. If the Developer tab isn’t visible, use the Customize Ribbon panel in the Excel Options dialog box to display it. n
151
Part I: Getting Started with Excel
FIGURE 7.4
Use Properties to store additional information about your workbook.
FIGURE 7.5
The Choose Details dialog box, where you choose additional properties to display in the file list.
152

Chapter 7: Understanding Excel Files
Using Workspace Files
If you have a project that uses multiple workbooks, you probably get tired of opening the same files every time you work on the project. The solution? Create a workspace file:
1.Open all the workbooks used for your project.
2.Arrange the workbook windows the way you like them.
3.Choose View Window Save Workspace to display the Save Workspace dialog box.
4.Excel proposes the name resume.xlw, but you can specify any name you like. Just make sure that you use the XLW extension.
5.Click Save. The workspace file is created.
After creating a workspace file, you can open it by choosing File Open. In the Open dialog box, specify Workspaces (*.xlw) from the Files of Type drop-down list. Better yet, pin it to the top of the recent files list so it will always be easily accessible.
Note
A workspace file contains only the filenames and window position information — not the workbooks. Make sure that you save the workbooks that comprise the workspace. n
Note
This discussion of document properties just barely scratches the surface. For example, you can display additional properties and even specify a custom document information panel template that contains information specific to your needs. A complete discussion is beyond the scope of this book. n
Other Workbook Info Options
The Info pane of Backstage View displays more file-related options, as shown in Figure 7.6. To display this pane, choose File Info. These options, described in the following sections, may be useful if you plan to distribute your workbook to others. Note that not all workbooks display all the options shown in Figure 7.6. Only the relevant options are shown.
Security Warning section
If the active workbook displayed a security warning when you opened it, the Info pane will display a Security Warning section, with an Enable Content button. Use this panel to find out more about why Excel triggered the security warning, and to enable the content if you’re sure that it’s safe to do so.
153

Part I: Getting Started with Excel
FIGURE 7.6
Choose File Info for additional options.
Compatibility Mode section
If the active workbook is an old workbook opened in compatibility mode, you’ll see the Compatibility Mode section in the Info pane. To convert the workbook to the Excel 2007/2010 format, click the Convert button.
Caution
Be aware that this command deletes the original version of the file — which seems like a rather drastic measure. It’s probably wise to make a copy of your workbook before you use this command. n
Permissions section
In the Permissions section of the Info pane, click the Protect Workbook button to display the following options:
154
Chapter 7: Understanding Excel Files
•Mark as Final
Use this option to designate the workbook as “final.” The document is saved as a readonly file to prevent changes. This isn’t a security feature. Rather, the Mark as Final command is useful to let others know that you are sharing a completed version of a workbook.
•Encrypt with Password
Use this command to specify a password that is required to open the workbook. See “Specifying a password,” earlier in this chapter.
•Protect Current Sheet
This command lets you protect various elements of a worksheet. It displays the same dialog box as the Review Changes Protect Sheet command. See Chapter 31 for more information about protecting worksheets.
•Protect Workbook Structure
This command lets you protect the structure of a workbook. It displays the same dialog box as Review Changes Protect Workbook. See Chapter 31 for more information for more information about protecting the structure of a workbook.
•Restrict Permission by People
Use this option to specify those who may open the document. This feature requires a feebased service called Information Rights Management.
•Add a Digital Signature
This command allows you to “sign” a workbook digitally. See Chapter 31 for more information about digital signatures.
Prepare for Sharing section
The Prepare for Sharing section of the Info pane contains a Check for Issues button. When clicked, the button displays three options:
•Inspect Document
This command displays the Document Inspector dialog box. This feature can alert you to some potentially private information that may be contained in your workbook — perhaps information that’s contained in hidden rows or columns or hidden worksheets. If you plan on making a workbook available to a large audience, it’s an excellent idea to use the Document Inspector for a final check.
•Check Accessibility
This command checks the workbook for potential problems that might occur for people with disabilities. The results of the check are displayed in a task pane in the workbook. This feature works only with Excel 2007/2010 workbooks.
155