


Virtuoso XL Layout Editor User Guide
Editing Your Layout with Virtuoso XL Layout Editor
If Show Incomplete Nets is on, flight lines show the pin connected to the net.
Note: You can also add pins defined with shapes. You can use any layer purpose for pin shapes. Pins made as large as possible make routing easier.
Assigning Pins to a Net
If you place instances in a layout that does not have a connectivity source (a schematic or netlist), the software does not connect them to any net unless you specifically assign the instance pins to a net using the Assign Nets command.
You can also use this command to connect a new instance to an existing net in a design that has a connectivity source.
To assign the pins of an instance that you place in a layout to a net that you specify, follow these steps.
1.Place the new instances that you need in the layout using Create – Instance.
2.Choose Connectivity – Show Incomplete Nets.
3.Choose Connectivity – Assign Nets.
The layout window and the CIW prompt you to select a pin to add to a net.
4.Click on a pin in one of the new instances you have placed.
You can use Shift click or click and drag to select multiple pins to be added to the same net. You can use Control click or click and drag to deselect multiple pins you have selected in this step.
The pin you select is highlighted. The layout window and the CIW prompt you to select a net to add the pin to.
5.Click on a pin that is connected to the existing net you want to add the pin to.
The flight lines representing that net are extended to show that the pin is added to the net. The CIW lists the name of the pin and the name of the net it was connected to.
The layout window and the CIW prompt you to select another pin to add to a net.
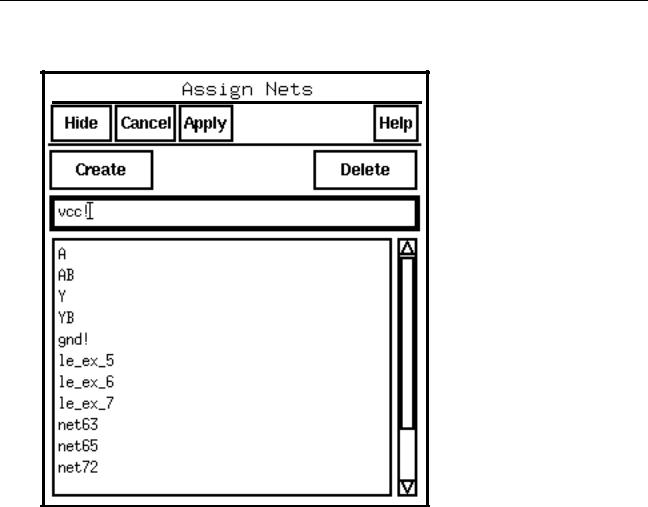
6.Display a list of all the nets in the layout by pressing F3.
December 2002 |
243 |
Product Version 5.0 |
Virtuoso XL Layout Editor User Guide
Editing Your Layout with Virtuoso XL Layout Editor
The Assign Nets form appears listing all the nets in the layout.
Nets with names that begin with le_ex_ belong to the new instances you placed in the design. After you assign all the pins of these new instances to existing nets, the software deletes the le_ex_ nets from the form and the layout.
7.To add a pin you selected in the layout to a net listed in this form, click on the name of the net in the form and then click Apply.
The flight lines representing that net are extended to show that the pin is added to the net.
8.To exit this command, press Escape.
Maintaining Connectivity When Editing a Flattened Pcell
To edit a parameterized cell (pcell) from a layout in which it is a component, you need to use the layout window Design – Hierarchy – Edit in Place command. However, Virtuoso XL
December 2002 |
244 |
Product Version 5.0 |
Virtuoso XL Layout Editor User Guide
Editing Your Layout with Virtuoso XL Layout Editor
commands are turned off while the Edit in Place command is active, so connectivity between the pcell and the layout of which it is a part can be lost.
To maintain this connectivity when you edit a pcell, make a new cell, edit it, and reconnect it to the original layout. To do so, follow these steps.
1.In the layout, select the instance you want to edit.
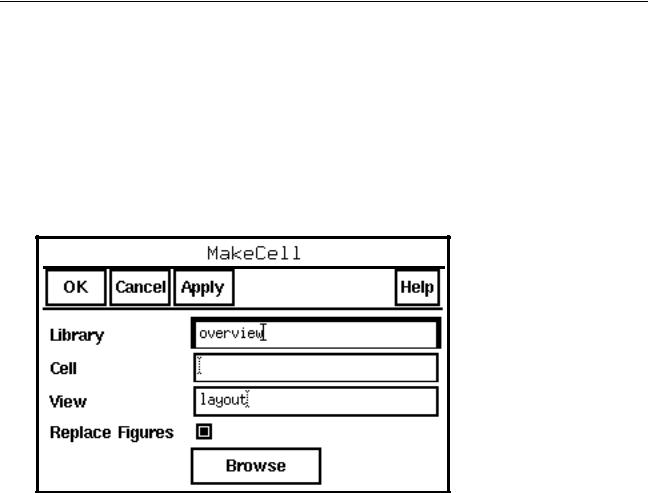
2.From the layout window, choose Edit – Hierarchy – Make Cell.
The Make Cell form appears.
3.In the Library field, type the name of the library of your design.
4.In the Cell field, type the same cell name as the master.
5.In the View field, type a unique view name (for example,layout.new).
6.Click Apply.
The software creates the new cell.
7.In the layout window, select the new instance you want to edit.
8.In the layout window, choose Design – Hierarchy – Edit in Place.
9.Select the pcell instance within the cell.
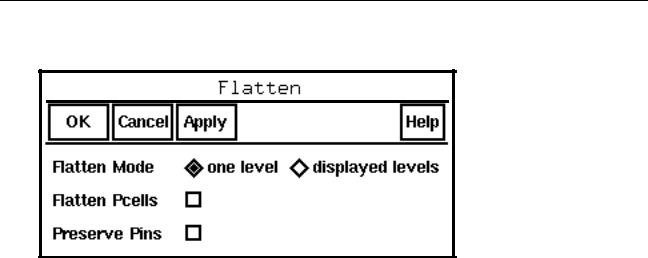
10.Choose Edit – Hierarchy – Flatten.
December 2002 |
245 |
Product Version 5.0 |
Virtuoso XL Layout Editor User Guide
Editing Your Layout with Virtuoso XL Layout Editor
The Flatten form appears.
11.Set Flatten Mode to one level.
12.Turn on Flatten Pcells.
13.Turn on Preserve Pins.
14.Click OK.
15.Make the necessary edits to the cell. Note that this cell is no longer a pcell.
16.Choose Design – Hierarchy – Return.
A dialog box asks you if you want save your changes.
17.Click Yes.
18.If you do not have the Show Incomplete Nets command active, choose Connectivity
– Show Incomplete Nets.
The flight lines show that there is no connectivity to the instance you just edited.
19.Choose Connectivity – Update – Device Correspondence.
20.Click on the symbol for the instance in the schematic.
21.Click on the new instance in the layout.
The connectivity is updated.
To use this layout for other instances of this cell, you can edit the Component Description Format (CDF) for the cell and set the stopList property to layout.new layout. For other instances, you can use the Virtuoso XL command Connectivity – Update – Change
Instance View to pick between views while maintaining connectivity.
December 2002 |
246 |
Product Version 5.0 |