

270 Adding Value to Your Data
Technical requirements
For this chapter, you will be using the following:
•Power BI Desktop: https://www.microsoft.com/en-us/download/ details.aspx?id=58494
The minimum requirements for installation are as follows:
•.NET Framework 4.6 (Gateway release August 2019 and earlier)
•.NET Framework 4.7.2 (Gateway release September 2019 and later)
•A 64-bit version of Windows 8 or a 64-bit version of Windows Server 2012 R2 with current TLS 1.2 and cipher suites
•4 GB disk space for performance monitoring logs
You can find the data resources referred to in this chapter at https://github.com/ PacktPublishing/Power-Query-Cookbook/tree/main/Chapter08.
Adding columns from examples
We often need to add new columns based on the structure or values of an already existing column or set of columns. Imagine you want to extract information from an existing column quickly or to concatenate some values by typing an example and then apply an underlying rule to all the values of that column. These scenarios can be easily achieved by building new content by adding columns from examples. In this recipe, we will see how to best leverage this feature.
Getting ready
For this recipe, you need to download the FactInternetSales CSV file. In this example, we will refer to the C:\Data folder.
How to do it…
Once you open your Power BI Desktop application, you are ready to perform the following steps:
1.Click on Get data and select the Text/CSV connector.
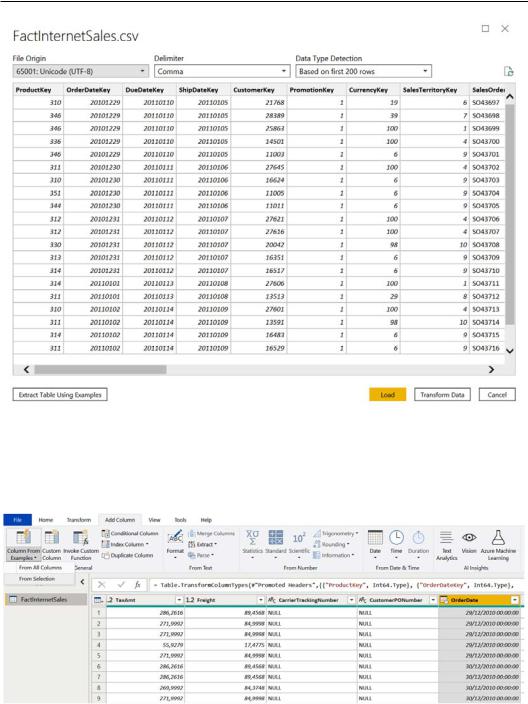
2.Browse to your local folder where you downloaded the FactInternetSales CSV file and open it. The following window with a preview of the data will pop up; click on Transform Data:
Adding columns from examples 271
Figure 8.1 – CSV data preview
3.Select the OrderDate column, browse to the Add Column tab, and click on
Column From Examples and then From Selection, as shown in the following screenshot:
Figure 8.2 – Adding a column from examples

272Adding Value to Your Data
4.The usual Power Query interface will change and you will enter Add Column From Examples mode, where you will have the previously selected column flagged, while on the right side, you will have an empty column, Column1, ready to be created.
Figure 8.3 – Add Column From Examples section
5.Double-click on the first empty cell under Column1 and you will see a dropdown appearing with some suggestions with values that can be extracted from the selected column.
Figure 8.4 – Example columns suggestion
Adding columns from examples 273
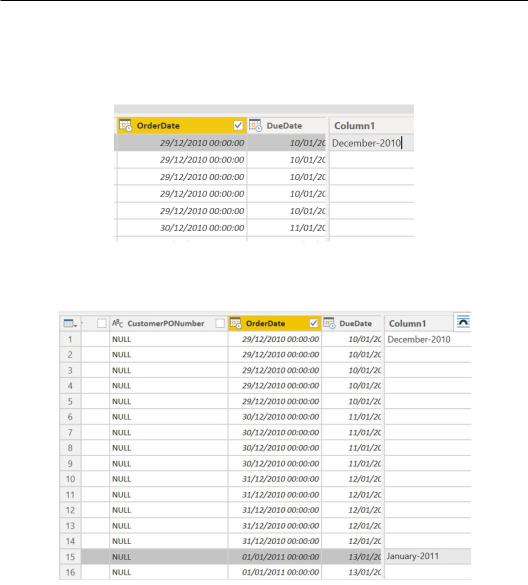
6.In this case, we want to extract the month expressed in letters and the year expressed in numbers in order to convert the value 29/12/2010 00:00:00 into December-2010. Type into the first cell the value you want to obtain, as in the following example, and press Enter on your keyboard:
Figure 8.5 – Writing first column input
7. Then, go to row 15 and type January-2011, as in the following screenshot:
Figure 8.6 – Writing second column input
274Adding Value to Your Data
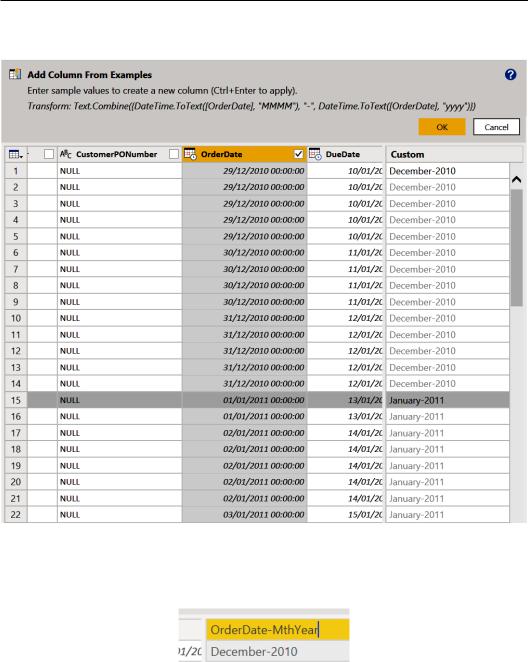
8.Press the Enter key or click on another row and observe how the other rows are filled in following the two examples you have written.
Figure 8.7 – Input autofill
9.Rename the column that has the temporary name Custom (because you have been creating a custom column) and call it OrderDate-MthYear.
Figure 8.8 – Column name
Adding columns from examples 275
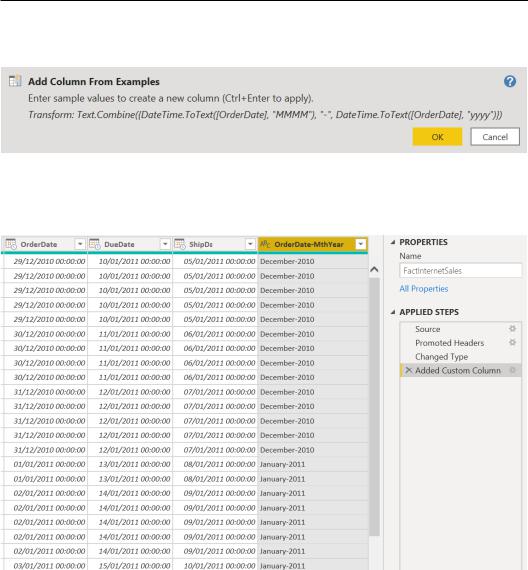
10.Observe the preview of the M code at the top of the section and the functions that were applied. At the end, click on OK.
Figure 8.9 – M code generated by the column creation
11.You can see the new column now and the newly added step in the APPLIED STEPS section, Added Custom Column.
Figure 8.10 – Newly created column step
This feature allows you to quickly create new columns by just entering the example you have in mind or a few inputs to see what the suggestion of the tool will be.
276 Adding Value to Your Data
Imagine you want to concatenate values from multiple columns and enrich your query with more data. You can easily achieve this with the same functionality by following the next example:
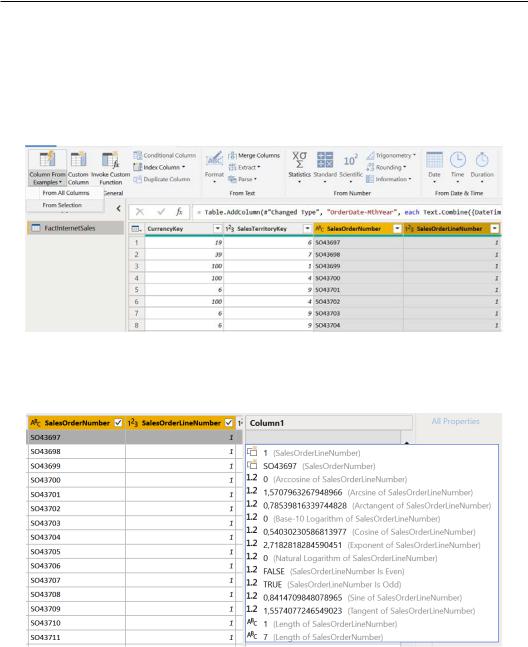
1.Select the SalesOrderNumber and SalesOrderLineNumber columns, browse to the Add Column tab, and click on Column From Examples and then From Selection, as shown in the following screenshot:
Figure 8.11 – Columns selection
2.Double-click on the first cell under Column1 and select SO43697 and you will get the first part of the new value.
Figure 8.12 – New column from examples
Adding columns from examples 277
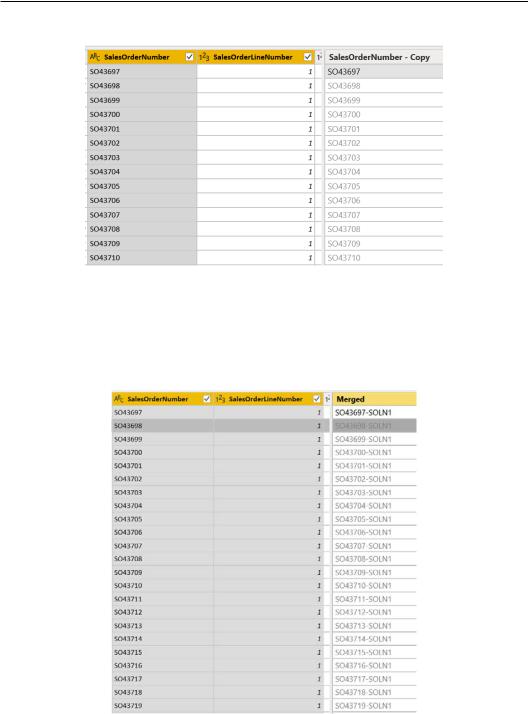
3. You can see the temporary values of this new column.
Figure 8.13 – Entering the first input
4.Now, click again on the first cell and let's add the second part of the value. Enter -SOLN1 to perform a concatenation between the following values -
SalesOrderNumber, added in the previous step, then a separator (-), then the initials of SalesOrderLineNumber (SOLN), and at the end, the value of it (1), as shown in the following screenshot:
Figure 8.14 – Second input within the same cell