


232 Leveraging the M Language
Technical requirements
For this chapter, you will be using the following:
•Power BI Desktop: https://www.microsoft.com/en-us/download/ details.aspx?id=58494
•Minimum requirements for installation:
a).NET Framework 4.6 (Gateway release August 2019 and earlier)
b).NET Framework 4.7.2 (Gateway release September 2019 and later)
c)A 64-bit version of Windows 8 or a 64-bit version of Windows Server 2012 R2 with current TLS 1.2 and cipher suites
d)4 GB disk space for performance monitoring logs
You can find the data resources referred to in this chapter at the following link: https://github.com/PacktPublishing/Power-Query-Cookbook/tree/ main/Chapter07.
Using M syntax and the Advanced Editor
Every step you perform in Power Query will translate into a line of M code. You usually realize what M code is after a while because you start using the features available from the UI at the beginning. Once you get more confident with Power Query steps, you become ready to explore the elements that lie behind them, learn how they work, and how you can create custom transformations by coding. In this recipe, we will see how to access M code and how steps are displayed in the Advanced Editor.
Getting ready
In this recipe, you need to download the FactInternetSales.csv file. In this example, we will refer to the C:\Data folder.

Using M syntax and the Advanced Editor 233
How to do it…
Once you open your Power BI Desktop application, you are ready to perform the following steps:
1. Click on Get Data and select the Text/CSV connector:
Figure 7.1 – Text/CSV connector
234Leveraging the M Language
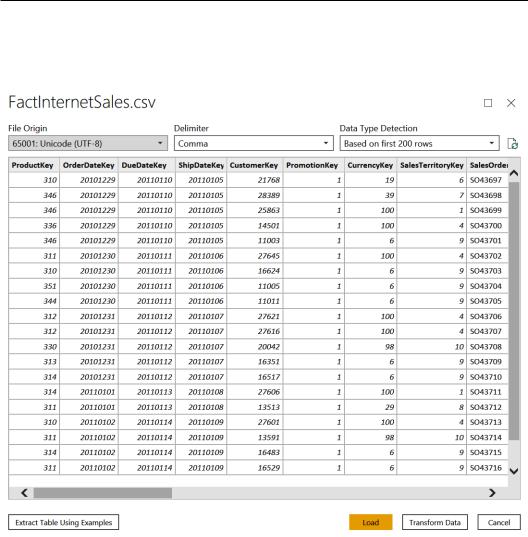
2.Browse to your local folder where you downloaded the FactInternetSales. csv file and open it. The following window, with a preview of the data, will pop up. Click on Transform Data:
Figure 7.2 – CSV data preview
3.You will see the query displayed in the Power Query UI, and on the right, you will see some automatically generated steps, especially Changed Type. This detects data types, as you can see in the following screenshot:
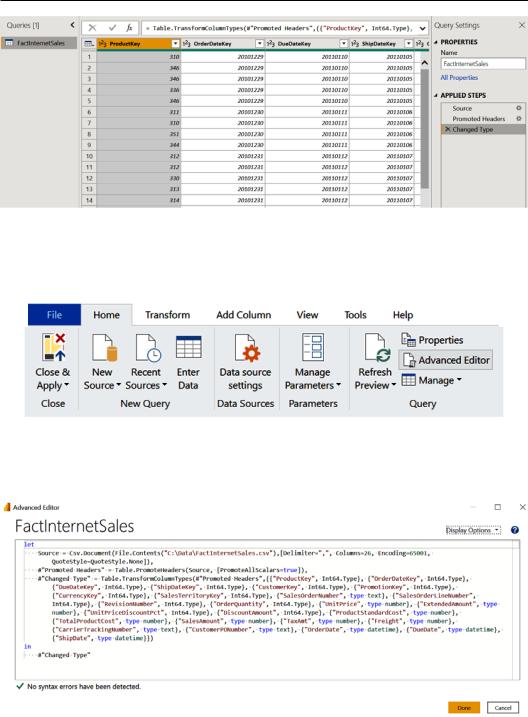
Using M syntax and the Advanced Editor 235
Figure 7.3 – Queries and Applied Steps
4.Imagine you want to modify the Changed Type step and apply a different data type to a column. In order to do this, you need to browse to the Home tab and click on Advanced Editor, as shown in the following screenshot:
Figure 7.4 – Advanced Editor button
5.The Advanced Editor window will pop up, and this will be the entry point in order to access the underlying M code. For each applied step listed in the UI, you can see that there is a line of code:
Figure 7.5 – Advanced Editor window
236Leveraging the M Language
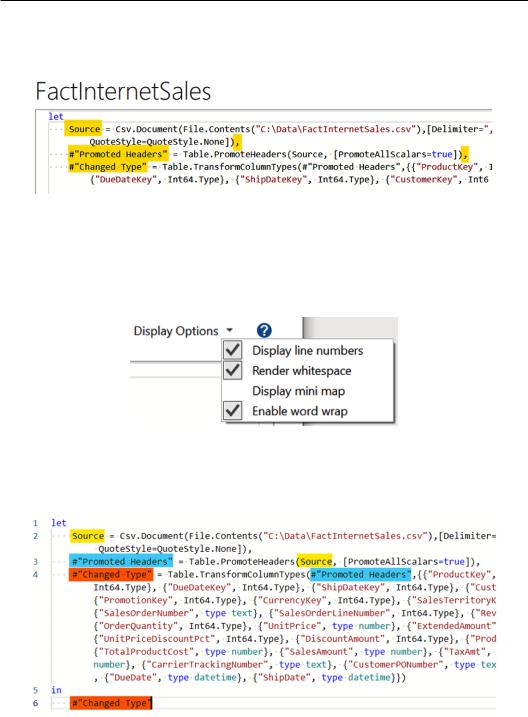
6.Each step can be identified with its name (Source, Promoted Headers, and Changed Type) and is separated from the previous one with a comma (,), as highlighted in the following screenshot:
Figure 7.6 – Steps in the Advanced Editor
7.You can also change how to display your M code by clicking on the top right on
Display Options and flag whether you want to Display line numbers, Render whitespace, Display mini map, and Enable word wrap. In this case, the second and last options were already flagged by default and in addition to this, we also flagged the first one to see the displayed code ordered in numbered lines:
Figure 7.7 – Flagged Display line numbers
8.Now have a look at how the different steps are displayed. Every step contains a reference to the previous one. On line 3, you have the Promoted Headers step, and the first variable of the function is a reference to the previous step, Source:
Figure 7.8 – Advanced Editor M code
Using M syntax and the Advanced Editor 237
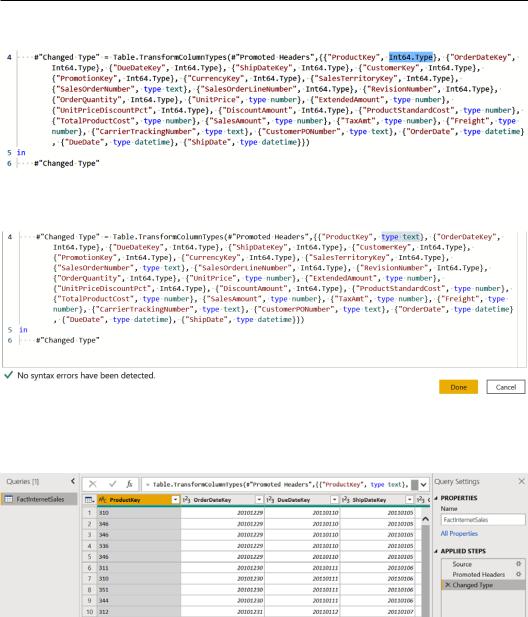
9. Let's change the data type for the ProductKey column by selecting Int64.Type:
Figure 7.9 – Advanced Editor change type
10. Now replace Int64.Type with type text and click on Done:
Figure 7.10 – Advanced Editor change type to text
You can see how the ProductKey column changed type, but no additional step was added because we edited the only step that was there in the APPLIED STEPS list:
Figure 7.11 – ProductKey column with updated type
For this recipe, we connected to a CSV file, but imagine you need to connect to a database with the same data and perform the same transformations, but you do not want to create a query from scratch and perform all the steps again. In this case, you can leverage the Advanced Editor and change the source through the M code, following the Authentication to data sources recipe you will find in Chapter 1, Getting Started with Power Query.