


56 Connecting to Fetch Data
Creating a query from a database
This recipe shows how to connect to a database and how tables and views are displayed while selecting which tables to display and work with in Power Query.
You have two generic options:
•Select tables or views as you would see them with a database viewer such as SQL Server Management Studio.
•Retrieve tables by writing SQL statements in a specific section that will pop up.
Getting ready
In this recipe, in order to connect to a SQL database, you need to have an Azure SQL Database instance with AdventureWorks data, database credentials, or access through Azure Active Directory authentication (log in with your Microsoft account).
How to do it...
Once you open the Power BI Desktop application, you are ready to perform the following steps:
1. Go to Get data, click on More, and browse for Azure SQL database:
Figure 2.32 - Azure Connectors section

Creating a query from a database 57
2.Enter the following information (expanding Advanced options):
a)Server: Server name
b)Database: Adventureworks
c)Data Connectivity mode: Import
d)SQL statement: This is a SQL view executed using the data source based on two tables in the database. The view is built as a SQL join between
FactResellerSales and DimSalesTerritory:
SELECT s.[ProductKey] ,s.[SalesTerritoryKey] ,s.[SalesOrderNumber] ,s.[SalesOrderLineNumber] ,s.[RevisionNumber] ,s.[OrderQuantity] ,s.[UnitPrice] ,s.[ExtendedAmount] ,s.[UnitPriceDiscountPct] ,s.[DiscountAmount] ,s.[ProductStandardCost] ,s.[TotalProductCost] ,s.[SalesAmount] ,s.[OrderDate] ,p.[SalesTerritoryRegion] ,p.[SalesTerritoryCountry] ,p.[SalesTerritoryGroup]
FROM [dbo].[FactResellerSalesXL_CCI] s
LEFT OUTER JOIN [dbo].[DimSalesTerritory] p ON s.[SalesTerritoryKey] = [p.SalesTerritoryKey]

58Connecting to Fetch Data
3.Copy and paste the code in the SQL statement section in order to get this view as the output table you will work on in Power Query:
Figure 2.33 – SQL Server database
4. Enter authentication details:
Figure 2.34 – SQL Server database authentication
Creating a query from a database 59
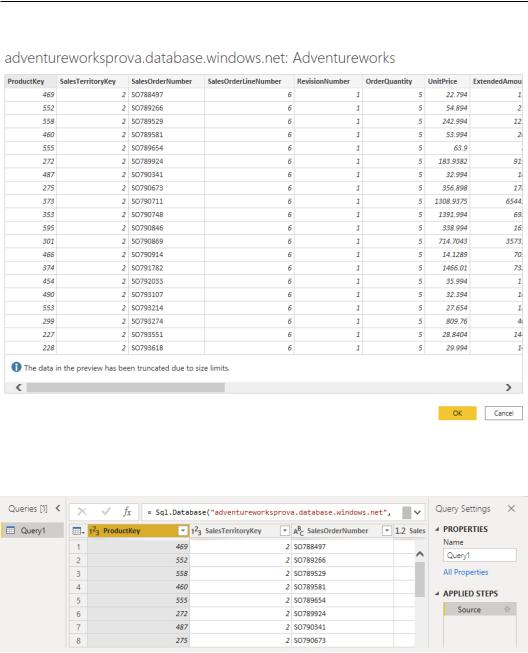
5. After signing in, the output of the SQL statement will pop up as follows:
Figure 2.35 – Table preview
6. Click on Transform Data in order to open the Power Query interface:
Figure 2.36 – Data preview in Power Query
60Connecting to Fetch Data
7.Click on Get data and select the connector Azure SQL Database. In this case, we won't enter a SQL statement, but we will select an existing table in the database:
Figure 2.37 – SQL Server database connector
8.After signing in, a preview interface will appear, and you will be able to select the tables that you want to open in Power Query after clicking on OK:
Figure 2.38 – SQL Database Navigator

Creating a query from a database 61
9.You will see on the left a set of queries as an output of connecting directly to the database tables and writing a SQL statement querying the database as you would do with any other database viewing tool:
Figure 2.39 – Data preview in Power Query
If you open Advanced Editor for both types, you will notice that if you need to change the SQL code or you have to change the table name, you can do that directly from the
Advanced Editor window:
a)The SalesData table's Advanced Editor code where you can see the details of the query run against the data source:
Figure 2.40 – Advanced Editor code for a SalesData query