

212Optimizing Power Query Performance
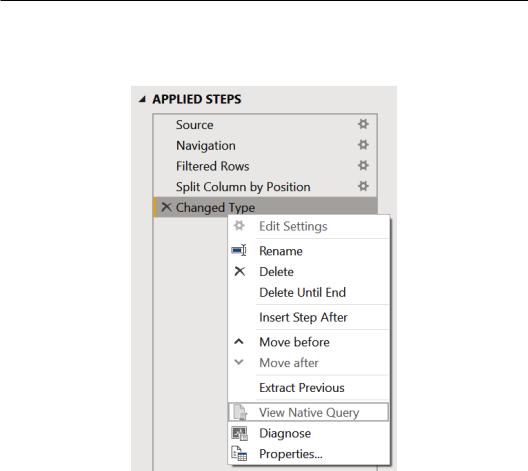
3.Go to APPLIED STEPS and right-click on the Navigation step. You can see that you can't select View Native Query and this means that you can't leverage query folding, as shown in the following screenshot:
Figure 6.45 – View Native Query disabled
When you perform some changes on the data, when you add columns and enrich the content of your queries, you will probably lose the query folding feature. The best practice is to perform the steps when query folding is active at the beginning in order
to send a single statement to the data source, and this will end up improving the overall performance, both in Import and Direct Query mode.
Leveraging incremental refresh and folding
When you load data from Power Query, you do not perform a one-time load, but usually, you need to refresh data in order to load new data or to update existing data. When loading data incrementally, it is possible to leverage parameters and query folding in order to optimize and retrieve data quickly. In this recipe, we will see how to set up time parameters and incremental refresh.

Leveraging incremental refresh and folding 213
Getting ready
In this recipe, you need to connect to an Azure SQL database that you can recreate in your environment with the Adventureworks.bacpac file.
How to do it…
Once you open your Power BI Desktop application, you are ready to perform the following steps:
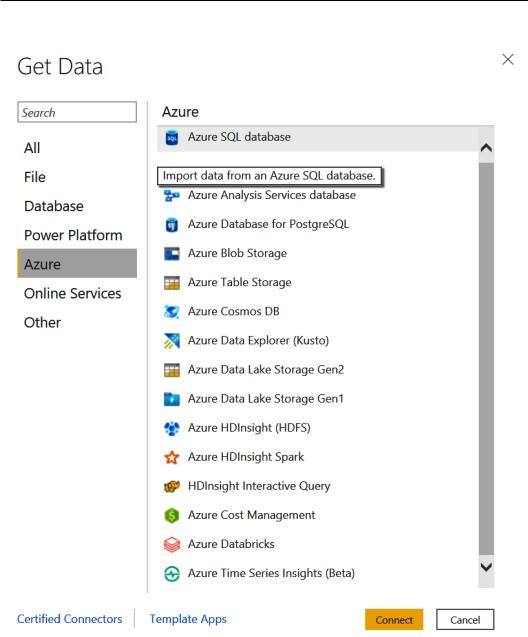
1.Click on Get data and click on More… to access the Get Data window and to see the complete list of connectors.
Figure 6.46 – Power BI connectors
214Optimizing Power Query Performance
2.Browse to the Azure SQL database connector, select it, and click on Connect.
Figure 6.47 – Azure SQL database connector
Leveraging incremental refresh and folding 215
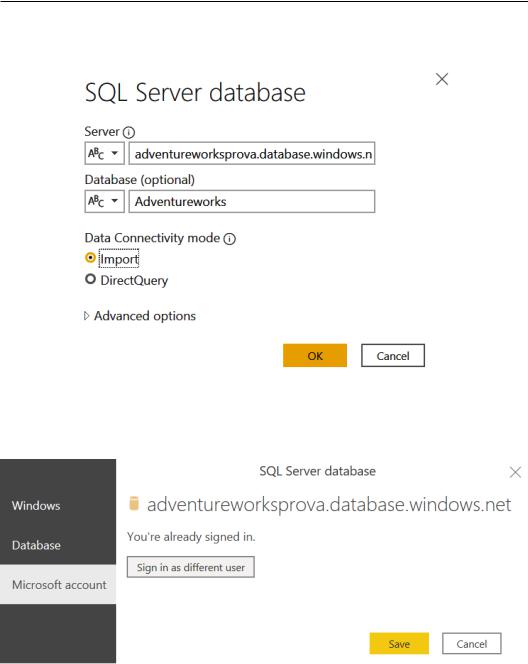
3.Enter your server and database information, flag Import for Data Connectivity mode, and then click on OK.
Figure 6.48 – SQL Server database information
4.Authenticate with your preferred authentication method. In this example, I'm using the Microsoft account authentication:
Figure 6.49 – SQL Server database authentication
216Optimizing Power Query Performance
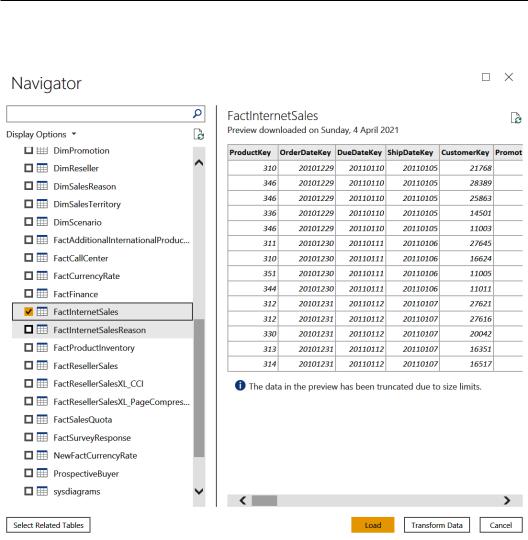
5.Select the FactInternetSales table from the database and click on
Transform Data.
Figure 6.50 – Selecting tables from a database
Leveraging incremental refresh and folding 217
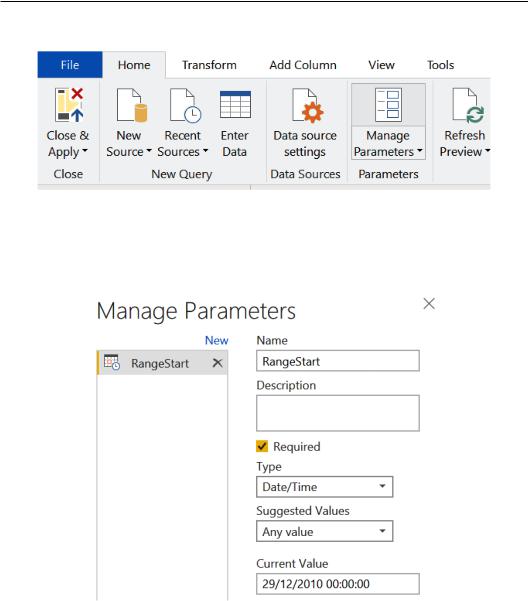
6. Browse to the Home tab and click on the Manage Parameters button.
Figure 6.51 – Manage Parameters button
7.Create a RangeStart parameter with Date/Time for Type and Any value for
Suggested Values and enter 29/12/2010 00:00:00 for Current Value, as shown in the following screenshot:
Figure 6.52 – Creating the RangeStart parameter

218Optimizing Power Query Performance
8.Create a second parameter, RangeEnd, with the same settings as the previous one, and then enter 05/01/2011 00:00:00 for Current Value and click on OK.
Figure 6.53 – Creating the RangeEnd parameter
Leveraging incremental refresh and folding 219
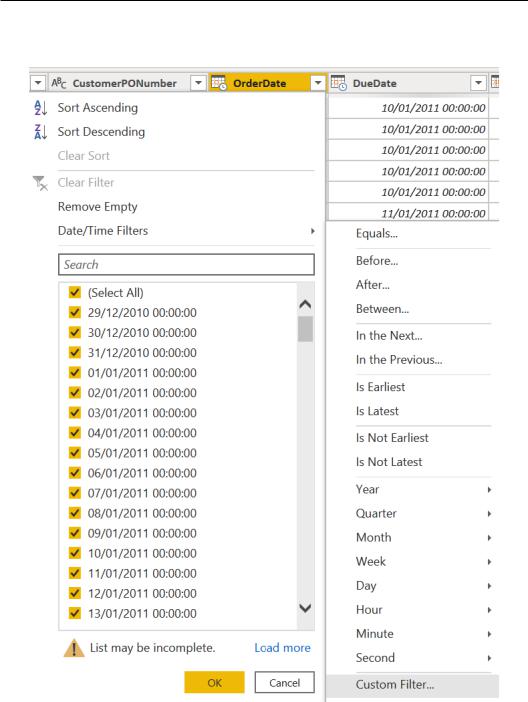
9.Select the FactInternetSales query and select the OrderDate column. Click on the filter icon, then Date/Time Filters, and then Custom Filter….
Figure 6.54 – Applying Custom Filter...
220Optimizing Power Query Performance
10.The Filter Rows window will pop up. Enter the two parameters as filter options, as shown in the following screenshot, and click on OK to apply the custom filters:
Figure 6.55 – Filter Rows window
In this way, we are defining a subset of data between a range defined by the parameters. The values of those parameters are not important at this time, because this acts just as a sample subset of data that will be managed by the incremental refresh rule that will be set later.
11. Click on Close & Apply to load all the queries within the model.
Figure 6.56 – Close & Apply
Leveraging incremental refresh and folding 221
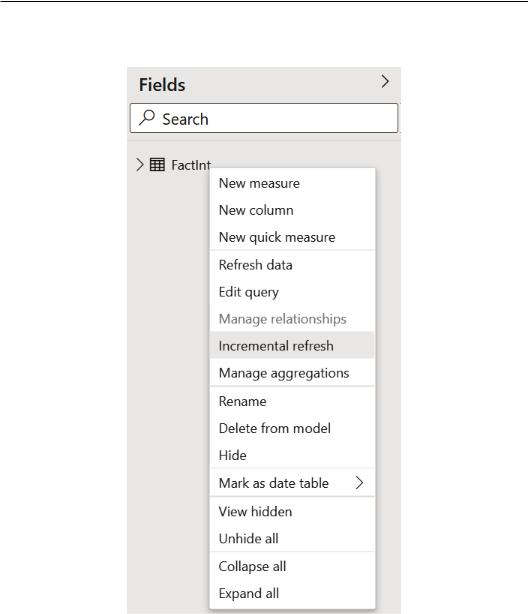
12.Go to the Fields section, right-click on the FactInternetSales table, and click on Incremental refresh.
Figure 6.57 – Setting up incremental refresh
222Optimizing Power Query Performance
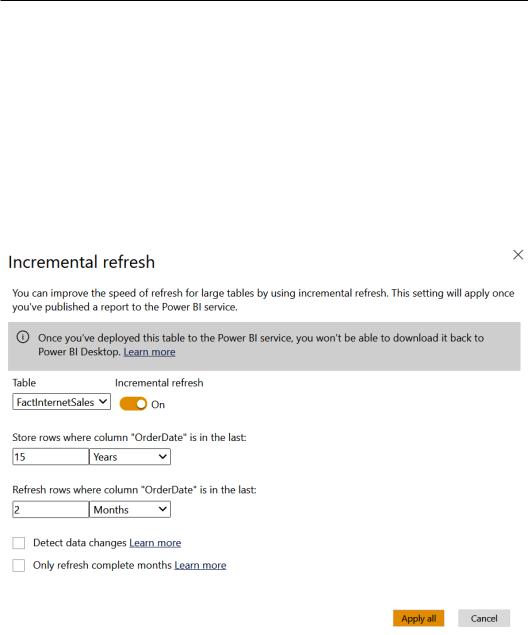
13.After having loaded the model with a sample subset of data defined by the two parameters, you can now set up a rule that will be used when you refresh the data from the Power BI service. You can select the table on which to apply the incremental refresh, enable the feature, and define which rows to store based on a historical period. In this case, we will store all data from the last 15 years. Then, you can define which time range to consider when refreshing data. In this case, we defined
a 2-month refresh range, which means that RangeStart and RangeEnd, the two date parameters defined previously, will adapt to this rule and that subset of data will be updated and added. Once you set this up, leave unflagged the optional settings (Detect data changes, which allows you to update data that has changed, and Only refresh complete months), as shown in the following screenshot, and click on Apply all:
Figure 6.58 – Incremental refresh details