


62Connecting to Fetch Data
b)The DimDate table's Advanced Editor code where you can see the details of the connection Source, the database retrieved from the server, Adventureworks, and the table selected from the data source DimDate:
Figure 2.41 – Advanced Editor code for the DimDate Query
How it works...
The Azure SQL Database connector also reflects how other database connectors work. If you connect to Amazon Redshift or an Oracle database, the experience will be very similar. Power Query provides a wide range of options for relational data sources and some of them may need the installation of specific drivers. For example, if you connect to SAP or Oracle, you have to install additional components (for example, in Oracle, the additional components will be the Oracle Data Access Components (ODAC)).
Creating a query from a website
Data is not only located in databases, but also in files, online services, and third-party applications as a growing number of users require the ability to connect to information available on the web. The idea behind the web connector is to allow easy and intuitive information extraction from websites. In this section, we will explore the possibilities of this connector and we will connect to a web page to extract data in an easily readable format.
Creating a query from a website 63
Getting ready
For this recipe, you need Power BI Desktop and access to the following website: https://www.packtpub.com/eu/all-products.
How to do it...
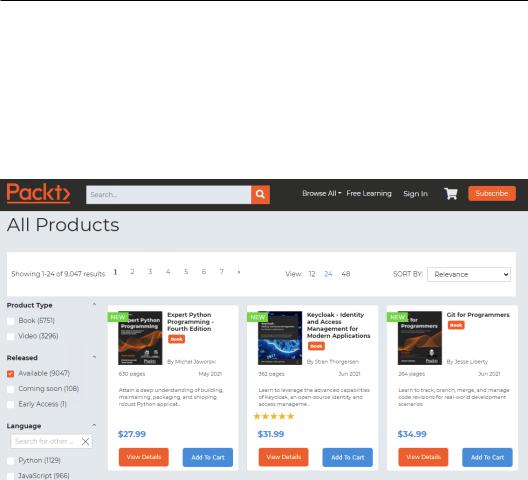
In this recipe, the idea is to retrieve data from the Packt online catalog. By clicking on the preceding link, you will see the following site:
Figure 2.42 – Packt online book catalog
64 Connecting to Fetch Data
Imagine you want to extract data regarding the books available on this site. Open Power BI Desktop and follow these steps:
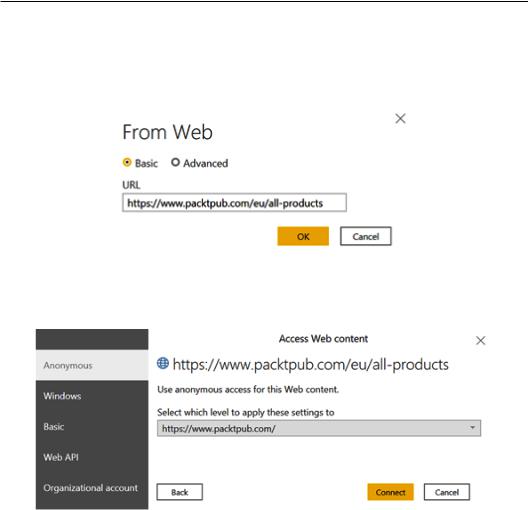
1. Go to Get data and click on Web. Insert the link in the URL field:
Figure 2.43 – Web connector
2. Authenticate as Anonymous (since it is a public website) and click on Connect:
Figure 2.44 – Web connector authentication
Creating a query from a website 65
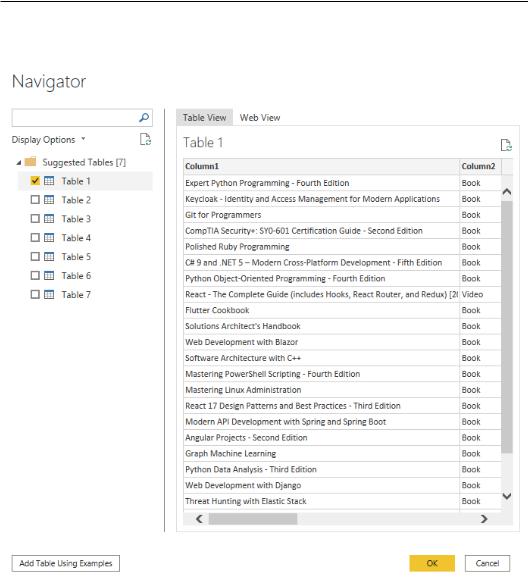
3.After authenticating, the following preview window will pop up where, on the left, you can find a list of suggested tables and, on the right, you can see a data preview:
Figure 2.45 – Web tables preview
66Connecting to Fetch Data
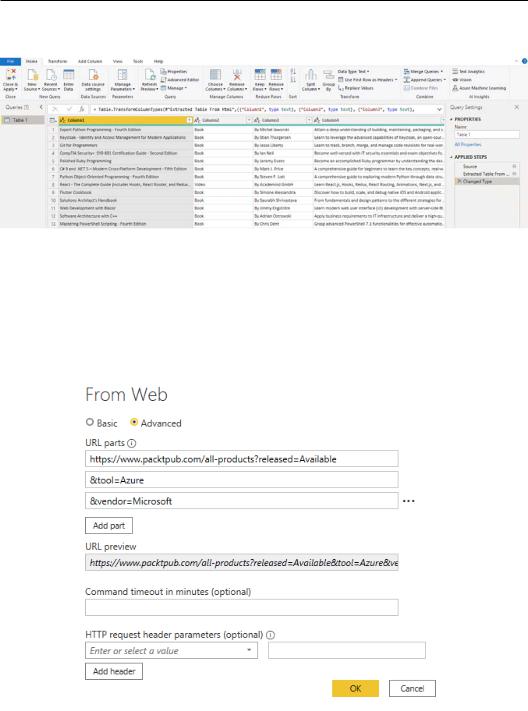
4.If you click on Transform Data, you will open the Power Query interface and then you can rename and clean up your data:
Figure 2.46 – Web data preview in Power Query
We will try another feature to extract data from the website and test an advanced link by inserting filters at the URL level:
1.Go to Get data and select the Web connector. Click on Advanced and split the URL https://www.packtpub.com/eu/all-products?
released=Available&tool=Azure&vendor=Microsoft into three parts as in the next screenshot and click on OK:
Figure 2.47 – Web connector advanced

Creating a query from a website 67
2. The preview window will pop up. Click on Add Table Using Examples:
Figure 2.48 – Add Table Using Examples button
3.Start naming the columns as follows:
a)Title
b)Author
c)Nr. Pages
d)Publication Date
The columns should look like the ones in the following screenshot:
Figure 2.49 – Add Table Using Examples
68Connecting to Fetch Data
4.Start filling in the first rows of each column and you'll see the other rows populate automatically:
Figure 2.50 – Add Table Using Examples details
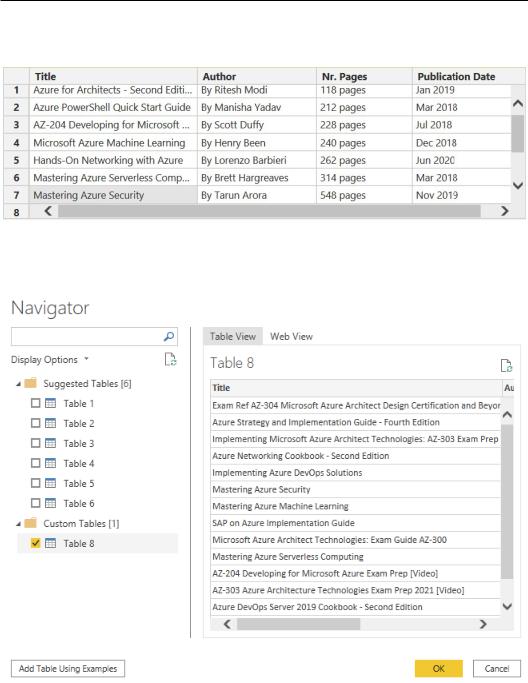
5.Click on OK and you will generate a table within the Custom Tables section that you can select and load into Power Query:
Figure 2.51 – Insert custom table from examples