


Folding queries 203
12.Click on the dropdown and observe how you can now choose among ProductKey values from the list we extracted from the FactInternetSales query.
Figure 6.34 – Edit Parameters window
You can see how you can adapt parameters to different use cases. You can also create multiple parameters and apply combinations of filters to the same query.
Folding queries
You often connect to relational sources, and it is important to know how to leverage query folding in order to retrieve data from the sources with Power Query steps that act as a single query statement. Query folding helps us to push more steps toward the origin data source in order to reduce the number of steps processed by the Power Query engine.
In this recipe, you will see how to perform query folding and how to control it.

204 Optimizing Power Query Performance
Getting ready
In this recipe, you need to connect to an Azure SQL database that you can recreate in your environment with the Adventureworks.bacpac file.
How to do it…
Once you open your Power BI Desktop application, you are ready to perform the following steps:
1.Click on Get data and then More… to access the Get Data window and see the complete list of connectors.
Figure 6.35 – Power BI connectors

Folding queries 205
2. Browse to the Azure SQL database connector, select it, and click on Connect.
Figure 6.36 – Azure SQL database connector
206Optimizing Power Query Performance
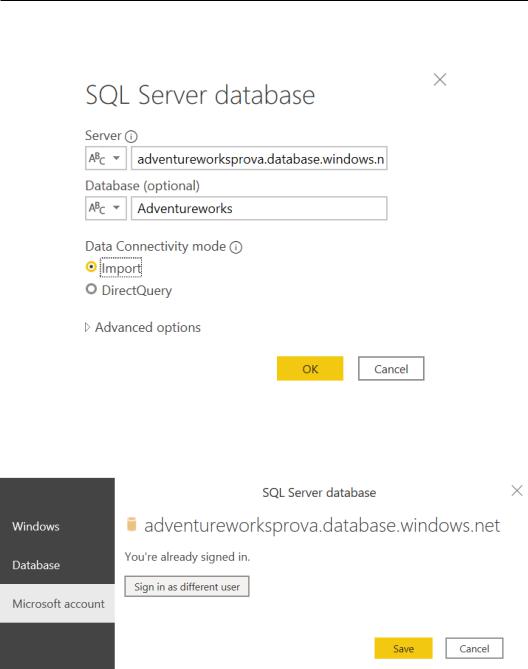
3.Enter your server and database information, flag Import for Data Connectivity mode, and then click on OK.
Figure 6.37 – SQL Server database information
4.Authenticate with your preferred authentication method. In this example, I'm using the Microsoft account authentication.
Figure 6.38 – SQL Server database authentication
Folding queries 207
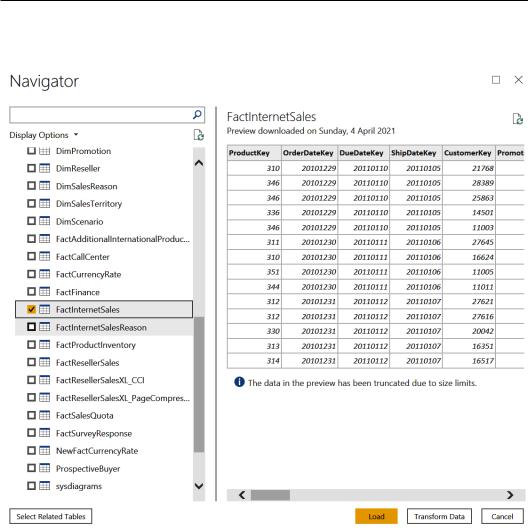
5.Select the FactInternetSales table from the database and click on
Transform Data.
Figure 6.39 – Selecting tables from a database

208Optimizing Power Query Performance
6.Go to APPLIED STEPS and right-click on the Navigation step. You can see that you are able to select View Native Query and this means that query folding is now active:
Figure 6.40 – View Native Query

Folding queries 209
7.Select the ProductKey column, click on the filter dropdown, select the first four values, as shown in the following screenshot, and click on OK:
Figure 6.41 – Filtering the ProductKey column
210Optimizing Power Query Performance
8.Go to the APPLIED STEPS section in the right pane in the Power Query UI, rightclick on the Filtered Rows step, as in Step 6, and click on View Native Query. The Native Query window will pop up, where you can see what the statement that is executed against the data source is:
Figure 6.42 – Native query details
When you apply a filter, it is like you are applying a WHERE statement toward the database. You can also select columns, group data, merge queries with JOIN statements, pivot and unpivot, and achieve query folding. If you change the data type, you will see how query folding will be disabled. Go through the following example:
1.Go to the OrderDateKey column, browse to the Transform tab, and click on
Split Column and By Number of Characters.

Folding queries 211
Figure 6.43 – Split Column button
2. Enter 4 for Number of characters, flag Once, as far left as possible, and click on OK.
Figure 6.44 – Split Column by Number of Characters