


C H A P T E R 6
Using the Communication APIs
In this chapter, we’ll explore what you can do with two of the important building blocks for real-time, cross-origin communication: Cross Document Messaging and XMLHttpRequest Level 2 and we’ll show you how they can be used to create compelling applications. Both of these building blocks add new communication options to HTML5 applications and allow applications served from different domains to safely communicate with each other.
First, we’ll discuss the postMessage API and the origin security concept—two key elements of HTML5 communication—and then we’ll show you how the postMessage API can be used to communicate between iframes, tabs, and windows.
Next, we’ll discuss XMLHttpRequest Level 2—an improved version of XMLHttpRequest. We’ll show you in which areas XMLHttpRequest has been improved. Specifically, we’ll show you how you can use XMLHttpRequest to make cross-origin requests and how to use the new progress events.
Cross Document Messaging
Until recently, communications between frames, tabs, and windows in a running browser was entirely restricted due to security concerns. For instance, while it might be handy for certain sites to share information from inside the browser, it would also open up the possibility for malicious attacks. If browsers granted the ability to programmatically access the content loaded into other frames and tabs, sites would be able to steal whatever information they could get from another site's content using scripting. Wisely, the browser vendors restricted this access; attempting to retrieve or modify content loaded from another source raises a security exception and prevents the operation.
However, there are some legitimate cases for content from different sites to be able to communicate inside the browser. The classic example is the "mashup", a combination of different applications such as mapping, chat, and news from different sites, all combined together to form a new meta-application. In these cases, a well-coordinated set of applications would be served by direct communication channels inside the browser itself.
To meet this need, the browser vendors and standards bodies agreed to introduce a new feature: Cross Document Messaging. Cross Document Messaging enables secure cross-origin communication across iframes, tabs, and windows. It defines the postMessage API as a standard way to send messages. As shown in the following example, it is very simple to send a message with the postMessage API.
chatFrame.contentWindow.postMessage('Hello, world', 'http://www.example.com/');
To receive messages, you just have to add an event handler to your page. When a message arrives, you can check its origin and decide whether or not to do something with the message. Listing 6-1 shows an event listener that passes the message to a messageHandler function.
135

CHAPTER 6 USING THE COMMUNICATION APIS
Listing 6-1. An Event Listener for Message Events
window.addEventListener(“message”, messageHandler, true); function messageHandler(e) {
switch(e.origin) {
case “friend.example.com”: // process message processMessage(e.data); break;
default:
//message origin not recognized
//ignoring message
}
}
A message event is a DOM event with data and origin properties. The data property is the actual message that the sender passed along and the origin property is the sender’s origin. Using the origin property, it is easy for the receiving side to ignore messages from untrusted sources; the origin can simply be checked against a list of allowed origins.
As shown in Figure 6-1, the postMessage API provides a way to communicate between a chat widget iframe hosted at http://chat.example.net and an HTML page that contains the chat widget iframe hosted at http://portal.example.com (two different origins).
Figure 6-1. postMessage communication between an iframe and a main HTML page
In this example, the chat widget is contained in an iframe from another origin, so it does not have direct access to the parent window. When the chat widget receives a chat message, it can use postMessage to send a message to the main page so that the page can alert the user of the chat widget
136
CHAPTER 6 USING THE COMMUNICATION APIS
that a new message has been received. Similarly, the page can send messages about the user’s status to the chat widget. Both the page and the widget can listen for messages from each other by adding the respective origins to a whitelist of allowed origins.
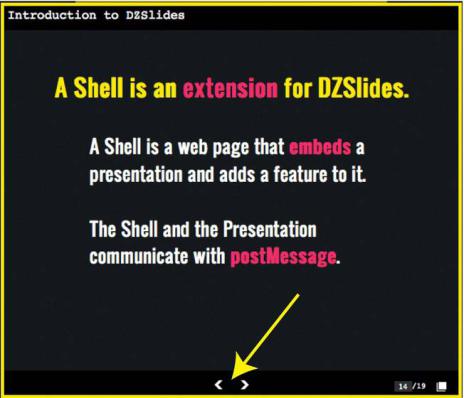
Figure 6-2 shows a real-life example of using the postMessage API in action. It is an HTML5 Slide viewer application called DZSlides, built by Firefox engineer and HTML5 evangelist Paul Rouget (http://paulrouget.com/dzslides). In this application, the presentation and its container communicate using the postMessage API.
Figure 6-2. Real-life use of postMessage API in DZSlides application
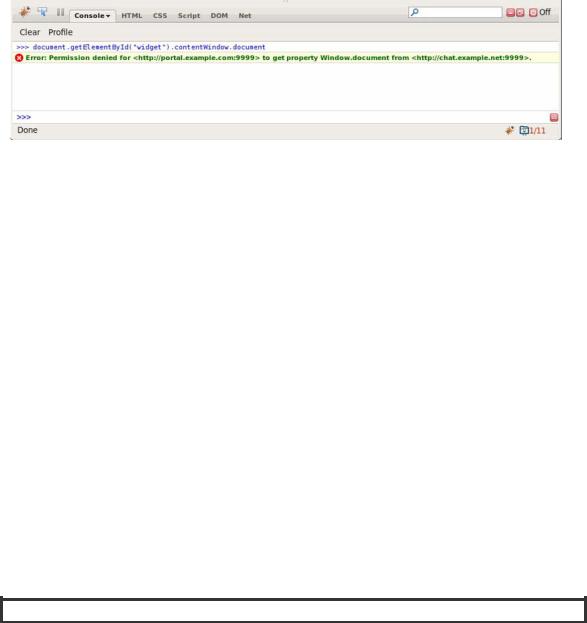
Before the introduction of postMessage, communicating between iframes could sometimes be accomplished by direct scripting. A script running in one page would attempt to manipulate another document. This might not be allowed due to security restrictions. Instead of direct programmatic access, postMessage provides asynchronous message passing between JavaScript contexts. As shown in Figure 6- 3, without postMessage, cross origin communication would result in security errors, enforced by browsers to prevent cross-site scripting attacks.
137
CHAPTER 6 USING THE COMMUNICATION APIS
Figure 6-3. Cross-site scripting error in earlier version of Firefox and Firebug
The postMessage API can be used for communicating between documents with the same origin, but it is particularly useful when communication might otherwise be disallowed by the same-domain policy, which is enforced by browsers. However, there are reasons to use postMessage for messaging between same-origin documents as well because it provides a consistent, easy-to-use API. The postMessage API is used whenever there is communication between JavaScript contexts, such as with HTML5 Web Workers.
Understanding Origin Security
HTML5 clarifies and refines domain security by introducing the concept of an origin. An origin is a subset of an address used for modeling trust relationships on the Web. Origins are made up of a scheme, a host, and a port. For example, a page at https://www.example.com has a different origin than one at http://www.example.com because the scheme differs (https vs. http). The path is not considered in the origin value, so a page at http://www.example.com/index.html has the same origin as a page at http://www.example.com/page2.html because only the paths differ.
HTML5 defines the serialization of origins. In string form, origins can be referred to in APIs and protocols. This is essential for cross-origin HTTP requests using XMLHttpRequest, as well as for WebSockets.
Cross-origin communication identifies the sender by origin. This allows the receiver to ignore messages from origins it does not trust or does not expect to receive messages from. Furthermore, applications must opt-in to receiving messages by adding an event listener for message events. Because of this, there is no risk of messages interfering with an unsuspecting application.
Security rules for postMessage ensure that messages cannot be delivered to pages with unexpected— and possibly undesired—origins. When sending a message, the sender specifies the receiver’s origin. If the window on which the sender is calling postMessage does not have that specific origin (for instance, if the user has navigated to another site) the browser will not transmit that message.
Likewise, when receiving a message, the sender’s origin is included as part of the message. The message’s origin is provided by the browser and cannot be spoofed. This allows the receiver to decide which messages to process and which to ignore. You can keep a white list and process only messages from documents with trusted origins.
Be careful with External input
Frank says: “Applications that process cross-origin messages should always verify the source origin of every message. Furthermore, message data should be treated with caution. Even if a message comes from
138