


CHAPTER 2 USING THE CANVAS API
What About Canvas Accessibility?
Peter says: “Providing alternate images or alternate text raises the subject of accessibility—an area in which the Canvas specification is, unfortunately, still lacking significantly. For example, there is no native method for inserting text alternatives for images that are being inserted into a canvas, and there is no native method to provide alternate text to match text generated with the canvas text API. At the time of this writing, there are no accessibility hooks that can be used with the dynamically generated content in a canvas, but a task force is working on designing them. Let’s hope this improves with time.”
One of the current proposals from the HTML5 designers for handling alternate, accessible canvas content is to use this fallback content section. However, in order for this to be useful for screen readers and other accessibility tools, the fallback content needs to be keyboard navigable even when a canvas is supported and displayed. While some browsers are supporting this capability now, you should not rely on it to support users with special needs. Using a separate section of the page to display canvas alternatives is recommended for now. As an added bonus, many users might enjoy using alternative controls or displays as a better way to quickly understand and navigate the page or application.
Future iterations of the Canvas API might also include focusable sub-areas of the canvas display and controls to interact with them. If your image display requires significant interaction, however, consider using SVG as an alternative to the Canvas API. SVG also allows drawing, but it integrates with the browser DOM as well.
CSS and Canvas
As with most HTML elements, CSS can be applied to the canvas element itself to add borders, padding, margins, etc. Additionally, some CSS values are inherited by the contents of the canvas; fonts are a good example, as fonts drawn into a canvas default to the settings of the canvas element itself.
Furthermore, properties set on the context used in canvas operations follow the syntax you may already be familiar with from CSS. Colors and fonts, for example, use the same notation on the context that they use throughout any HTML or CSS document.
Browser Support for HTML5 Canvas
With the arrival of Internet Explorer 9, all browser vendors now provide support for HTML5 Canvas, and it is already in the hands of a majority of users. This is a major milestone in web development, allowing 2D drawing to thrive on the modern Web.
In spite of the dwindling market share of previous versions of Internet Explorer, it is still a good idea to first test whether HTML5 Canvas is supported before you use the APIs. The section “Checking for Browser Support” later in this chapter will show you how you can programmatically check for browser support.
Using the HTML5 Canvas APIs
In this section, we’ll explore the use of the Canvas APIs in more detail. For the sake of illustration—no pun intended—we will use the various Canvas APIs to build a logo-like display of a forest scene with trees and a beautiful trail-running path suitable for a long-distance race event. Although our example
26
CHAPTER 2 USING THE CANVAS API
will not win any awards for graphical design, it should serve to illustrate the various capabilities of HTML5 Canvas in a reasonable order.
Checking for Browser Support
Before you use the canvas element, you will want to make sure there is support in the browser. This way, you can provide some alternate text in case there is no support in their antique browser. Listing 2-3 shows one way you can use to test for browser support.
Listing 2-3. Checking for Browser Support
try { document.createElement("canvas").getContext("2d"); document.getElementById("support").innerHTML =
"HTML5 Canvas is supported in your browser.";
}catch (e) {
document.getElementById("support").innerHTML = "HTML5 Canvas is not supported
in your browser.";
}
In this example, you try to create a canvas object and access its context. If there is an error, you will catch it and know that Canvas is not supported. A previously defined support element on the page is updated with a suitable message to reflect whether there is browser support or not.
This test will indicate whether the canvas element itself is supported by the browser. It will not indicate which capabilities of the Canvas are supported. At the time of this writing, the API is stable and well-supported, so this should generally not be an issue to worry about.
Additionally, it is a good idea to supply fallback content to your canvas element, as shown in Listing
2-3.
Adding a Canvas to a Page
Adding a canvas element in an HTML page is pretty straight-forward. Listing 2-4 shows the canvas element that can be added to an HTML page.
Listing 2-4. The Canvas Element
<canvas height="200" width="200"></canvas>
The resulting canvas will show up as an “invisible” 200 × 200 pixel rectangle on your page. If you want to add a border around it, you could use the HTML code shown in Listing 2-5 to style the canvas with normal CSS borders.
Listing 2-5. Canvas Element with a Solid Border
<canvas id="diagonal" style="border: 1px solid;" width="200" height="200"> </canvas>
Note the addition of the ID diagonal to make it easy to locate this canvas element programmatically. An ID attribute is crucial to any canvas because all the useful operations on this element must be done through scripting. Without an ID, you will have difficulty locating the element to interoperate with it.
Figure 2-2 shows what the canvas in Listing 2-5 would look like in a browser.
27
CHAPTER 2 USING THE CANVAS API
Figure 2-2. A simple HTML5 canvas element on an HTML page
Not very exciting, but as any artist would tell you, it is full of potential. Now, let’s do something with this pristine canvas. As mentioned before, it is not easy to draw a diagonal line on a web page without HTML5 Canvas. Let’s see how easy it is now that we can use Canvas. Listing 2-6 shows how, with just a few lines of code, you can draw a diagonal line on the canvas we added to the page earlier.
Listing 2-6. Creating a Diagonal Line on a Canvas
<script>
function drawDiagonal() {
//Get the canvas element and its drawing context var canvas = document.getElementById('diagonal'); var context = canvas.getContext('2d');
//Create a path in absolute coordinates context.beginPath();
context.moveTo(70, 140); context.lineTo(140, 70);
//Stroke the line onto the canvas context.stroke();
}
window.addEventListener("load", drawDiagonal, true); </script>
Let’s examine the JavaScript code used to create the diagonal line. It is a simple example, but it captures the essential flow of working with the Canvas API:
You first gain access to the canvas object by referencing a particular canvas’s ID value. In this example, the ID is diagonal. Next, you create a context variable and you call the canvas object’s getContext method, passing in the type of canvas you are looking for. You pass in the string “2d” to get a two-dimensional context—the only available context type at this time.
■ Note Much work has already been completed on a three-dimensional version of the Canvas context. Version 1.0 of the WebGL specification, a joint effort from browser vendors and the Khronos Group, was released in early 2011. WebGL is based on the same concepts and designs as the popular OpenGL library, bringing a similar API to JavaScript and HTML5. To create a three-dimensional drawing context in a supporting browser, you simply use
28
CHAPTER 2 USING THE CANVAS API
the string "webgl" as the argument to getContext. The resulting context has an entirely new set of drawing APIs: capabilities that are thorough and complex enough for their own book. Although some browsers are shipping implementations of WebGL today, not all vendors are on board. However, the potential of three-dimensional rendering on the Web is compelling enough that we expect rapid uptake of support in the next few years. For more information, consult the WebGL site at the Khronos Group (http://www.khronos.org/webgl). We will touch on WebGL in a little more detail in the final chapter of this book.
You then use the context to perform drawing operations. In this case, you can create the diagonal line by calling three methods—beginPath, moveTo, and lineTo—passing in the line’s start and end coordinates.
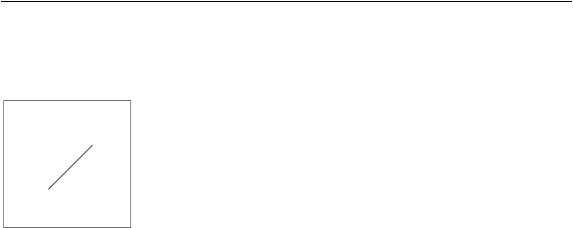
The drawing methods moveTo and lineTo do not actually create the line; you finalize a canvas operation and draw the line by calling the context.stroke(); method. Figure 2-3 shows the diagonal line created with the example code.
Figure 2-3. Diagonal line on a canvas
Triumph! Although this simple line may not appear to be the start of a revolution, keep in mind that drawing a diagonal line between two arbitrary points using classic HTML techniques was a very difficult maneuver involving stretched images, strange CSS and DOM objects, or other forms of black magic. Let us never speak of them again.
As you can see from this example’s code, all operations on the canvas are performed via the context object. This will hold true for the rest of your interaction with the canvas because all the important functions with visual output are accessible only from the context, not the canvas object itself. This flexibility allows the canvas to support different types of drawing models in the future, based on the type of context that is retrieved from the canvas. Although we will frequently refer in this chapter to actions we will take on the canvas, keep in mind that this actually means that we will be working with the context object that the canvas supplies.
As demonstrated in the previous example, many operations on the context do not immediately update the drawing surface. Functions such as beginPath, moveTo, and lineTo do not modify the canvas appearance immediately. The same is true of many functions that set the styling and preferences of the canvas. Only when a path is stroked or filled does it appear on the display. Otherwise, the canvas will only be immediately updated when images are displayed, text is shown, or rectangles are drawn, filled, or cleared.
29