

48 |
POWER EXCEL WITH MR EXCEL |
|
|
Figure 105 Delete any replacements that cause problems.
USE AUTOCORRECT TO ENABLE A SHORTCUT
Problem: I work for John Jacob Jingleheimer Schmidt. It is frustrating to type this name continuously. How can I save time?
Strategy: You can set up an AutoCorrect entry to replace JJJS with John Jacob Jingleheimer Schmidt. Here’s how:
1. Select File, Options, Proofing, AutoCorrect
Options or Alt+T+A.
2. On the AutoCorrect dialog, go to the AutoCorrect tab.
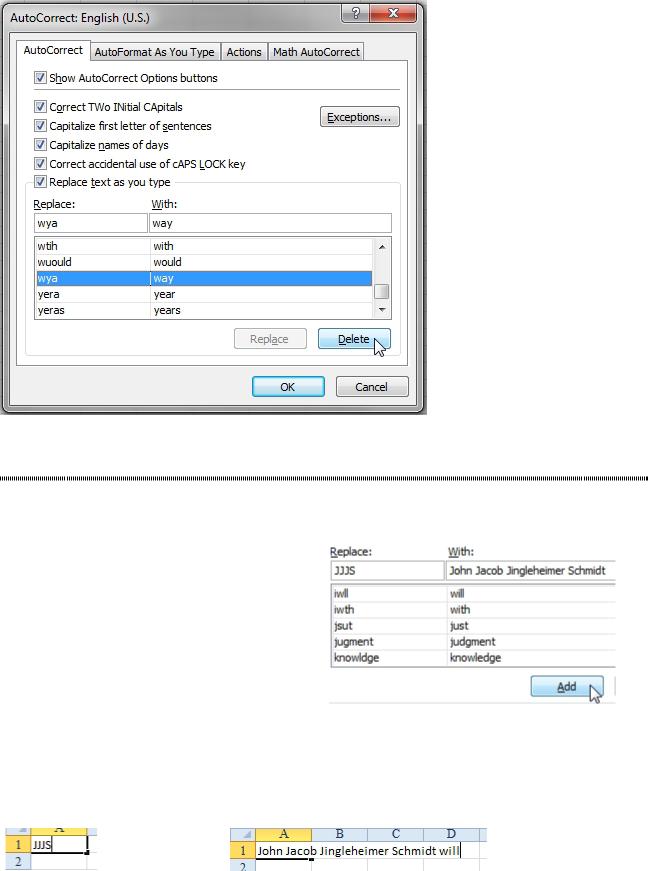
3. In the Replace section, type JJJS. In the With section, type the complete name. Click Add.
Figure 106 Add your own shortcut as an AutoCorrect option.
Results: When you type JJJS in a cell, and then type a space or press Enter, Excel will replace your text with the complete text specified in the AutoCorrect list.
Figure 107 Type the shortcut… Figure 108 …and a space to invoke the correction.
Additional Details: If you sometimes need to use the abbreviation and sometimes need to spell out the words, then set up JJJS> to be the shortcut for spelling out the words. Then, when you type JJJS, the initials will appear. When you type JJJS>, the words will appear.

PART 1: THE EXCEL ENVIRONMENT |
49 |
|
|
WHY WON’T THE TRACK CHANGES FEATURE WORK IN EXCEL?
Problem: After I select Review, Track Changes, Highlight Changes, I cannot insert cells. What’s going on?
Strategy: Track Changes is a great feature in Word. However, when you turn on Track Changes in Excel,
Microsoft automatically makes your workbook a shared workbook.
1
Figure 109 Tracking changes shares the workbook.
The shared workbook function in Excel has so many limitations that it is nearly impossible to use. When you share a workbook, you cannot do any of the following tasks:
●● Insert blocks of cells ●● Create an Excel Table ●● Delete worksheets
●● Merge or unmerge cells
●● Sort or Filter by Formatting
●● Change conditional formatting or data validation ●● Create or change charts or PivotCharts
●● Insert drawing objects, hyperlinks, or scenarios
●● Assign, change, or remove passwords, protect or unprotect sheets ●● Create, change, or view scenarios
●● Use automatic subtotals ●● Group or outline data
●● Create or change pivot tables, including using slicers ●● Create or modify sparklines
●● Record, edit, or assign macros
●● Enter CSE or array formulas ●● Use data tables
●● Work with XML data
●● Use a data form
It is possible that a novice Excel user might never use these features. It is even possible that before you bought this book, you never used them. However, sharing a workbook makes it virtually unusable for an intermediate Excel user. There is no strategy to get around this. Unless your changes will involve only radically simple worksheet changes, you should avoid the Track Changes and Share Workbooks options.
Alternate Strategy: Visit Litera.com for a third-party application that can compare an original and current version of a workbook and show all changes, including changes to graphic elements such as charts.
SIMULTANEOUSLY COLLABORATE ON A WORKBOOK WITH EXCEL WEB APP
Problem: We have five co-workers who need to edit the same workbook. When someone (Marcia…) leaves it open, the rest of us are forced into Read-Only mode.
50 |
POWER EXCEL WITH MR EXCEL |
|
|
Strategy: The Excel Web App has solved this problem. This is one of those things that the Excel Web App does better than regular Excel.
From Excel 2013+, us File, Save As, OneDrive. Once the file is on OneDrive, use File, Share, Get a Shar- ing Link. Next to the Edit Link, click Create Link. Excel will generate a URL that will be impossible to remember. Copy that URL and send it to your co-workers.
With Excel 2010, Use File, Save & Send, Save to Web and save the file to OneDrive. Then, from Office.com, find the file in your recent documents. Open the workbook. Use Share, Share With People, and choose the editing link.
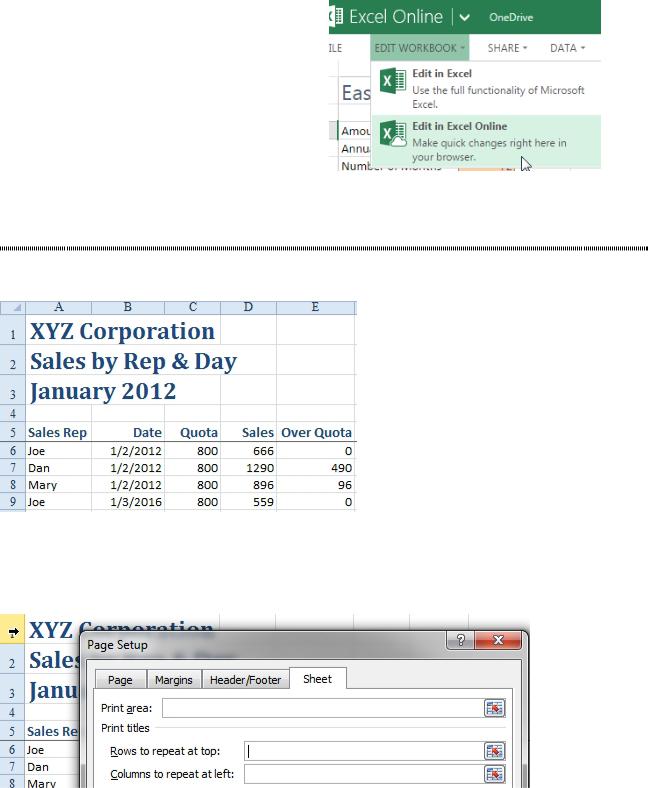
When people follow the link, they will choose to Edit in Excel Online. Multiple people can have the document open and edit difference cells at the same time. A status bar in the top right shows who is in the document. A color-coded box shows the cell that each person is editing.
Gotcha: Filtering is the one odd thing. If I filter the worksheet to only my records, it gets filtered for everyone. Here at MrExcel, we had to agree on a “no filtering” rule. The Excel team wants to fix this,
but it is hard… functions like AGGREGATE will Figure 110 Choose to Edit online. return different answers based on hidden rows.
HOW TO PRINT TITLES AT THE TOP OF EACH PAGE
Problem: I have a report that has 90 rows of data. I want to have the title rows print at the top of each printed page.
Figure 111 Repeat titles at the top of each printed page.
Strategy: Printing options are controlled on the fourth tab of the legacy Page Setup dialog box. In this case, you want rows 1 through 5 to print at the top of each page. Follow these steps:
1. Select Print Titles. The Sheet tab of the Page Setup dialog will be displayed.
2. Click the mouse in the Rows to Repeat at Top box.
Figure 112 Select Rows to Repeat at Top

PART 1: THE EXCEL ENVIRONMENT |
51 |
|
|
3.Look behind the dialog box. If you can see the row numbers that you want to repeat, click on the first row and drag down to the last row. Excel should fill in $1:$5 for you. Alternatively, you could type this text or use the RefEdit button at the right edge of the box.
4.There is a Print Preview button at the bottom of the dialog. Check page 2 of the Print Preview to see if the rows are appearing correctly.
See Also: "How to Print Page Numbers at the Bottom of Each Page" on page 51.
PRINT A LETTER AT THE TOP OF PAGE 1 AND REPEAT HEADINGS AT THE TOP OF EACH SUBSEQUENT PAGE
Problem: I am sending out a worksheet that contains a letter followed by a lengthy report. I would like the headings to appear at the top of each page after the first page. I don’t want the headings to appear at the top of the letter on the first page.
1
Figure 113 You want row 19 to appear at the top of page 2 & beyond.
Strategy: Follow the steps in the previous topic. Specify $19:$19 as the Rows To Repeat At Top. If you specify that a row in the middle of the print range should be repeated at the top of the pages, it will not begin repeating until the next page.
Results: The headings do not print at the top of page 1, but they do print at the top of pages 2 and beyond.
HOW TO PRINT PAGE NUMBERS AT THE BOTTOM OF EACH PAGE
Problem: I am printing a lengthy report, and I want the pages to be numbered.
Strategy: Headers and footers are controlled in the Page Setup dialog or in the new Page Layout view.
This topic will show you the new Page Layout view.
1. Ensure that your document is in Page Layout mode by clicking the middle of the three icons next to the zoom slider in the lower-right corner of the document window. Excel will show your worksheet in virtual pages.
Figure 114 Page layout mode offers visible headers and footers.
2. Scroll to the bottom of the first virtual page. Look for the area in the bottom center of the page with the words “Click to add footer.” Hover over this area, and a box will appear illustrating the position for three footer areas. Click in the center footer area. A new ribbon tab, Header & Footer Tools, will appear.