

Communicating Over Networks Using an Ethernet Shield • 173
Communicating Over Networks Using an Ethernet Shield
In the previous section, you learned how to build network applications with an Arduino by using your PC’s network connection. This approach works nicely, but it also has a few disadvantages. The biggest problem is that you need a complete PC, while for many applications the Arduino’s hardware capabilities would be sufficient. In this section, you’ll learn how to solve this problem with an Ethernet shield.
Usually, you can’t connect a naked Arduino to a network. Not only are its hardware capabilities too limited, but also most Arduino boards don’t have an Ethernet port. That means you can’t plug an Ethernet cable into them, and to overcome this limitation, you have to use an Ethernet shield. Such shields come with an Ethernet chip and Ethernet connectors and turn your Arduino into a networking device immediately. You only have to plug it in.
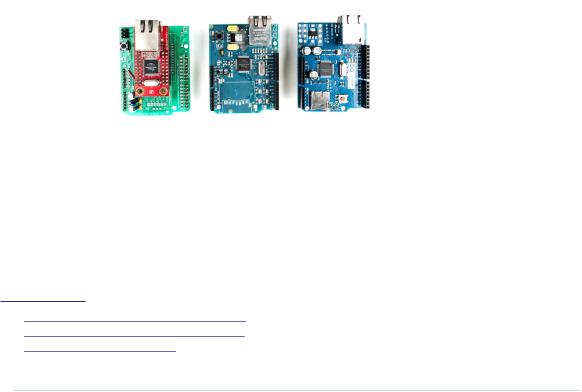
You can choose from several products (the following figure shows some of them); they all are good and serve their purpose well. For prototyping, I prefer the “official” shield,7 because it comes with sockets for all pins and has a microSD card slot. Alternatively, you can use the Arduino Ethernet,8 an Arduino board that comes with an Ethernet port and doesn’t need a separate shield.
Hardware is only one aspect of turning an Arduino into a network device. We also need some software for network communication. The Arduino IDE comes with a convenient Ethernet library that contains a few classes related to networking. We’ll use it now to access a Daytime service on the Internet.
A Daytime service9 returns the current date and time as an ASCII string. Daytime servers listen on either TCP or UDP port 13. You can find many Daytime services on the Internet; one of them runs at time.nist.gov. Before
7.http://www.arduino.cc/en/Main/ArduinoEthernetShield
8.http://www.arduino.cc/en/Main/ArduinoBoardEthernet
9.http://en.wikipedia.org/wiki/DAYTIME
report erratum • discuss
Chapter 10. Networking with Arduino • 174
we use the service programmatically with an Arduino, see how it works using the telnet command:
maik> telnet time.nist.gov 13
Trying 192.43.244.18...
Connected to time.nist.gov. Escape character is '^]'.
56965 14-11-04 20:33:03 00 0 0 867.4 UTC(NIST) * Connection closed by foreign host.
As soon as the telnet command connects to the Daytime server, it sends back the current time and date.10 Then the service shuts down the connection immediately.
Here’s an implementation of exactly the same behavior for an Arduino with an Ethernet shield:
Ethernet/TimeServer/TimeServer.ino
Line 1 #include <SPI.h>
-#include <Ethernet.h>
-const unsigned int BAUD_RATE = 9600;
-const unsigned int DAYTIME_PORT = 13;
5
-byte mac[] = { 0xDE, 0xAD, 0xBE, 0xEF, 0xFE, 0xED };
-IPAddress my_ip(192, 168, 2, 120);
-IPAddress time_server(192, 43, 244, 18); // time.nist.gov
-EthernetClient client;
10
-void setup() {
-Serial.begin(BAUD_RATE);
-Ethernet.begin(mac, my_ip);
-}
15
-void loop() {
-delay(1000);
-Serial.print("Connecting...");
-
20 if (client.connect(time_server, DAYTIME_PORT) <= 0) {
-Serial.println("connection failed.");
-} else {
-Serial.println("connected.");
-delay(300);
25 while (client.available()) {
-char c = client.read();
-Serial.print(c);
-}
-
10.See http://www.nist.gov/physlab/div847/grp40/its.cfm for a detailed description of the date string’s format.
report erratum • discuss

Communicating Over Networks Using an Ethernet Shield • 175
30 Serial.println("Disconnecting.");
-client.stop();
-}
-}
First, we include the Ethernet library and define a constant for the Daytime service port. (We also have to include the SPI library, because the Ethernet library depends on it.) Then we define a few global variables:
•mac contains the MAC address we’re going to use for the Ethernet shield. A MAC address is a 48-bit number that uniquely identifies a network device.11 Usually the manufacturer sets this identifier, but for the Ethernet shield, we have to set it ourselves; we use an arbitrary number.
Important note: the MAC address has to be unique on your network. If you connect more than one Arduino, make sure they all have different MAC addresses! Also note that the Arduino Ethernet and the latest versions of the Ethernet shields have a MAC address that can be found on a sticker on their back side.
•Whenever you connect your PC to the Internet, it probably gets a new IP address via the Dynamic Host Configuration Protocol (DHCP).12 For most Arduino applications, a DHCP implementation is comparatively costly, so you usually assign an IP address manually. (See how to use DHCP in
Using DHCP and DNS, on page 177.) In most cases, this will be a local address in the 192.168.x.y range; we store this address in the my_ip variable using the Arduino’s IPAddress class. In older versions of the Arduino IDE, you had to use a byte array to store IP addresses. You can still do so, because byte arrays will be converted to IPAddress objects automatically if needed.
•To turn domain names such as time.nist.gov into an IP address, you need access to the Domain Name System (DNS). The Arduino’s standard library supports DNS, but we’ll find out the IP address ourselves. (See how to use DNS in Using DHCP and DNS, on page 177.) We assign it to time_server. The telnet command already turned the Daytime service domain name into an IP address for us. Alternatively, you can use one of the following commands to determine a domain name’s IP address:
maik> host time.nist.gov
time.nist.gov has address 192.43.244.18 maik> dig +short time.nist.gov
11.http://en.wikipedia.org/wiki/Mac_address
12.http://en.wikipedia.org/wiki/Dynamic_Host_Configuration_Protocol
report erratum • discuss

Chapter 10. Networking with Arduino • 176
192.43.244.18
maik> resolveip time.nist.gov
IP address of time.nist.gov is 192.43.244.18 maik> ping -c 1 time.nist.gov
PING time.nist.gov (192.43.244.18): 56 data bytes
64 bytes from 192.43.244.18: icmp_seq=0 ttl=48 time=173.598 ms
--- time.nist.gov ping statistics ---
1 packets transmitted, 1 packets received, 0.0% packet loss round-trip min/avg/max/stddev = 173.598/173.598/173.598/0.000 ms
Back to the source code! In line 9, we create a new EthernetClient object. This class is part of the Ethernet library and allows us to create network clients that connect to a certain IP address and port. In former versions of the Arduino IDE, this class was named Client.
Now we have to initialize the Ethernet shield itself; we do this in line 13 in the setup function. We have to invoke Ethernet.begin, passing it our MAC and IP address. Then we initialize the serial port so that we can output some debug messages. At this point, we’ve initialized all the components we need, so we can finally connect to the Daytime server and read its output.
Please note that you can also pass the IP address of your network gateway and your subnet mask to Ethernet.begin. This is necessary if you don’t connect the Arduino directly to the Internet but use a router or a cable modem instead. In this case, you can pass the gateway address as follows:
// ...
byte mac[] = { 0xDE, 0xAD, 0xBE, 0xEF, 0xFE, 0xED }; IPAddress my_ip(192, 168, 2, 120);
IPAddress time_server(192, 43, 244, 18); // time.nist.gov
//Insert IP address of your domain name system below:
IPAddress dns(8, 8, 8, 8);
//Insert IP address of your cable or DSL router below:
IPAddress gateway(192, 168, 13, 254);
EthernetClient client(time_server, DAYTIME_PORT); void setup() {
Ethernet.begin(mac, my_ip, dns, gateway); Serial.begin(BAUD_RATE);
}
// ...
The loop function of our sketch starts with a short delay, allowing all components to initialize properly. This is necessary because the Ethernet shield is an autonomous device that is capable of working in parallel to the Arduino. In line 20, we try to connect to the Daytime service. If the connection cannot be established, we print an error message. Otherwise, we wait for 300 millisec-
report erratum • discuss