

Registering an Application with Twitter • 167
Registering an Application with Twitter
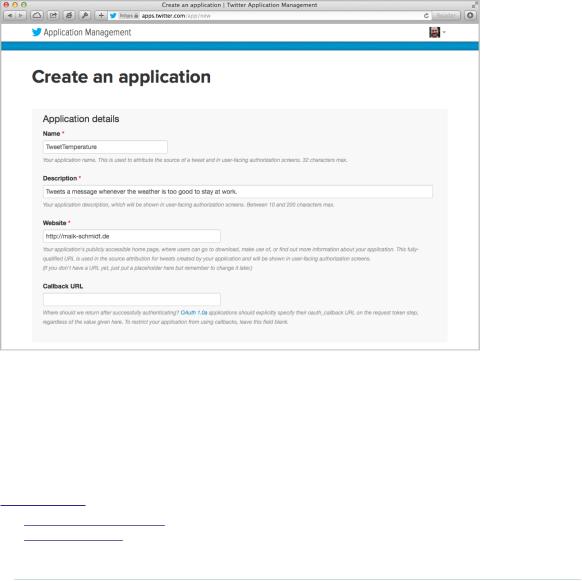
Before we start coding, we have to register our application at the Twitter website to get API keys and an OAuth access token.3 OAuth is an authentication scheme that allows applications to use other applications’ resources. In our case, we’ll grant our very own application the right to update our Twitter feed without using our Twitter username and password.
To get all of the information needed, create a new application in the applications section of the Twitter website.4 After you’ve logged in, click the Create New App button and fill out the form:
After you’ve created your new application, go to the Permissions tab and set the application’s access level to Read and Write. Then navigate to the API Keys tab and press the Create My Access Token button. It can take a few moments-refresh the page a few times until the access token is available.
The API Keys tab should contain all information that you need to allow your application to modify your Twitter status. It should look similar to this:
3.http://en.wikipedia.org/wiki/Oauth
4.https://apps.twitter.com
report erratum • discuss

Chapter 10. Networking with Arduino • 168
Copy the API key, the API secret, the access token, and the access token secret. You’ll need them in the next section, when we Tweet messages using Processing.
Tweeting Messages with Processing
Processing doesn’t have Twitter support, but in Processing programs we have direct access to Java libraries, and you can find several good Twitter libraries for Java. One of them is Twitter4J.5 We’ll use it because it’s very mature and has excellent OAuth support.
Download Twitter4J from its website6 and unpack it to a temporary folder. Depending on the version you’ve downloaded, you’ll find a file named twitter4j- core-x.y.z.jar or twitter4j-core-x.y.z-SNAPSHOT.jar in the folder. Open the Processing IDE, create a new sketch, and then drag and drop the jar file to the IDE. (The
5.http://twitter4j.org/
6.http://twitter4j.org/en/index.html#download
report erratum • discuss

Tweeting Messages with Processing • 169
jar file will automatically be copied to a local folder named code.) That’s all you have to do to give your application access to the Twitter4J library.
We proceed with some boilerplate code:
Ethernet/TweetTemperature/TweetTemperature.pde import processing.serial.*;
final float |
MAX_WORKING_TEMP = 32.0; |
final int |
LINE_FEED = 10; |
final int |
BAUD_RATE = 9600; |
final int |
FONT_SIZE = 32; |
final int |
WIDTH = 320; |
final int |
HEIGHT = 240; |
final String |
API_KEY = "<YOUR API KEY>"; |
final String |
API_SECRET = "<YOUR API SECRET>"; |
final String |
ACCESS_TOKEN = "<YOUR ACCESS TOKEN>"; |
final String |
ACCESS_TOKEN_SECRET = "<YOUR ACCESS TOKEN SECRET>"; |
Serial _arduinoPort; float _temperature; boolean _isCelsius; PFont _font;
void setup() { size(WIDTH, HEIGHT);
_font = createFont("Arial", FONT_SIZE, true); println(Serial.list());
_arduinoPort = new Serial(this, Serial.list()[0], BAUD_RATE); _arduinoPort.clear();
_arduinoPort.bufferUntil(LINE_FEED); _arduinoPort.readStringUntil(LINE_FEED);
}
void draw() { background(255); fill(0);
textFont(_font, FONT_SIZE); textAlign(CENTER, CENTER); if (_isCelsius)
text(_temperature + " \u2103", WIDTH / 2, HEIGHT / 2); else
text(_temperature + " \u2109", WIDTH / 2, HEIGHT / 2);
}
As usual, we import the serial libraries for communicating with the Arduino, and then we define some constants we’ll need later. Most of them contain the credentials we need to access the Twitter service. With MAX_WORKING_TEMP, you can define at which temperature the application starts to Tweet. This can be a degrees Celsius or Fahrenheit value. The rest defines a few values we need
report erratum • discuss
Chapter 10. Networking with Arduino • 170
for the user interface, such as the screen width, the screen height, and the font size.
After that, we define a few member variables. _arduinoPort contains a reference to the Serial object we use to communicate with the Arduino. _temperature contains the last temperature value we received from the Arduino, and _isCelsius is true if the value we read was in degrees Celsius. We need the _font variable to define the font we use to output the temperature on the screen.
In the setup method, we set the window size and create the font we’re going to use. Then we print out a list of all serial devices available. We initialize our
_arduinoPort variable with the first one we find, hoping that it’s the Arduino. You could also loop through the list automatically and search for something that looks like an Arduino port name, but that’d be fragile, too.
We call the clear method to empty the serial port’s buffer. With bufferUntil, we make sure that we get notified about serial events only when we’ve received a linefeed character. The call to readStringUntil ensures that we start with a fresh serial buffer that doesn’t contain an incomplete line of data.
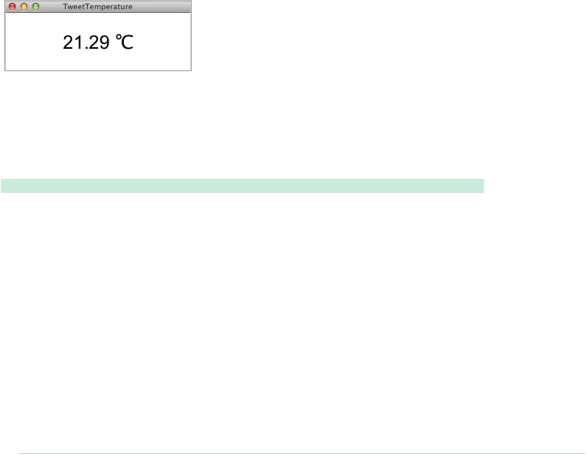
The draw method prints the last temperature we received on the screen. It sets the background color to white using background and the text color to black using fill. Then it sets the font and ensures the text we are printing is
centered horizontally and vertically. Eventually, we print the temperature using the text method. To make the result look nicer, we use the official Unicode characters for degrees Celsius (\u2103) and Fahrenheit (\u2109).
Now let’s implement the business logic of our “Take me to the beach” alarm:
Ethernet/TweetTemperature/TweetTemperature.pde void serialEvent(Serial port) {
final String arduinoData = port.readStringUntil(LINE_FEED); if (arduinoData != null) {
final String[] data = split(trim(arduinoData), ' '); if (data.length == 2 &&
(data[1].equals("C") || data[1].equals("F")))
{
_isCelsius = data[1].equals("C"); _temperature = float(data[0]); if (Float.isNaN(_temperature))
return; println(_temperature);
int sleepTime = 5 * 60 * 1000;
if (_temperature > MAX_WORKING_TEMP) { tweetAlarm();
report erratum • discuss

Tweeting Messages with Processing • 171
sleepTime = 120 * 60 * 1000;
}
try {
Thread.sleep(sleepTime);
}
catch(InterruptedException ignoreMe) {}
}
}
}
void tweetAlarm() {
ConfigurationBuilder cb = new ConfigurationBuilder(); cb.setDebugEnabled(true)
.setOAuthConsumerKey(API_KEY)
.setOAuthConsumerSecret(API_SECRET)
.setOAuthAccessToken(ACCESS_TOKEN)
.setOAuthAccessTokenSecret(ACCESS_TOKEN_SECRET); TwitterFactory tf = new TwitterFactory(cb.build()); Twitter twitter = tf.getInstance();
try {
Status status = twitter.updateStatus(
"Someone, please, take me to the beach!"
);
println(
"Successfully updated status to '" + status.getText() + "'."
);
}
catch (TwitterException e) { e.printStackTrace();
}
}
Whenever new data arrives on the serial port, the Processing runtime environment calls the serialEvent method. There we try to read a line of text, and then we check whether it contains a decimal number followed by a blank and a C or an F character. This ensures we’ve read an actual temperature data set and not some digital garbage.
If we got a syntactically correct temperature data set, we convert it into a float object and check to see whether it’s greater than MAX_WORKING_TEMP. (No one should be forced to work at temperatures that high!) If yes, we call tweetAlarm and Tweet a message to encourage some followers to rescue us. Then we wait for two hours until our next check. Otherwise, we wait five minutes and check the temperature again.
tweetAlarm updates our Twitter status and is simple. In good old Java tradition, we create a new Twitter instance using a TwitterFactory. The factory expects a
ConfigurationBuilder object that we have initialized with our Twitter application
report erratum • discuss

Chapter 10. Networking with Arduino • 172
 Tweeting Arduinos
A useful and interesting hardware kit is Botanicalls.a It checks whether your plants need water, and if they do, it sends a reminder message via http://twitter.com/. As soon as you water the plant, Botanicalls dutifully sends a “Thank You” message. Although the official version of Botanicalls is a specialized piece of hardware, you can build it using an Arduino.b
Botanicalls certainly make your life easier. Whether the Tweeting Vending Machinec improves your life is a matter of taste. Users of this modified vending machine have to identify themselves using an RFID card. Whenever they buy some sweets, the vending machine Tweets their name and what they’ve bought.
a.http://www.botanicalls.com/
b.http://www.botanicalls.com/archived_kits/twitter/
c.http://www.popsugar.com/tech/Tweeting-Vending-Machine-34558986
credentials. Finally, we invoke updateStatus. If everything went fine, we print a success message to the console. If anything goes wrong, updateStatus will raise an exception, and we’ll print its stack trace for debugging purposes.
That’s all the code we need, so connect your Arduino to your PC and run it! The following figure shows what happens on Twitter when the temperature in my working room is higher than 32 degrees Celsius. (For your first tests, you might have to change 32.0 to a smaller value. If you don’t have to change it, why aren’t you at the beach?)
Using a full-blown PC as an Internet relay for your Arduino is convenient, but it’s also overkill for most applications. In the next section, you’ll learn how to turn an Arduino into a real networking device.
report erratum • discuss