

Phone_81_Development_for_Absolute_Beginners
.pdfTo retrieve the selected ComboBoxItem, I’ll add the following code to my myButton_Click event handler:
Also, to provide an initially selected / default value, I’ll set the IsSelected=”True” attribute value:
Windows Phone 8.1 Development for Absolute Beginners – Page 50
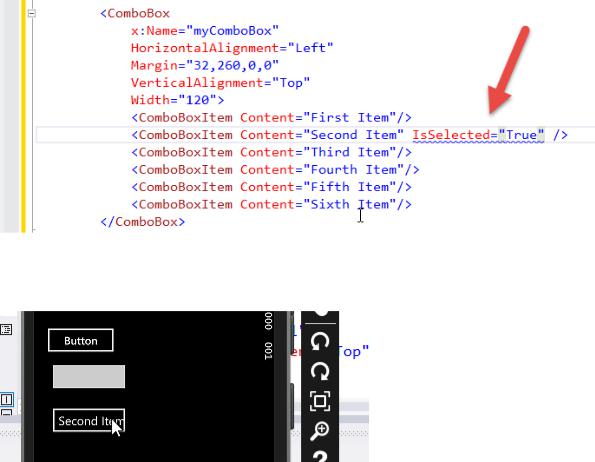
And when I run the app, notice that the ComboBox is already set to “Second Item”:
When I click on that item, a flyout control appears displaying all the possible items in the ComboBox. I can selected on of them and click the checkmark icon in the command bar to accept that choice:
Windows Phone 8.1 Development for Absolute Beginners – Page 51
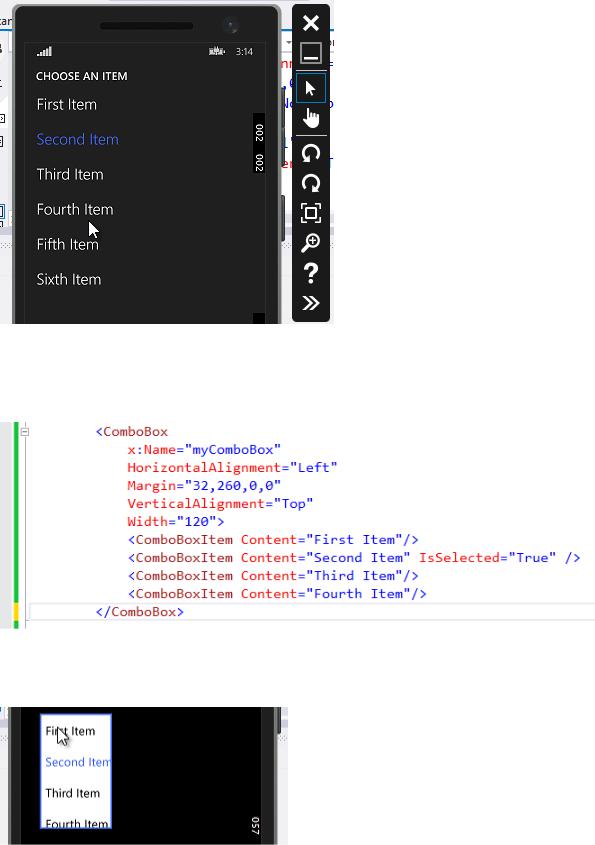
The flyout panel only appears when you have five or more items. I’ll reduce this to just four
ComboBoxItems:
And this time when I run the app, clicking on the ComboBox reveals a list of four items:
Windows Phone 8.1 Development for Absolute Beginners – Page 52
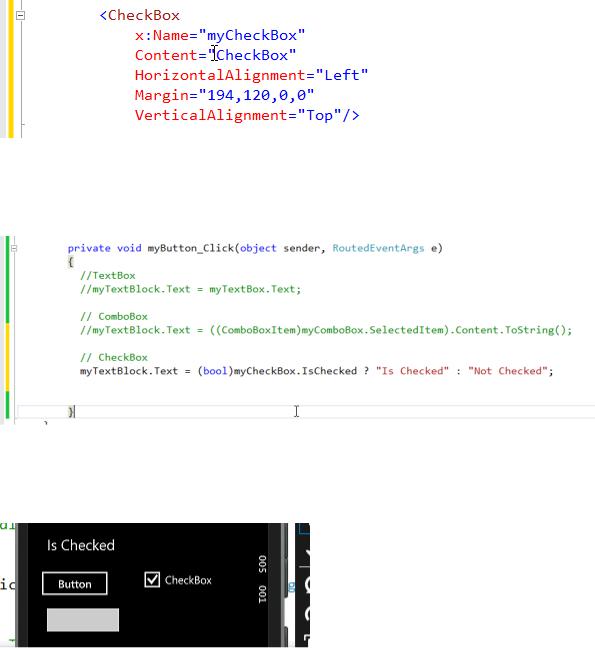
Next, we’ll look at the CheckBox. It is useful when you want to retrieve a yes or no answer from the user:
To retrieve the value from the CheckBox, I’ll use the IsChecked property. Here, I use the decision operator to return one of two strings depending on whether IsChecked is true or false:
When I run the app and check the CheckBox, then click the Button, I can see the value returned in each “state” of the CheckBox:
Similar to the CheckBox is the RadioButton. The only difference: RadioButtons work in groups so that no two RadioButtons in a group can be selected at the same time. This is useful where you want to present a limited set of options to the user (otherwise you should use the ComboBox). Here I create two RadioButtons:
Windows Phone 8.1 Development for Absolute Beginners – Page 53
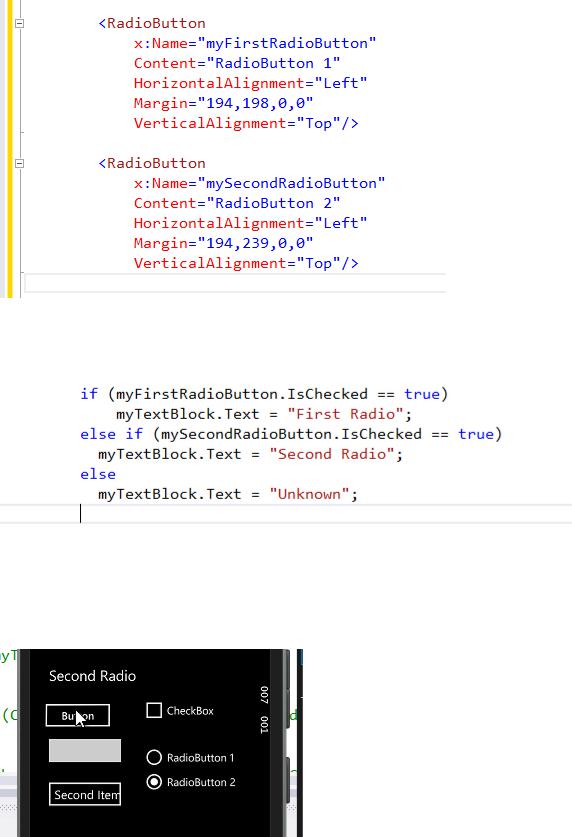
Here I determine which RadioButton was checked:
When I run the app, I can see my selection and the associated text when I choose a RadioButton then click the Button:
Windows Phone 8.1 Development for Absolute Beginners – Page 54
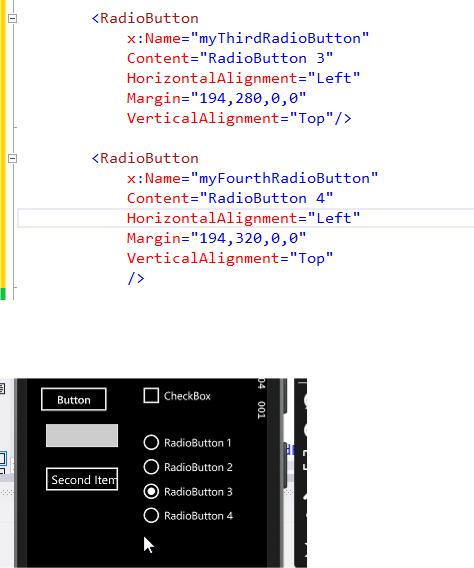
I’ll add a few more RadioButtons:
And currently there are four all in one group:
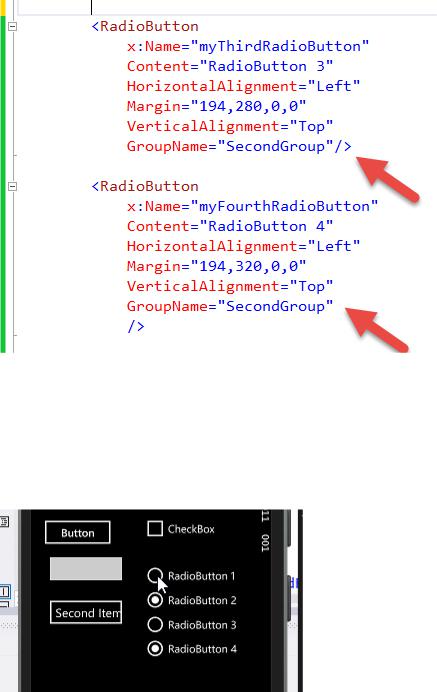
If I want to split these four RadioButtons into two separate groups, I’ll give the last two
RadioButton controls a GroupName. The GroupName must be spelled the same in order for them to be grouped together:
Windows Phone 8.1 Development for Absolute Beginners – Page 55
Note: If you don’t add a group name to RadioButtons, they will be added to a default group. That’s why our previous example worked.
When I run the app now, I have two groups of RadioButtons, each group allowing a selection of a single RadioButton:
Next, we’ll discuss the DatePicker which allows the user to enter a reliable date using a special flyout:
Windows Phone 8.1 Development for Absolute Beginners – Page 56

To retrieve the selected date from the DatePicker, I add the following C# codE:
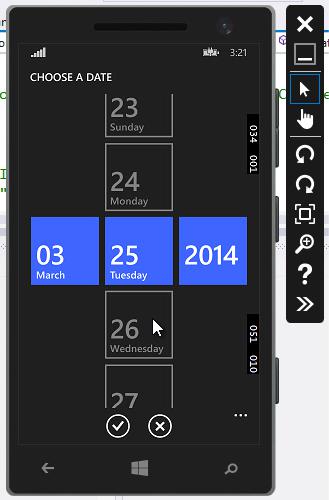
When I run the app and tap the DatePicker, a flyout displays a three-column selection control. I can change the month, day and year independently by scrolling the date part up or down. Once
I’ve found the date I’m looking for, I select the check mark icon to accept the selection or the x icon to cancel:
Windows Phone 8.1 Development for Absolute Beginners – Page 57
When I select a date and click the Button, I retrieve the date and display it in a raw format. I could use the many built-in DateTime formatting options on this string before I display it or I could use String.Format’s special formatting codes:
Windows Phone 8.1 Development for Absolute Beginners – Page 58
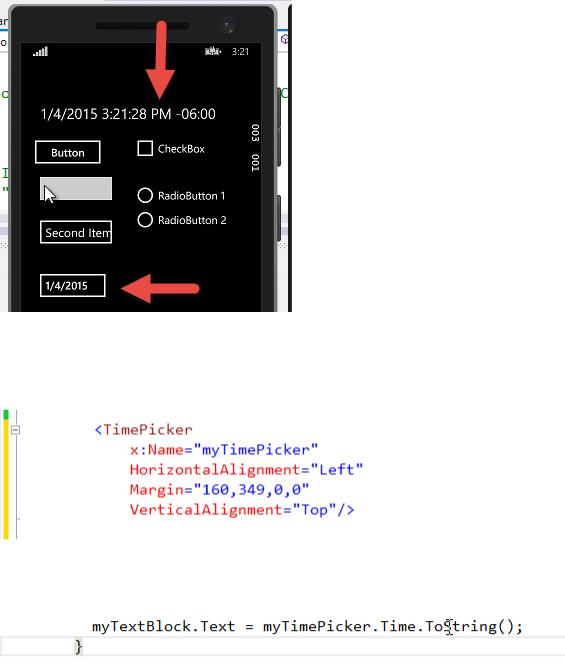
Next, we’ll talk about the TimePicker. This is almost identical to the DatePicker except it only deals with the Time part:
Here I’ll retrieve the current selected Time from the TimePicker and display it in the TextBlock:
Again, when I run the app and tap the TimePicker, I see a three-column display of time parts, the hour, minute and AM/PM:
Windows Phone 8.1 Development for Absolute Beginners – Page 59