

Phone_81_Development_for_Absolute_Beginners
.pdfThe purpose of this lesson is to demonstrate how little effort will be required to take our
Windows Phone app and turn it into a Windows app. To that end, I’ll begin by literally copying all of the XAML from my Phone’s user interface and pasting it into the XAML editor for the Windows app.
Once I copy and paste everything in the body of my page, I can see the preview displays my work:
Admittedly, there’s a lot of blank space on the right-hand side that we're not using, and I certainly could re-work a lot of this to make it utilize some of that blank space, however as a first pass, I'm pretty happy with this. It's the promise and the value of XAML that I'm able to reuse it both these contexts, and it works well.
Beyond the XAML layout, we’ll need to modify the MainPage.xaml.cs using the technique I demonstrated earlier, using F12 to Go To Definition … and create the event handler method stubs.
Windows Phone 8.1 Development for Absolute Beginners – Page 110
The code in the code behind is identical to what we created before, so use the techniques and the code we used earlier in this lesson for the event handlers, the reference to the Tip class, and the performCalculation() helper method.
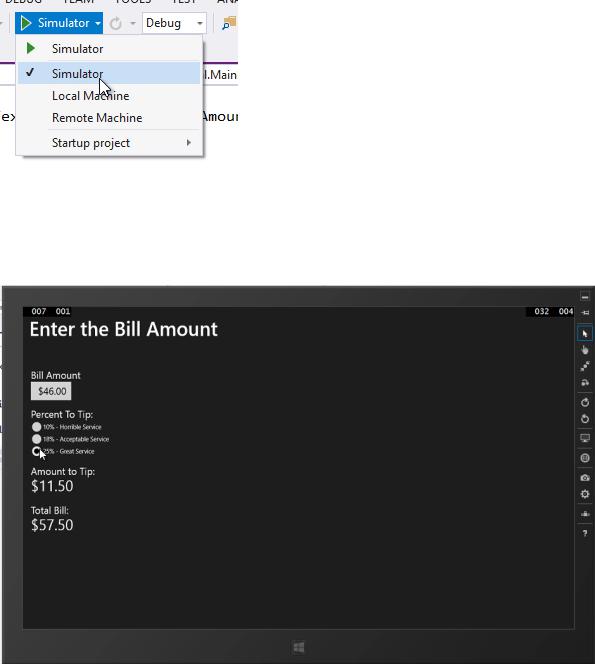
Once you’ve finished that, select the arrow next to the debug button that is currently set to
Local Machine and change it to Simulator:
Click the debug button.
In the simulator, you can work with the app as expected:
Windows Phone 8.1 Development for Absolute Beginners – Page 111
As you can see, you can create a Universal App using one code base (the Tip class) and almost identical XAML for layout. Admittedly, I could tweak the Windows version of the XAML if I wanted to make it look good on the larger form factor, but even when I didn't modify it, it looked just fine, at least for this initial version.
So I encourage you to do this: Whatever you're going to build, build it for both Windows and Windows Phone. Structure your shared logic with that in mind. Once you keep your shared logic / business rules / data access in the Shared project, you’ll just reference methods and so forth that are inside of the classes of your Shared project from both the Windows and the Windows phone projects.
Windows Phone 8.1 Development for Absolute Beginners – Page 112
Lesson 11: Working with the Windows Phone 8.1 Emulator
We've seen the Windows Phone Emulator at work in this series. It is a crucial component to developing apps for the Windows Phone platform, so I wanted to spend a little time becoming more familiar with it and point you in the right direction for more information.
Our game plan in this lesson ...
(1)We'll learn about what the Windows Phone Emulator really is, and how it supplies different versions for different deployment scenarios.
(2)We'll learn about the function of the Emulator, including keyboard shortcuts that emulate device buttons.
(3)We'll learn about the controls to resize, rotate and simulate the act of handling the virtual device as if it were a physical one, with accelerometer support, GPS support and more.
What is the Windows Phone Emulator?
In a nutshell, the Windows Phone Emulator is a desktop application that simulates a Windows Phone device, and actually provides similar performance to a physical Windows Phone device. It provides a virtualized environment in which you can debug and test Windows Phone apps without a physical device -- in fact the emulator is running Microsoft's Hyper-V.
Now, while the Emulator is great for development and quick debugging sessions, before you publish your app to the Windows Phone Store, Microsoft recommends that you actually test your app on a real Windows Phone.
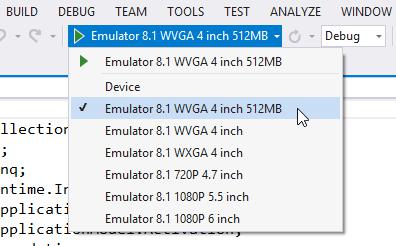
Choosing different versions of the Emulator for debugging
Up to now, when we clicked the Run / Debug button on Visual Studio's toolbar, we were running the Emulator in its default configuration ... something called WVGA 512MB.
Windows Phone 8.1 Development for Absolute Beginners – Page 113
What does WVGA and 512MB really mean?
The 512MB indicates that we're running in a memory constrained environment ... The default emulator image in Visual Studio is Emulator WVGA 512MB, which emulates a memoryconstrained Windows Phone 8.1 phone. So, for example, the Lumia 610 is an inexpensive entry level Windows Phone 8.1 device which sports only 256MB of RAM. By contrast, the Lumia 920 has 1 GB of RAM. On lower-RAM devices, having multiple apps running at the same time or creating a memory intensive app could cause performance problems. So, to be sure that your app will run well on lower-RAM devices you can test your app using a realistic Emulator image.
There are a number of great articles about RAM usage on MSDN ... let me point out the best starting point to learn more:
App performance considerations for Windows Phone http://msdn.microsoft.com/en-us/library/windowsphone/develop/ff967560(v=vs.105).aspx
Optimizing Apps for Lower Cost Devices http://blogs.windows.com/windows_phone/b/wpdev/archive/2012/03/07/optimizing-apps- for-lower-cost-devices.aspx
What does "WVGA" as well as those other acronyms stand for?
The Emulator allows you to test your app on a unique emulator image for each of the screen resolutions supported by Windows Phone. This default selection encourages you to target the largest possible market for your Windows Phone 8 app.
•WVGA (800 × 480)
•WXGA (1280 × 768)
•720p (1280 × 720)
Windows Phone 8.1 Development for Absolute Beginners – Page 114

•1080p (1920 x 1080)
If you run the default, then go to the Settings app in the About button, you can see this confirmed.
How does this translate into the actual phones on the market?
Lumia 1520
Display Size: 6 inch
Display Resolution: Full 1080p (1920 x 1080)
Lumia Icon
Display Size: 5 inch
Display Resolution: Full 1080p (1920 x 1080)
Lumia 1020 and 920
Display size: 4.5 inch
Display resolution: WXGA (1280 x 768)
Lumia 820
Display size: 4.3 inch
Display resolution: WVGA (800 x 480)
Windows Phone 8.1 Development for Absolute Beginners – Page 115
Lumia 610
Display size: 3.7 ''
Display resolution - WVGA (800 x 480)
I realize by the time you watch this there may be newer phone models. The point is that you should be aware of the fact that you'll need to support different screen resolutions and memory constraints. Like I talked about in the lesson on Layout using XAML, you will want to eliminate specific pixel sizes for layout (except for margins). Choosing from the different Emulator sizes, you can make sure you're on the right track.
Working with the Phone Emulator's special features
I'll not spend a lot of time on the phone's basic navigation. A lot of this you'll pick up by using the Emulator throughout the series if you don't already have a physical phone in your possession. Essentially, you'll have an almost identical experience, complete with the Start and Apps page, search, web browsing, clock, battery, etc.
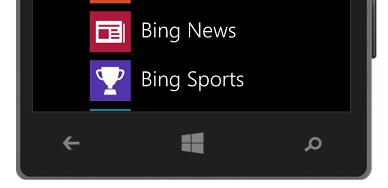
You have the same hardware buttons on the bottom of the Emulator as you would have on a Windows Phone.
Windows Phone 8.1 Development for Absolute Beginners – Page 116
However, you'll be missing the buttons on the side of the phone. For example, my Lumia 920 has three buttons on the side ... a volume up and down, a power button, and a camera button. These can be access in the Emulator with keyboard function keys.
There's a list of keyboard mappings here:
http://msdn.microsoft.com/enus/library/windowsphone/develop/ff754352(v=vs.105).aspx#BKMK_KeyboardMapping
F6 - Camera button half-way
F7 - Camera button
F9 - F10 raise and lower the volume
F11 - plays / pauses audio ... it simulates an in-line headphone button that pauses music and answers incoming phone calls. If you double-tap the button, it'll skip to the next audio track on your playlist or album
F12 - Power button / lock screen
F1 - Back button
F2 - Windows key
F3 - Search button
PAGE DOWN button - When a textbox is the target input, PAGE DOWN disables the virtualized "hardware" keyboard down, and you can use your physical keyboard for input
Windows Phone 8.1 Development for Absolute Beginners – Page 117

PAGE UP button - When a textbox is the target input, PAGE UP enables the virtualized "hardware" keyboard.
PAUSE/BREAK button - Toggles the keyboard, so you could just use that all the time.
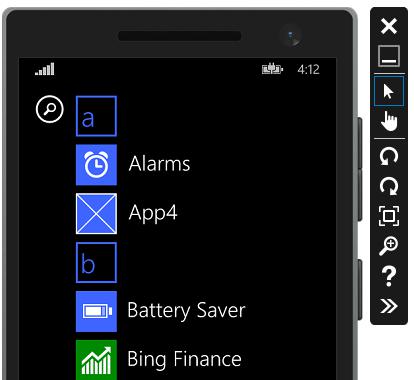
In addition to the "virtualized" phone on screen, there's a floating menu off to the right. A little experimentation will reveal that the first six buttons, in order:
Windows Phone 8.1 Development for Absolute Beginners – Page 118
(1)Shuts down the emulator
(2)Minimizes the emulator
(3)Changes to single-finger selection mode
(4)Changes to two-finger selection mode (for pinch gesture)
(5)Rotates the emulator 90 degrees counter clockwise
(6)Rotates the emulator 90 degrees clockwise
(7)Expands the emulator to the largest size that can fit comfortably on your computer screen
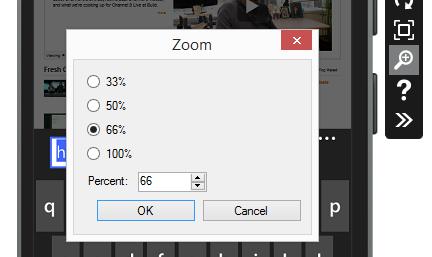
(8)Brings up the zoom dialog
(9)Presumably this will open up a help portal online, however that hasn’t been implemented at the time I write this.
(10)The double chevron at the bottom opens up the additional tools dialog.
There are eight tabs on the Additional Tools dialog. The first is the Accelerometer which can be used to test apps that utilize the accelerometer sensor.
Windows Phone 8.1 Development for Absolute Beginners – Page 119