

epwzf20
.pdfEasy PHP Websites with the Zend Framework |
168 |
|
|
Google's hosted version, chances are the user already has a copy cached within his browser. To include the library within your site, add the following lines within the head enclosure:
<script src="http://www.google.com/jsapi"></script> <script type="text/javascript" >
google.load("jquery", "1"); </script>
In this example, the 1 parameter tells Google to serve the most recent stable 1.X version available. If you need the highest release in the 1.3 branch, pass along 1.3. If you desire a specific version, such as 1.4.4, pass that specific version number.
If you would like to peruse the source code, you can download the latest release from the jQuery website. There you'll find a "minified" and an uncompressed version of the latest release. You should download the uncompressed version because in the minified version all code formatting has been eliminated, producing a smaller file size and therefore improved loading performance.
Managing Event Loading
Because much of your time spent working with jQuery will involve manipulating the HTML DOM (the DOM comprises all of the various page elements which you may want to select, hide, toggle, modify, animate, or otherwise manipulate), you'll want to make sure the jQuery JavaScript doesn't execute until the entire page has loaded to the browser window. Therefore you'll want to encapsulate your jQuery code within the google.setOnLoadCallback() method, like this:
<script type="text/javascript" > google.setOnLoadCallback(function() {
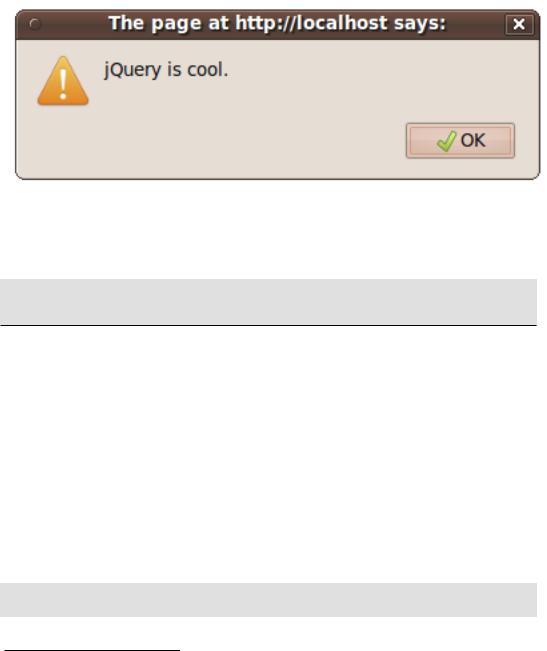
alert("jQuery is cool."); });
</script>
Add the setOnLoadCallback() method to your newly jQuery-enabled web page, and you'll see the alert box presented in Figure 9.5.
Easy PHP Websites with the Zend Framework |
169 |
|
|
Figure 9.5. Triggering an alert box after the DOM has loaded
If you're not loading the jQuery library from Google's CDN, the loading event syntax will look like this:
$(document).ready(function() { alert("jQuery is cool.");
});
You can use this syntax when the jQuery library is being served from your server, however when using jQuery in conjunction with Google's content distribution mechanism you'll need to use the former syntax.
DOM Manipulation
One of the most common tasks you'll want to carry out with jQuery is DOM manipulation. Thankfully, jQuery supports an extremely powerful and flexible selector engine for parsing the page DOM in a variety of ways. In this section I'll introduce you to this feature's many facets.
Retrieving an Object By ID
You'll recall from earlier in this chapter that JavaScript can retrieve a DOM object by its ID using the getElementByID() method. Because this is such a common task, jQuery offers a shortcut for calling this method, known as the dollar sign function. Thus, the following two calls are identical in purpose:
var title = document.getElementById("title"); var title = $("#title");
Easy PHP Websites with the Zend Framework |
170 |
|
|
In each case, title would be assigned the object identified by a DIV such as this:
<p id="title">The Hunt for Red October, by Tom Clancy</p>
Keep in mind that in both cases title is assigned an object, and not the element contents. For instance, you can use the object's text() method to retrieve the element contents:
alert(title.text());
To retrieve the element content length, reference the length attribute like this:
alert(title.text().length);
Several other properties and methods exist, including several which allow you to traverse an element's siblings, children, and parents. Consult the jQuery documentation for all of the details.
Retrieving Objects by Class
To retrieve all objects assigned to a particular class, use the same syntax as that used to retrieve an element by its ID but with a period preceding the class name rather than a hash mark:
var titles = document.getElementById(".title"); var titles = $("title");
For instance, given the following HTML, titles would be assigned an array of three objects:
<p class="title">The Hunt |
for |
Red |
October, by Tom |
Clancy</p> |
|
<p |
class="title">On Her Majesty's |
Secret Service, |
by Ian Fleming</p> |
||
<p |
class="title">A Spy in |
the |
Ointment, by Donald |
Westlake</p> |
|
|
|
|
|
|
|
To prove that titles is indeed an array containing three objects, you can iterate over the array and retrieve the text found within each object using the following snippet:
$.each(titles, function(index)
{
alert($(this).text()); });
jQuery's dollar sign syntax can also be used to retrieve HTML elements. For instance, you can use this call to retrieve the all h1 elements on the page:
var headers = $("h1");

Easy PHP Websites with the Zend Framework |
171 |
|
|
Retrieving and Changing Object Text
As was informally demonstrated in several preceding examples, to retrieve the text you'll need to call the object's .text() method. The following example demonstrates how this is accomplished:
<script type="text/javascript" > alert($("#title").text());
</script>
<body>
<p id="title">The Hunt for Red October, by Tom Clancy</p> </body>
To change the text, all you need to do is pass text into the .text() method. For instance, the following example will swap out Tom Clancy's book with a book by Donald Westlake:
<script type="text/javascript"> google.setOnLoadCallback(function() {
$("#title").text("A Spy in the Ointment, by Donald Westlake"); });
</script>
<body>
<p id="title">The Hunt for Red October, by Tom Clancy</p> </body>
Working with Object HTML
The text() method behaves perhaps a bit unexpectedly when an object's text includes HTML tags. Consider the following HTML snippet:
<p id="title"><i>The Hunt for Red October</i>, by Tom Clancy</p>
If you were to retrieve the title ID's text using the text() method, the following string would be returned:
The Hunt for Red October, by Tom Clancy
So what happened? The text() method will strip out any HTML tags found in the text, which might be perfectly acceptable depending upon what you want to do with the text. However, if you'd also like the HTML, use the html() method instead:
var title = $("#title").html();
The same concept applies when adding or replacing text. If the new text includes HTML, and you attempt to insert it using text(), the HTML will be encoded and output as text on the page. However,

Easy PHP Websites with the Zend Framework |
172 |
|
|
if you use html() when inserting HTML-enhanced text, the tags will be rendered by the browser as expected.
Determining Whether a DIV Exists
Because jQuery or a server-side language such as PHP could dynamically create DOM elements based on some predefined criteria, you'll often need to first verify an element's existence before interacting with it. However, you can't just check for existence, because jQuery will always return TRUE even if the DIV does not exist:
if ($("#title")) {
alert("The title div exists!");
}
However, an easy way to verify existence is to use one of the members exposed to each available DIV, for instance length:
if ( $("#title").length > 0 ) { alert("The title div exists!");
}
Removing an Element
To remove an element from the page, use the remove() method. For instance, the following example will remove the element identified by the news ID from the page:
$("title").remove();
...
<div id="title"><i>The Day of the Jackal</i>, by Frederick Forsyth</div>
Retrieving a Child
Many of the previous elements in this section referenced a book title and its author, with some of the examples delimiting the book title with italics tags (i):
<div id="title"><i>The Day of the Jackal</i>, by Frederick Forsyth</div>
What if you wanted to retrieve the book title, but not the author? You can use jQuery's child selector syntax to retrieve the value of a nested element:
var title = $("#title > i").text();
Similar features exist for retrieving an element's siblings and parents. See the jQuery documentation for more details.
Easy PHP Websites with the Zend Framework |
173 |
|
|
Event Handling with jQuery
Of course, all of the interesting jQuery features we've introduced so far aren't going to happen in a vacuum. Typically DOM manipulation tasks such as those described above are going to occur in response to some sort of useror server-initiated event. In this section you'll learn how to tie jQuery tasks to a variety of events. In fact, you've already been introduced to one such event, namely the Google Ajax API's setOnLoadCallback() method. This code contained within it executes once the method confirms that the page has successfully loaded.
jQuery can respond to many different types of events, such as a user-initiated mouse click, doubleclick, or mouseover. As you'll see later in this chapter, it can also monitor for changes to web forms, such as when the user begins to insert text into a text field, changes a select box, or presses the submit button.
Creating Your First Event Handler
Earlier in this chapter I talked about JavaScript's predefined event handlers, including mouse click onclick, mouse over mouseover, and form submission onsubmit). jQuery works in the same way, although its terminology occasionally strays from that used within standard JavaScript. Table 9-2 introduces jQuery's event types.
Table 9.2. jQuery's supported event types
Event Handler |
Description |
|
|
blur |
Executes when focus is removed from a select, text, or textarea |
|
form field. |
|
|
change |
Executes when the value of an event changes. |
|
|
click |
Executes when an element is clicked. |
|
|
dblclick |
Executes when an element is double-clicked. |
|
|
error |
Executes when an element is not loaded correctly. |
|
|
focus |
Executes when an element gains focus. |
|
|
keydown |
Executes when the user first presses a key on the keyboard. |
|
|
keypress |
Executes when the user presses any key on the keyboard. |
|
|
keyup |
Executes when the user releases a key on the keyboard. |
|
|
load |
Executes when an element and its contents have been loaded. |
|
|
|
|

Easy PHP Websites with the Zend Framework |
174 |
|
|
|
|
|
|
|
Event Handler |
Description |
|
|
|
|
mousedown |
Executes when the mouse button is clicked atop an element. |
|
|
|
|
mouseenter |
Executes when the mouse pointer enters the element. |
|
|
|
|
mouseleave |
Executes when the mouse pointer leaves the element. |
|
|
|
|
mousemove |
Executes when the mouse pointer moves while inside an element |
|
|
|
|
mouseout |
Executes when the mouse pointer leaves the element. |
|
|
|
|
mouseover |
Executes when the mouse pointer enters the element. |
|
|
|
|
mouseup |
Executes when the mouse button is released while atop an |
|
|
element. |
|
|
|
|
resize |
Executes when the size of the browser window changes. |
|
|
|
|
scroll |
Executes when the user scrolls to a different place within the |
|
|
element. |
|
|
|
|
select |
Executes when the user selects text residing inside an element. |
|
|
|
|
unload |
Executes when the user navigates away from the page. |
|
|
|
|
jQuery actually supports numerous approaches to tying an event to the DOM, however the easiest involves using an anonymous function. In doing so, we'll bind the page element to one of the events listed in Table 9-2, defining the function which will execute when the event occurs. The following example will toggle the CSS class of the paragraph assigned the ID title:
01 <style type="text/css">
02 .clicked { background: #CCC; padding: 2px;}
03 </style>
04
05 <script type="text/javascript" >
06
07 google.load("jquery", "1");
08
09google.setOnLoadCallback(function() {
10$("#title").bind("click", function(e){
11$("#title").toggleClass("clicked");
12});
13});
14
15 </script>
16
17</head>
18<body>

Easy PHP Websites with the Zend Framework |
175 |
|
|
19<p id="title">The Hunt for Red October, by Tom Clancy</p>
20</body>
Let's review the code:
•Lines 01-03 define the style which will be toggled each time the user clicks on the paragraph.
•Lines 10-12 define the event handler, binding an anonymous function to the element ID title. Each time this element ID is clicked, the CSS class clicked will be toggled.
•Line 19 defines the paragraph assigned the element ID title.
Try executing this script to watch the CSS class change each time you click on the paragraph. Then try swapping out the click event with some of the others defined in Table 9-2.
Introducing Ajax
You might be wondering why I chose to name this section title "Introducing Ajax". After all, haven't we been doing Ajax programming in many of the prior examples? Actually, what we've been doing is fancy JavaScript programming involving HTML, CSS and the DOM. As defined by the originator of the term Ajax Jesse James Garrett, several other requisite technologies are needed to complete the picture, including notably XML (or similarly globally understood format) and the XMLHttpRequest object. With the additional technologies thrown into the mix, we're able to harness the true power of this programming technique, which involves being able to communicate with the Web server in order to retrieve and even update data found or submitted through the existing Web page, without having to reload the entire page!
By now you've seen the power of Ajax in action countless times using popular websites such as Facebook, Gmail, and Yahoo!, so I don't think I need to belabor the advantages of this feature. At the same time, it's doubtful an in-depth discussion regarding how all of these technologies work together is even practical, particularly because it's possible to take advantage of them without having to understand the gory details, much in the same way we can use many Zend Framework components without being privy to the underlying mechanics.
Passing Messages Using JSON
Ajax-driven features are the product of interactions occurring between the client and server, which immediately raises a question. If the client-side language is JavaScript and the server-side language is PHP, how is data passed from one side to the other in a format both languages can understand? There are actually several possible solutions, however JSON (JavaScript Object Notation) has emerged as the most commonly used format.

Easy PHP Websites with the Zend Framework |
176 |
|
|
JSON is an open standard used to format data which is subsequently serialized and transmitted over a network. Unlike many XML dialects is actually quite readable, although of course it is ultimately intended for consumption by programming languages. For instance, the following presents a JSON snippet which represents an object describing a video game:
{
"asin": "B002I0K780", "name": "LittleBigPlanet 2", "rel": "January 18, 2011", "price":"59.99"
}
Both jQuery and PHP offer easy ways to both write and read JSON, meaning you'll be able to pass messages between the client and server without having to worry about the complexities of JSON message formatting and parsing. You'll see how easy and frankly transparent it is to both construct and parse these messages in the example that follows.
Validating Account Usernames
Any social networking website requires users to be uniquely identifiable, logically because users need to be certain of their friends' identities before potentially sharing personal information. GameNomad uses a pretty simplistic solution for ensuring users are uniquely identifiable, done by requiring users to choose a unique username when creating a new account.
Such a constraint can be a source of frustration for users who complete the registration form only to be greeted with an error indicating that the desired username has already been taken. On a popular website it's entirely likely that a user could submit the form several times before happening to choose an unused username, no doubt causing some frustration and possibly causing the user to give up altogether. Many websites alleviate the frustration by providing users with real-time feedback regarding whether the desired username is available, done by using Ajax to compare the provided username with those already found in the database, and updating the page asynchronously with some indication of whether the username is available.
In order to verify the availability of a provided username in real-time an event-handler must be associated with the registration form's username field. The username field looks like this:
<input type="text" name="username" id="username" value="" size="35">
Because we want validation to occur the moment the user enters the desired username into this field, a blur event is attached to the username field. The blur event handler will execute as soon as focus is taken away from the associated DOM element. Therefore when the user completes the username field and either tabs or moves the mouse to the next field, the handler will execute.

Easy PHP Websites with the Zend Framework |
177 |
|
|
This handler is presented below, followed by some commentary:
01 |
$('#username').bind('blur', function (e) { |
02 |
|
03 |
$.getJSON('/ws/username', |
04 |
{username: $('#username').val()}, |
05 |
function(data) { |
06 |
if (data == "TRUE") { |
07 |
$("#available").text("This username is available!"); |
08 |
} else { |
09$("#available").text("This username is not available!");
10}
11}
12);
13
14 });
Let's review the code:
• Line 01 defines the handler, associating a blur handler with the DOM element identified by username.
•Line 03 specifies that a GET request will be sent to /ws/username (The ws controller's username action), and that JSON-formatted data is expected in return.
•Line 04 sends a GET parameter named username to /ws/username. This parameter is assigned the value of whatever is found in the username field.
•Lines 05-11 define the anonymous function which executes when the response is returned to the handler. If the response is TRUE, the username is available and the user will be notified accordingly (by updating a DIV associated with the ID available). Otherwise, the username has already been taken and the user will be warned.
Next let's examine the ws controller (ws is just a convenient abbreviation for web services) and the username action used to verify the username's existence. This controller is presented next, followed by some commentary:
01 <?php
02
03 class WsController extends Zend_Controller_Action
04 {
05
06 public function init()
07 {