

epwzf20
.pdfEasy PHP Websites with the Zend Framework |
138 |
|
|
?>
For organizational purposes, I store these e-mail message files within application/views/scripts. However, chances are this particular directory doesn't reside on PHP's include_path, so you'll need to add it if you'd like to follow this convention. Rather than muddle up the configuration directive within php.ini I prefer to add it to the set_include_path() function call within the front controller public/index.php):
set_include_path(implode(PATH_SEPARATOR, array( realpath(APPLICATION_PATH . '/../library'), realpath(APPLICATION_PATH . '/../application/views/scripts'), get_include_path(),
)));
Configuring Zend_Mail to Use SMTP
Zend_Mail will by default rely upon the server's Sendmail daemon to send e-mail, which is installed and configured on most Unix-based systems by default. However, if you're running Windows or would otherwise like to use SMTP to send e-mail you'll need to configure Zend_Mail so it can authenticate and connect to the SMTP server.
Because you might send e-mail from any number of actions spread throughout the site, you'll want this configuration to be global. I do so by adding a method to the Bootstrap.php file which executes with each request. In a high-traffic environment you'll probably want to devise a more efficient strategy but for most developers this approach will work just fine. Within this method (which I call _initEmail) you'll pass the SMTP server's address, port, type of protocol used if the connection is secure, and information about the account used to send the e-mail, including the account username and password. I store all of this information within the application.ini file for easy maintenance. For instance, the following snippet demonstrates how you would define these parameters to send e- mail through a Gmail account:
email.server = "smtp.gmail.com" email.port = 587
email.username = "example@gmail.com" email.password = "secret" email.protocol = "tls"
The method will retrieve these parameters, pass them to the Zend_Mail_Transport_Smtp constructor, along with the SMTP server address, and then pass the newly created Zend_Mail_Transport_Smtp object to Zend_Mail's setDefaultTransport() method. The entire _initEmail() method is presented here:

|
Easy PHP Websites with the Zend Framework |
139 |
|
||
|
|
|
|
|
|
|
|
|
|
|
|
|
protected function |
_initEmail() |
|
|
|
|
{ |
|
|
|
|
|
$emailConfig = array( |
|
|
||
|
'auth'=> 'login', |
|
|
||
|
'username' |
=> |
Zend_Registry::get('config')->email->username, |
|
|
|
'password' |
=> |
Zend_Registry::get('config')->email->password, |
|
|
|
'ssl' |
=> |
Zend_Registry::get('config')->email->protocol, |
|
|
|
'port' |
=> |
Zend_Registry::get('config')->email->port |
|
|
|
); |
|
|
|
|
$mailTransport = new Zend_Mail_Transport_Smtp( Zend_Registry::get('config')->email->server, $emailConfig);
Zend_Mail::setDefaultTransport($mailTransport);
}
With _initEmail() in place, you can go about sending e-mail anywhere within your application!
Confirming the Account
After the account has been successfully created, a confirmation e-mail will be generated and sent to the account's e-mail address. This e-mail contains a link known as a "one-time URL" which uniquely identifies the account by passing the value stored in the account record's recovery column. The URL is generated by inserting the account's randomly generated recovery key into the e-mail body stored within _email_confirm_email_address.phtml. The particular line within this file which creates the URL looks like this:
http://www.gamenomad.com/account/confirm/key/{$account->recovery}
When the user clicks this URL he will be transported to GameNomad's account confirmation page, hosted within the Account controller's confirm action. The action code is presented next, followed by a breakdown of relevant lines.
|
01 |
public function confirmAction() |
|
02 |
{ |
|
03 |
|
|
04 |
$key = $this->_request->getParam('key'); |
|
05 |
|
|
06 |
// Key should not be blank |
|
07 |
if ($key != "") |
|
08 |
{ |
|
09 |
|
|
|
|

Easy PHP Websites with the Zend Framework |
140 |
|
|
10$em = $this->getInvokeArg('bootstrap')
11->getResource('entityManager');
12
13$account = $em->getRepository('Entities\Account')
14->findOneByRecovery($this->_request->getParam('key'));
16// Was the account found?
17if ($account) {
19// Account found, confirm and reset recovery attribute
20$account->setConfirmed(1);
21$account->setRecovery("");
23// Save the account to the database
24$em->persist($account);
25$em->flush();
26
27// Set the flash message and redirect the user to the login page
28$this->_helper->flashMessenger->addMessage(
29Zend_Registry::get('config')->messages
30->register->confirm->successful
31);
32$this->_helper->redirector('login', 'account');
33
34 } else {
35
36// Set flash message and redirect user to the login page
37$this->_helper->flashMessenger->addMessage(
38Zend_Registry::get('config')->messages
39->register->confirm->failed
40);
41$this->_helper->redirector('login', 'account');
42
43 }
44
45 }
46
47 }
Let's review several relevant lines of the confirm action:
•Line 13-14 retrieves the account record associated with the recovery key passed via the URL.
•If the key is found (line 17), the account is confirmed, the recovery key is deleted, and the changes are saved to the database (lines 20-25)

Easy PHP Websites with the Zend Framework |
141 |
|
|
•Once the updated account information has been saved back to the database, a message is assigned to the flash messenger and the user is redirected to the Account controller's login action (lines 28-32).
•If the recovery key is not found in the database, presumably because the user had previously confirmed his account and is for some reason trying to confirm it anew, an error message is assigned to the flash messenger and the user is redirected to the login page (lines 37-41).
Creating the User Login Feature
With the user's account created and confirmed, he can login to the site in order to begin taking advantage of GameNomad's special features. Like account registration, the account login feature is typically implemented using a form model (application/models/FormLogin.php), associated view script (application/views/scripts/_form_login.html), and a controller action which you'll find in the Account controller's login action. Just as was the case with the earlier section covering registration, I'll forego discussion of the form model and instead focus on the login action. As always you can review the form model and its associated parts by perusing the relevant files within the code download. The login action is presented next, followed by a review of relevant lines.
01 public function loginAction()
02 {
03
04 $form = new Application_Model_FormLogin(); 05
06 // Has the login form been posted? 07 if ($this->getRequest()->isPost()) { 08
09// If the submitted data is valid, attempt to authenticate the user
10if ($form->isValid($this->_request->getPost())) {
11
12// Did the user successfully login?
13if ($this->_authenticate($this->_request->getPost())) {
15$account = $this->em->getRepository('Entities\Account')
16 |
->findOneByEmail($form->getValue('email')); |
17 |
|
18// Save the account to the database
19$this->em->persist($account);
20$this->em->flush();
21
22// Generate the flash message and redirect the user
23$this->_helper->flashMessenger->addMessage(
24Zend_Registry::get('config')->messages->login->successful
25);

Easy PHP Websites with the Zend Framework |
142 |
|
|
26
27 return $this->_helper->redirector('index', 'index'); 28
29} else {
30$this->view->errors["form"] = array(
31Zend_Registry::get('config')->messages->login->failed
32);
33}
34
35} else {
36$this->view->errors = $form->getErrors();
37}
38
39 }
40
41 $this->view->form = $form; 42 43 }
Let's review the relevant lines of this snippet:
•Line 04 instantiates a new instance of the FormLogin model, which is passed to the view on line 34.
•If the form has been submitted back to the action (line 07), and the form data has properly validated (line 10), the action will next attempt to authenticate the user (line 13) by comparing the provided e-mail address and password with what's on record in the database. I like to maintain the authentication-specific code within its own protected method _authenticate()), which we'll review in just a moment.
•If authentication is successful, lines 15-16 will retrieve the account record using the provided e-mail address. Finally, a notification message is added to the flash messenger and the user is redirected to GameNomad's home page.
•If authentication fails, an error message is added to the global errors array (lines 30-32) and the login form is displayed anew.
As I mentioned, _authenticate() is a protected method which encapsulates the authenticationspecific code and establishes a new user session if authentication is successful. You could just as easily embed this logic within your login action however I prefer my approach as it results in somewhat more succinct code. The _authenticate() method is presented next, followed by a review of relevant lines:
01 protected function _authenticate($data)
02 {

Easy PHP Websites with the Zend Framework |
143 |
|
|
|
|
03 |
|
|
04 |
$db = Zend_Db_Table::getDefaultAdapter(); |
|
05 |
$authAdapter = new Zend_Auth_Adapter_DbTable($db); |
|
06 |
|
|
07 |
$authAdapter->setTableName('accounts'); |
|
08 |
$authAdapter->setIdentityColumn('email'); |
|
09$authAdapter->setCredentialColumn('password');
10$authAdapter->setCredentialTreatment('MD5(?) and confirmed = 1');
12$authAdapter->setIdentity($data['email']);
13$authAdapter->setCredential($data['pswd']);
15$auth = Zend_Auth::getInstance();
16$result = $auth->authenticate($authAdapter);
18if ($result->isValid())
19{
21if ($data['public'] == "1") {
22Zend_Session::rememberMe(1209600);
23} else {
24Zend_Session::forgetMe();
25}
26
27 return TRUE;
28
29 } else {
30
31 return FALSE;
32
33 }
34
35 }
Let's review the code:
•The Zend_Auth component authenticates an account by defining the account data source and within that source, the associated account credentials. Several sources are supported, including any database supported by the Zend Framework, LDAP, Open ID. Because GameNomad's account data is stored within the MySQL database's accounts table, the _authenticate() method uses Zend_Auth's Zend_Auth_Adapter_DbTable() method (line 05) to pass in the default database adapter handle (see Chapter 6 for more about this topic), and then uses the setTableName() method (line 07) to define the accounts table as the account data repository. Unfortunately at the time of this writing there is not a Doctrine-specific Zend_Auth adapter, and so you are forced to define two sets of database connection credentials within the application.ini file in order to

Easy PHP Websites with the Zend Framework |
144 |
|
|
take advantage of Zend_Auth in this manner, however it is a small price to pay in return for the conveniences otherwise offered by this component.
•Lines 08 - 09 associate the accounts table's email and password columns as those used to establish an account's credentials. These are the two items of information a user is expected to pass along when prompted to login.
•Line 10 uses the setCredentialTreatment() method to determine how the password should be passed into the query. Because the password is encrypted within the accounts table using the MD5 algorithm, we need to make sure that the provided password is similarly encrypted in order to determine whether a match exists. Additionally, because the user must confirm his account before being allowed to login, we also check whether the table's confirmed column has been set to 1.
•Lines 12 and 13 define the account identifier (the e-mail address) and credential (the password) used in the authentication attempt. These values are passed into the _authenticate() method, and originate as $_POST variables passed in via the login form.
•Line 15 instantiates a new instance of Zend_Auth, and passes in the authentication configuration data into the object using the authenticate() method.
•Line 18 determines whether the provided authentication identifier and credential exists as a pair within the database. If so, the user has successfully authenticated and we next determine whether the user has specified whether he would like to remain logged-in on his computer for two weeks, as determined by whether the check box on the login form was selected. If so, the cookie's expiration date will be set for two weeks from the present (the session cookie is used by Zend_Auth for all subsequent requests to determine whether the user is logged into the website). Otherwise, the cookie's expiration date will be set in such a way that the cookie will expire once the user closes the browser.
•Finally, a value of either TRUE or FALSE will be returned to the login action, indicating whether the authentication attempt was successful or has failed, respectively.
Determining Whether the User Session is Valid
After determining that the user has successfully authenticated, Zend_Auth will place a cookie on the user's computer which can subsequently be used to determine whether the user session is still valid. You can use Zend_Auth's hasIdentity() method to verify session validity. If valid, you can use the getIdentity() method to retrieve the account's identity (which in the case of GameNomad is the e-mail address).
$auth = Zend_Auth::getInstance();

Easy PHP Websites with the Zend Framework |
145 |
|
|
|
|
if ($auth->hasIdentity()) |
{ |
|
$identity = $auth->getIdentity(); |
|
|
if (isset($identity)) { |
|
|
printf("Welcome back, |
%s", $identity); |
|
} |
|
|
}
However, you're likely going to want to determine whether a valid account session exists at any given point within the website, meaning you'll need to execute the above code with every page request. My suggested solution is to insert this logic into a custom action helper and then call this action helper from within the application bootstrap (meaning the action helper will be called every time the application executes). Because this action helper can be used to initialize other useful global behaviors and other attributes, I've called it Initializer.php and for organizational purposes have placed it within /library/WJG/Controller/Action/Helper/. The authentication-relevant part of the Initializer action helper is presented next, followed by a discussion of the relevant lines.
01 |
$auth = Zend_Auth::getInstance(); |
02 |
|
03 |
if ($auth->hasIdentity()) { |
04 |
|
05 |
$identity = $auth->getIdentity(); |
06 |
|
07 |
if (isset($identity)) { |
08 |
|
09 |
$em = $this->getActionController() |
10 |
->getInvokeArg('bootstrap') |
11 |
->getResource('entityManager'); |
12 |
|
13// Retrieve information about the logged-in user
14$account = $em->getRepository('Entities\Account')
15 |
->findOneByEmail($identity); |
16 |
|
17 |
Zend_Layout::getMvcInstance()->getView()->account = $account; |
18 |
|
19 |
} |
20 |
|
21 |
} |
Let's review the code:
• Line 02 retrieves a static instance of the Zend_Auth object

Easy PHP Websites with the Zend Framework |
146 |
|
|
•Line 03 determines whether the user is currently logged in. If so, line 05 retrieves the identity of the currently logged-in user as specified by his username.
•Line 09 retrieves the entity manager, which is needed on lines 14-15 in order to retrieve information about the logged-in user.
•Line 17 passes the retrieved account object into the application's view scope using a littleknown feature of the Zend Framework which allows you to inject values into the view via the Zend_Layout component's getView() method.
With the Initializer custom action helper defined, you'll next need to add a method to the bootstrap /application/Bootstrap.php) which will result in Initializer being executed each time the application initializes. The following example method defines the custom action helper path using the Zend_Controller_Action_HelperBroker's addPath() method, and then executes the action using the Zend_Controller_Action_HelperBroker's addHelper() method:
protected function _initGlobalVars()
{
Zend_Controller_Action_HelperBroker::addPath( APPLICATION_PATH.'/../library/WJG/Controller/Action/Helper' );
$initializer = Zend_Controller_Action_HelperBroker::addHelper( new WJG_Controller_Action_Helper_Initializer() );
}
Because the account object is injected into the view scope, you can determine whether a valid session exists within both controllers and views by referencing the $this->view->account and $this->account variables, respectively. For instance, the following code might be used to determine whether a valid session exists. If so, a custom welcome message can be provided, otherwise registration and login links can be presented.
<?php if (! $this->account) { ?> <p>
<a href="/account/login">Login to your account</a> | <a href="/account/register">Register</a>
</p>
<?php } else { ?> <p>
Welcome back, <a href="/account/"><?= $this->account->username; ?></a> ·
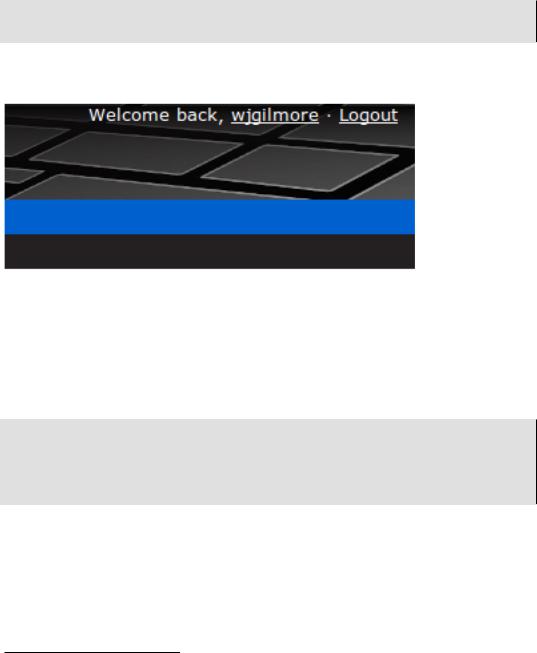
Easy PHP Websites with the Zend Framework |
147 |
|
|
<a href="/account/logout">Logout</a> </p>
<?php } ?>
A GameNomad screenshot using similar functionality to determine session validity is presented in Figure 8.1.
Figure 8.1. Greeting an authenticated user
Creating the User Logout Feature
Particularly if the user is interacting with your website via a publicly accessible computer he will want to be confident that his session is terminated before walking away. Fortunately, logging the user out is easily accomplished using Zend_Auth's clearIdentity() method, as demonstrated here:
public function logoutAction()
{
Zend_Auth::getInstance()->clearIdentity(); $this->_helper->flashMessenger->addMessage('You are logged out of your account'); $this->_helper->redirector('index', 'index');
}
Creating an Automated Password Recovery Feature
With everything else you need to accomplish on any given day, the last thing you'll want to deal with is responding to requests to reset an account password. Fortunately, creating an automated password recovery feature is quite easy. Like the account confirmation feature introduced earlier in this chapter, the password recovery feature will depend upon the use of a one-time URL sent via e-