

acer extensa 5635
.pdfBIOS Flash Utility
The BIOS flash memory update is required for the following conditions:
•New versions of system programs
•New features or options
•Restore a BIOS when it becomes corrupted.
Use the Flash16 utility to update the system BIOS flash ROM.
NOTE: Do not install memory-related drivers (XMS, EMS, DPMI) when you use the Flash16 Utility.
NOTE: Please use the AC adaptor power supply when you run the flashit utility. If the battery pack does not contain enough power to finish the BIOS flash, yo u may not boot the system because the BIOS is not completely loaded.
Using the Flash16 Utility to Update the BIOS
Follow the steps below to run the Flash16 Utility.
1.Prepare a bootable diskette.
2.Copy the flash utilities to the bootable diskette.
3.Boot the system from the bootable diskette.
4.Run Phlash16.exe z06_3106.wph /mode=3 /x. After flashing the BIOS the system will restart.
5.During POST, press F2 to enter into the BIOS setup screen.
6.Navigate to the Exit page, choose Load Setup Defaults then press ENTER.
7.When a Setup Confirmation appears, choose 'Yes’. The system will restart with the BIOS settings included in the utility.
Chapter 2 |
31 |
Downloaded from www.Manualslib.com manuals search engine
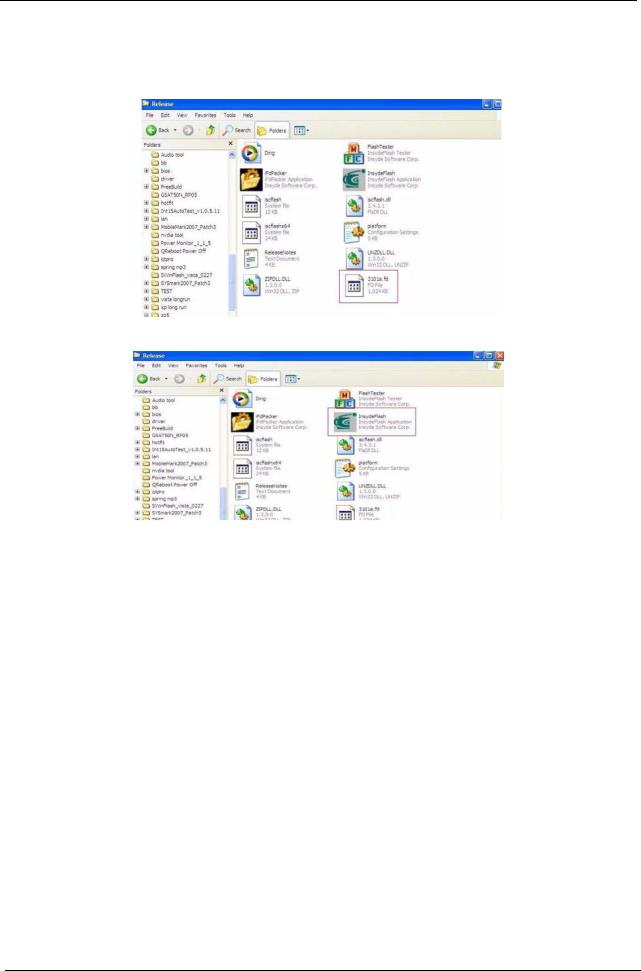
WinFlash Utility
Perform the following steps to use the WinFlash Utility:
1.Copy the BIOS file into the Winflash folder.
2.Double-click the WinFlash executable file.
32 |
Chapter 2 |
Downloaded from www.Manualslib.com manuals search engine
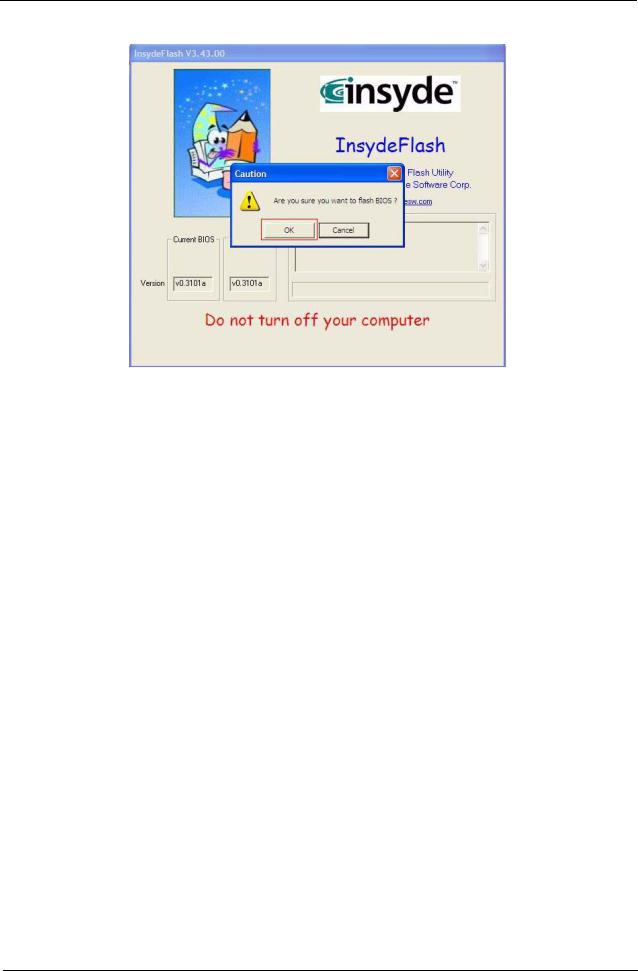
3.Click OK to begin the update. A progress screen displays.
4.When the process is complete, close all programs and applications and reboot the system.
Chapter 2 |
33 |
Downloaded from www.Manualslib.com manuals search engine
Remove HDD/BIOS Password Utilities
To reset a hard drive or BIOS password you require an additional PC. The utilities run on a DOS prompt on the second machine.
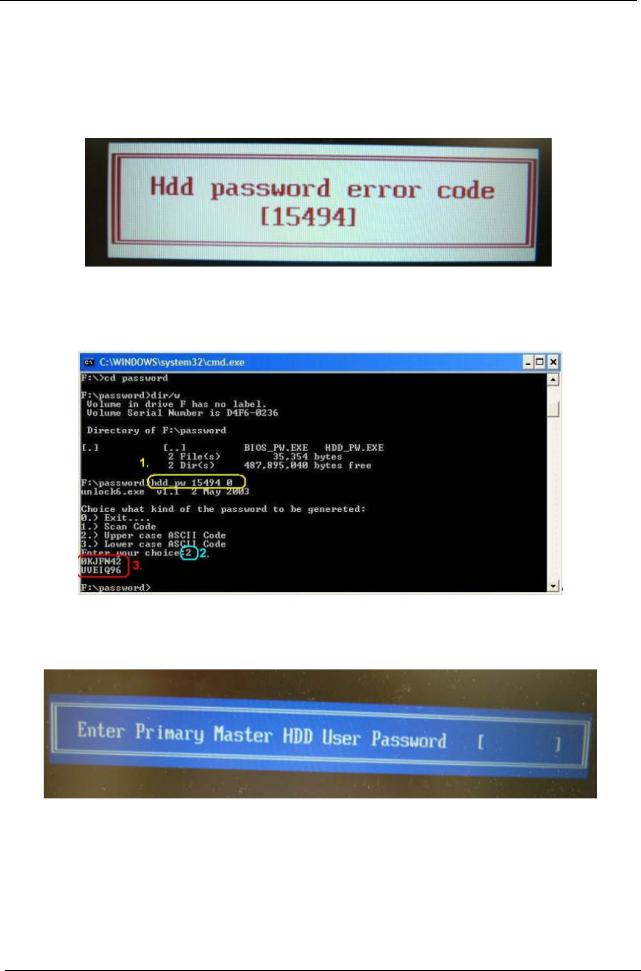
This section provides instructions on how to remove a HDD password. If you enter the wrong hard drive password three times, the system reports the following error code:
To reset the HDD password, run HDD_PW.EXE on a second machine as follows:
1.At a command prompt, type hdd_pw 15494 0
2.Type 2.
3.Write down one of the two strings (in this example, OKJFN42 or UVEIQ96).
4.Reboot the system and type the selected string (in this example OKJFN42 or UVEIQ96) for the HDD user password.
34 |
Chapter 2 |
Downloaded from www.Manualslib.com manuals search engine
Removing BIOS Passwords:
If you key in the wrong Supervisor Password three times, System Disabled displays on the screen as below.
To reset the BIOS password, run BIOS_PW.EXE on a second machine as follows:
1.At a command prompt, type bios_pw 14452 0.
2.Select one string from the list.
Chapter 2 |
35 |
Downloaded from www.Manualslib.com manuals search engine
3. Reboot the system and type the selected string (inthis example qjjg9vy or 07yqmjd etc.) for the BIOS user password.
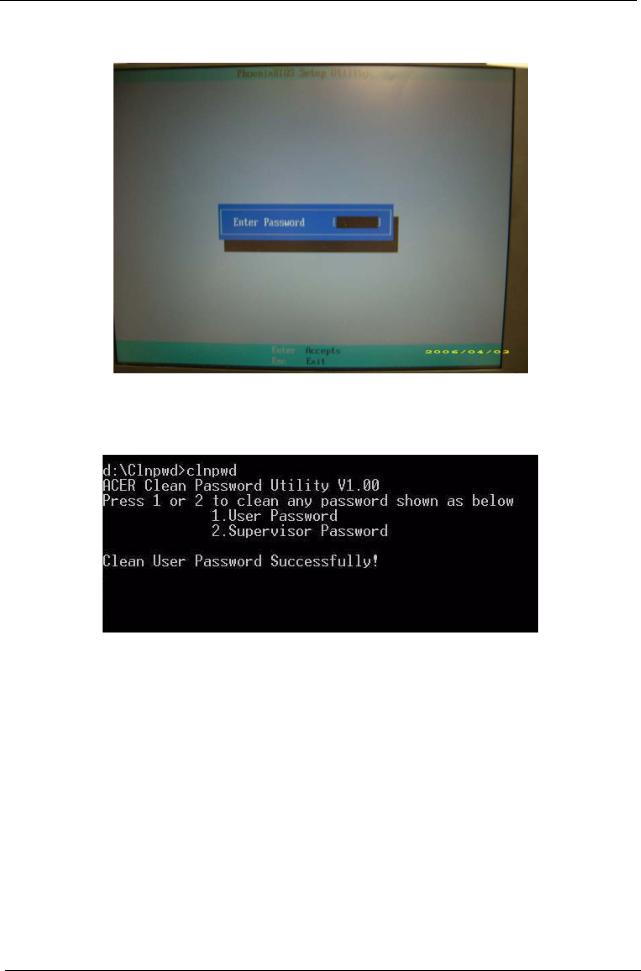
Cleaning BIOS Passwords
To clear the password, perform the following steps:
1.From a DOS prompt, Execute clnpwd.exe
2.Press 1 or 2 to clean the desired password shown on the screen.
The onscreen message determines whether the function is successful or not.
36 |
Chapter 2 |
Downloaded from www.Manualslib.com manuals search engine

Miscellaneous Utilities
Using Boot Sequence Selector
Boot Sequence Selector allows the boot order to be changed without accessing the BIOS. To use Boot Sequence Selector, perform the following steps:
1.Enter into DOS.
2.Execute BS.exe to display the usage screen.
3.Select the desired boot sequence by entering the corresponding sequence, for example, enter BS2 to change the boot sequence to HDD|CD ROM|LAN|Floppy.
Using DMITools
The DMI (Desktop Management Interface) Tool copies BIOS information to eeprom to be used in the DMI pool for hardware management.
When the BIOS displays Verifying DMI pool data it is checking the table correlates with the hardware before sending to the operating system (Windows, etc.).
To update the DMI Pool, perform the following steps:
1.Op[en a command prompt.
2.Execute dmitools.exe. The following messages show dmitools usage:
IMPORTANT:The following write examples (2 to 5) require a system reboot to take effect
Chapter 2 |
37 |
Downloaded from www.Manualslib.com manuals search engine

Example 1: Read DMI Information from Memory
Input: dmitools /r
Output:
Manufacturer (Type1, Offset04h): Acer
Product Name (Type1, Offset05h): Aspire one xxxxx
Serial Number (Type1, Offset07h): 01234567890123456789
UUID String (Type1, Offset08h): xxxxxxxx-xxxx-xxxx-xxxx-xxxxxxxxxxxx Asset Tag (Type3, Offset04h): Acer Asstag
Example 2: Write Product Name to EEPROM
Input:
dmitools /wp Acer
Example 3: Write Serial Number to EEPROM
Input:
dmitools /ws 01234567890123456789
Example 4: Write UUID to EEPROM
Input:
dmitools /wu
Example 5: Write Asset Tag to EEPROM
Input:
dmitools /wa Acer Asstag
Using the LAN MAC Utility
Perform the following steps to write MAC information to eeprom:
1.Use a text editor, for example Notepad, to edit the MAC.CFG file as shown:
•WriteData= '001122334455' <------- MAC value
•StartAddr=7A <------- MAC address
•WriteLeng=6 <------- MAC value length
•KeepByte=0 <------- can be any value
2.Boot into DOS.
3.Execute MAC.BAT to write MAC information to eeprom.
38 |
Chapter 2 |
Downloaded from www.Manualslib.com manuals search engine

Chapter 3
Machine Disassembly and Replacement
This chapter contains step-by-s tep procedures on how to disassemble the notebook computer for maintenance and troubleshooting.
Disassembly Requirements
To disassemble the computer, you need the following tools:
•Wrist grounding strap and conductive mat for preventing electrostatic discharge
•Flat screwdriver
•Philips screwdriver
•Plastic flat screwdriver
•Plastic tweezers
NOTE: The screws for the different components vary in size. During the disassembly process, group the screws with the corresponding components to avoid mismatch when putting back the components.
Chapter 3 |
39 |
Downloaded from www.Manualslib.com manuals search engine
General Information
Pre-disassembly Instructions
Before proceeding with the disassembly procedure, make sure that you do the following:
1.Turn off the power to the system and all peripherals.
2.Unplug the AC adapter and all power and signal cables from the system.
3.Place the system on a flat, stable surface.
4.Remove the battery pack.
Disassembly Process
The disassembly process is divided into the following stages:
•External module disassembly
•Main unit disassembly
•LCD module disassembly
The flowcharts provided in the succeeding disassembly sections illustrate the entire disassembly sequence. Observe the order of the sequence to avoid damage to any of the hardware components. For example, if you want to remove the main board, you must first remove the keyboard, then disassemble the inside assembly frame in that order.
Main Screw List
Screw |
Quantity |
Part Number |
|
|
|
M3*0.5+3.5I |
2 |
86.A03V7.006 |
|
|
|
M2.5*3.0-I (BZN) |
4 |
86.TPK07.003 |
|
|
|
M2.5*2-I (NI,NYLOK) IRON |
3 |
86.EDM07.002 |
|
|
|
M2.5*4.0-I (BUWZN) (NYLON PATCH) IRON |
10 |
86.EDM07.003 |
|
|
|
M2.5*5.0-I (BZN) |
50 |
86.ARE07.003 |
|
|
|
M2.0*3.0-I (BKAG) (NYLOK) IRON |
9 |
86.ARE07.002 |
|
|
|
40 |
Chapter 3 |
Downloaded from www.Manualslib.com manuals search engine