

LearningSDL011
.pdfDecember 15, 2011 [LEARNING SDL – A BEGINNER’S GUIDE]
Figure 22 - Tip of the Day message
I recommend letting the IDE startup with the ―Tip of the Day‖.
Figure 23 - Code::Blocks start up screen
2.Copy SDL.dll under C:\SDL-1.2.14\bin to Code::Blocks bin directory.
a.This will allow the IDE to find the SDL.dll when you execute from the IDE, otherwise you will always have to copy the SDL.dll into the same directory as the exe file.
We have now completed all the steps that need only happen one time.
21
December 15, 2011 [LEARNING SDL – A BEGINNER’S GUIDE]
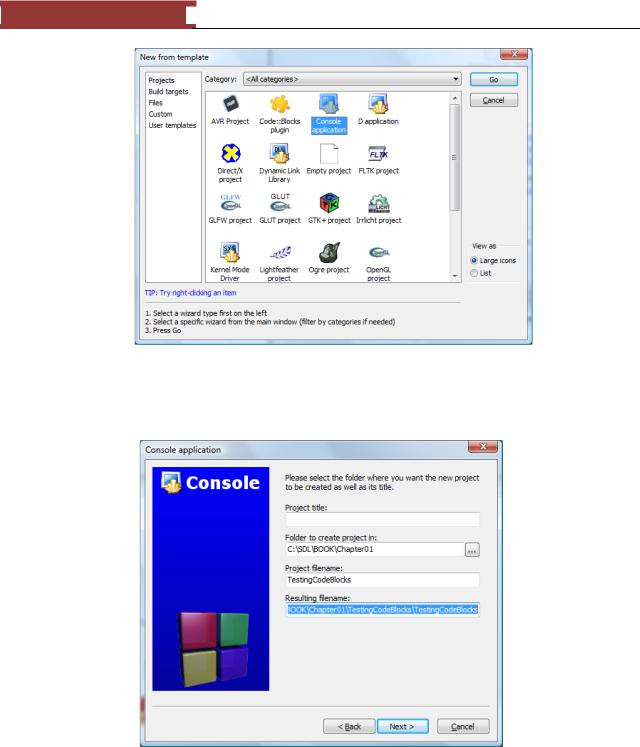
Figure 24 - Creating a Console Application
3.Create a C++ Project to test simple SDL application. Select File | New Project. Click on ―Console Project‖ icon in the dialog box that appears.
Figure 25 - TestingCodeBlocks Project
I decided to give my project title the name ―TestingCodeBlocks‖ . Select a folder to insert the new project. I usually create a folder with the same name as the project.
4. Take the defaults and click on ―Finish‖.
22
December 15, 2011 [LEARNING SDL – A BEGINNER’S GUIDE]
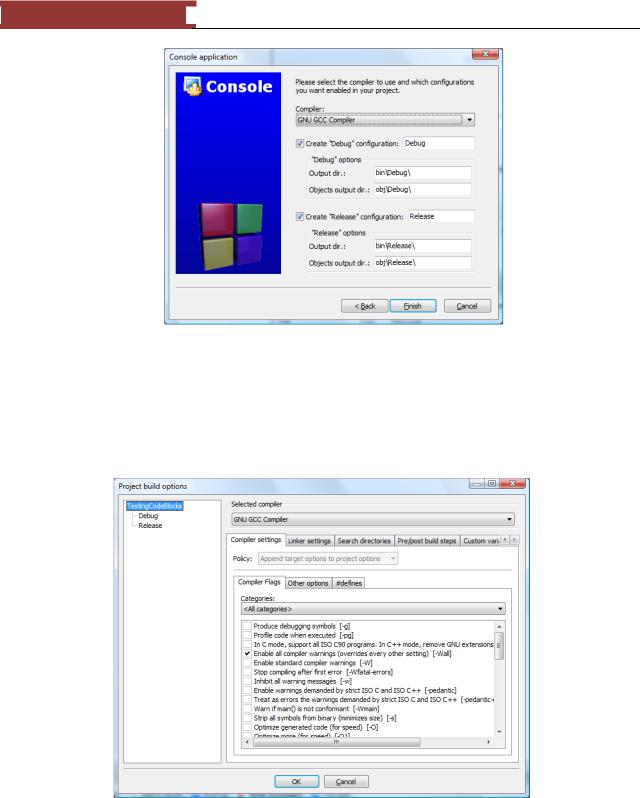
Figure 26 - Creating Console Applications
5.In order to locate the SDL header files you will need to locate
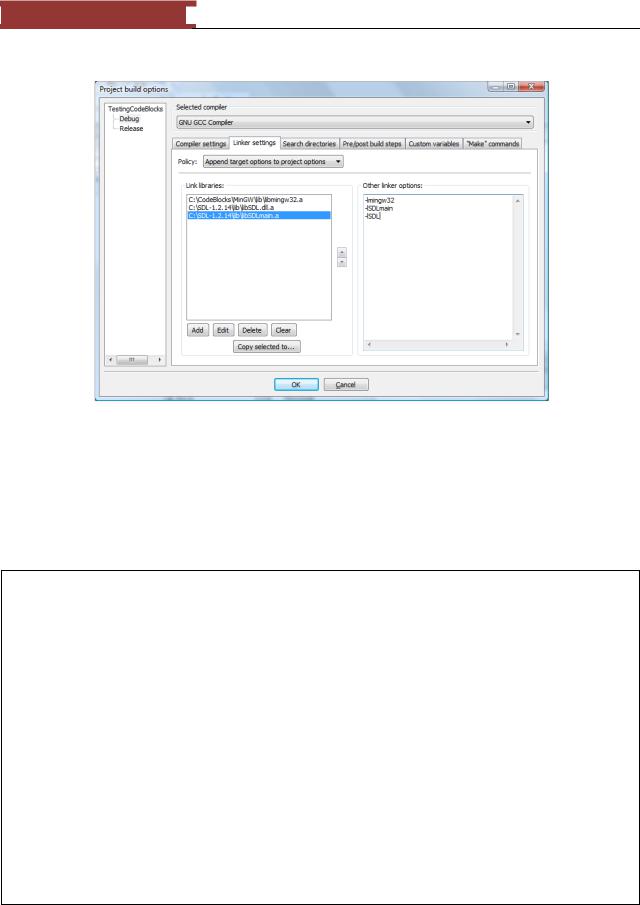
6.Set up your project‘s specific libraries. Select ―Project‖, choose ―Build options‖, select the main project (TestingCodeBlocks). Click on the ―Linker settings‖ tab. Click on ―Add‖ button. Add mingw32 first followed by the two SDL libraries. Add ―-lmingw32 –lSDLmain –lSDL‖ to the ―Other linker options‖. Click on OK
Figure 27 - Selecting the main "TestingCodeBlocks"
23
December 15, 2011 [LEARNING SDL – A BEGINNER’S GUIDE]
Figure 28 - Adding linker options
7. Replace the code in the default main.cpp with the sample SDL code.
Table 1 - TestingCodeBlocks (main.cpp)
#include <cstdlib> #include <iostream> #include "SDL\SDL.h"
using namespace std;
// screen dimensions const int SCREEN_WIDTH=640; const int SCREEN_HEIGHT=480;
//display surface
SDL_Surface* pDisplaySurface = NULL;
//event structure SDL_Event event;
int main(int argc, char *argv[])
{
//initialize SDL
if (SDL_Init(SDL_INIT_VIDEO)==-1) {
cerr << "Could not initialize SDL!" << SDL_GetError() << endl; exit(1);
24

December 15, 2011 [LEARNING SDL – A BEGINNER’S GUIDE]
} else |
{ |
|
|
cout << |
"SDL initialized properly!" << endl; |
}
//create windowed environment pDisplaySurface =
SDL_SetVideoMode(SCREEN_WIDTH,SCREEN_HEIGHT,0,SDL_ANYFORMAT);
//error check
if (pDisplaySurface == NULL) { //report error
cerr << "Could not set up display surface!" << SDL_GetError() << endl;
exit(1);
}
// set caption SDL_WM_SetCaption("Template", NULL);
//repeat forever for(;;) {
//wait for an event if(SDL_PollEvent(&event)==0) {
// DO OUR THING . . .
//update the screen SDL_UpdateRect(pDisplaySurface,0,0,0,0);
} else {
//event occurred, check for quit if(event.type==SDL_QUIT) break;
}
}
SDL_FreeSurface(pDisplaySurface); SDL_Quit();
//normal termination
cout << "Terminating normally." << endl; return EXIT_SUCCESS;
}
If you try to build the program (Build | Build) you will see many errors. The main reason is the inability to find the file ―SDL\SDL.h‖.
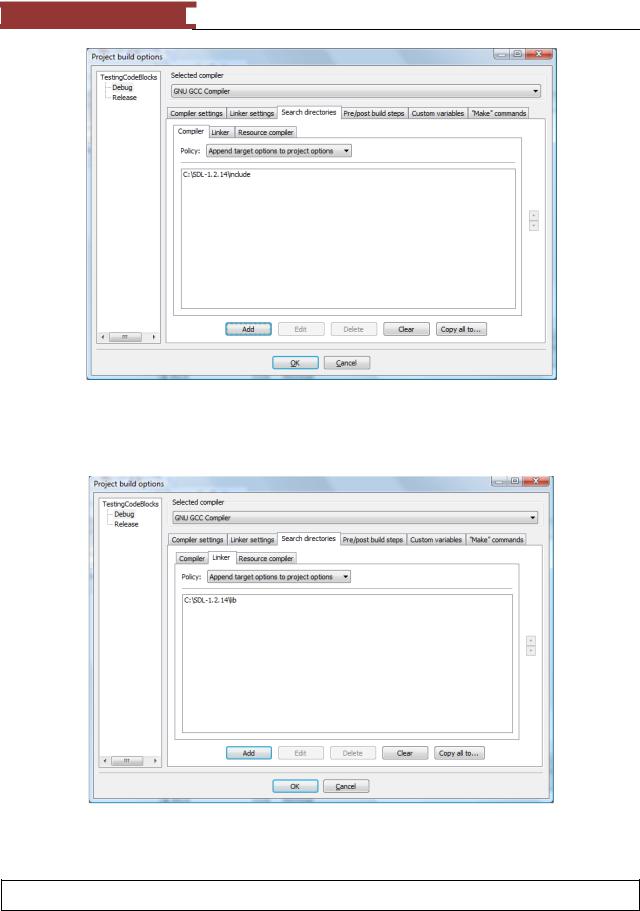
8.Open Project | Build Options and click on ―Search directories‖ tab. Click on ―Add‖ and navigate to ―C:\SDL-1.2.14\include‖. Click OK
25
December 15, 2011 [LEARNING SDL – A BEGINNER’S GUIDE]
Figure 29 - Adding SDL include file to compiler "search directory" list
If you try to build the program again it will fail with the message ―…cannot find –lSDLmain‖. In the same screen as shown in Figure 29 click on ―Linker‖ sub-tab and navigate to SDL\lib directory.
Figure 30 - Add SDL lib to Linker "search directory"
The program should now successfully build with the Build log showing:
-------------- Build: Debug in TestingCodeBlocks ---------------
26
December 15, 2011 [LEARNING SDL – A BEGINNER’S GUIDE]
Linking console executable: bin\Debug\TestingCodeBlocks.exe Output size is 831.02 KB
Process terminated with status 0 (0 minutes, 0 seconds) 0 errors, 0 warnings
The program is a very simple SDL program that:
Initializes SDL for video Creates a window
The for loop constantly looks for events but the only one it is handling is the event that gets generated when you close the window or when you quit (SDL_QUIT) the application window.
8. Compile and execute
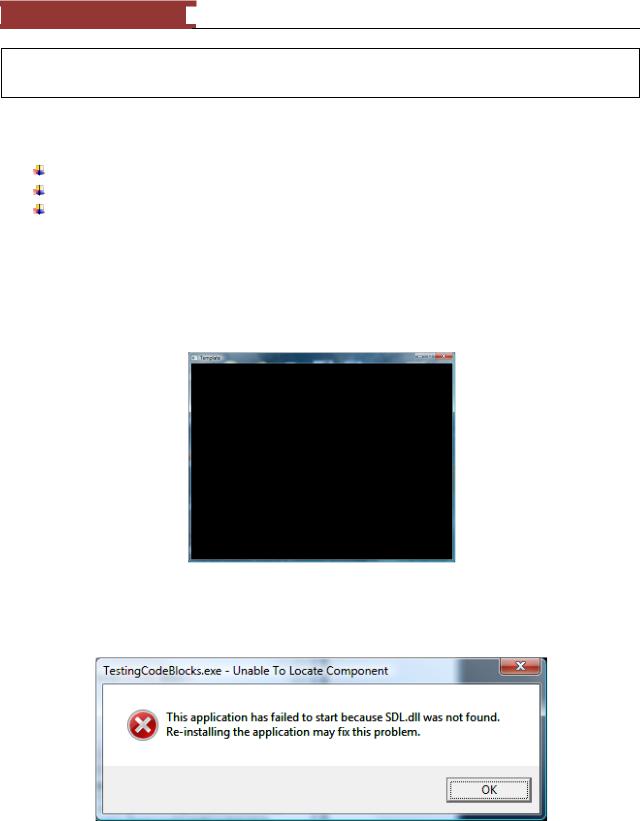
Figure 31 - Test SDL Program Window
If you followed the directions you should see a window similar to the above. If you see the following message:
Figure 32 - Execution error
Copy the file C:\SDL-1.2.14\bin\SDL.dll into C:\Windowscan you
27
December 15, 2011 [LEARNING SDL – A BEGINNER’S GUIDE]
What is a wizard?
Many applications have wizards, which are programming aids implemented as a set of dialog boxes that are used to automate things for you. For example, when you create programs using SDL you will find that unless you use a wizard you will always need to add the same set of include files, link the same libraries and dlls. Using a wizard to create a project specifically for SDL will get all these mundane tasks done for you at the start. In addition, you can specify a start-up main file to be used as the template for all your SDL programs. No need to add main and all the startup SDL code – it will be all done by the wizard!
Using the Code::Blocks SDL wizard
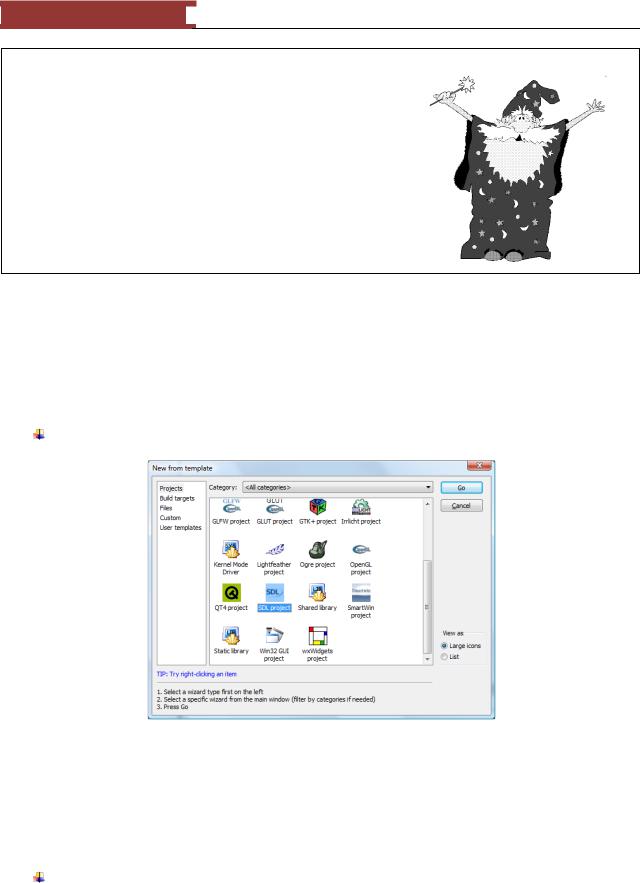
Create a Project and select ―SDL Project‖
Figure 33 - Creating an SDL project
There seems to be a problem with the Code::Blocks wizard on Windows. So I will skip using it. Follow the following instructions to create your own user template.
Creating your own SDL Custom Template
Open the last project (if it is not open).
28
December 15, 2011 [LEARNING SDL – A BEGINNER’S GUIDE]
Figure 34 - Save Project as User-Template
Select File | Save Project as User-Template
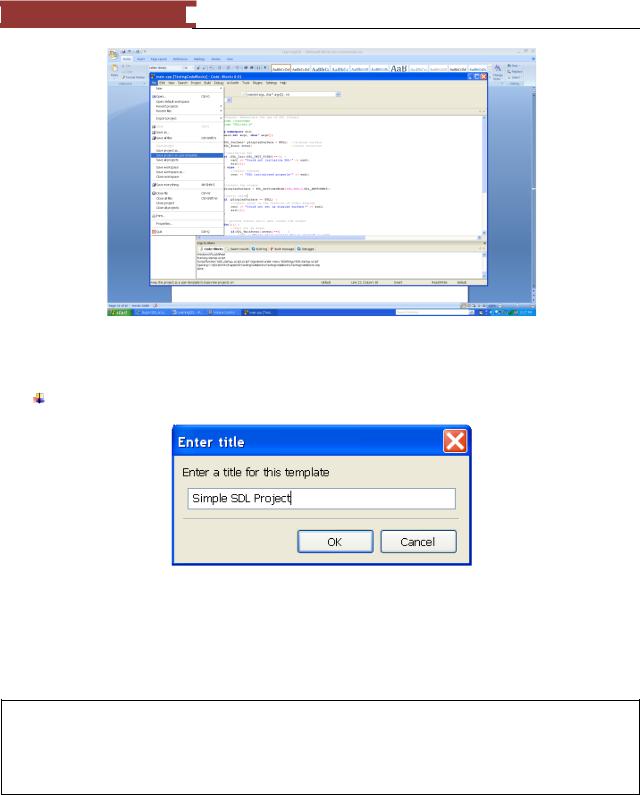
Figure 35 - Giving user-template a name
Now when you start a Simple SDL Project (something we will do for all our non-game programs) you can just start the project by selecting: File | New | From user template and select ―Simple SDL Project‖.
This will create a starting project for a simple SDL Project. In chapter TBD we will create another usertemplate for our games. Click OK to create your own SDL Project.
How do we use this template?
Now when you create a new SDL program by selecting File | New Project. Select User templates and select ―Simple SDL Project‖.
Installing to work with WxDev-C++
1. Remove any previous copy of Dev-C++.
29

December 15, 2011 [LEARNING SDL – A BEGINNER’S GUIDE]
2.Obtain and install the latest version of wxDev-C++ from http://wxdsgn.sourceforge.net/.
a.Note: I installed under the directory C:\Dev-Cpp. You can choose to save under the default directory under C:\Program Files.
b.Install the version wxdevcpp_7.2.0.2_full_setup
Double click on the setup program
Figure 36 - WxDev-C++ License Agreement
The starting point for this IDE is the popular and free IDE Bloodshed Dev-C++.
Click on ―I Agree‖
30