

LearningSDL011
.pdfDecember 15, 2011 [LEARNING SDL – A BEGINNER’S GUIDE]
if (vInfo->blit_sw_CC)
cout << "blit_sw_CC, supports accelerated blits SW-->SW with Colorkey" << endl;
else
cout << "blit_sw_CC, DOES NOT support accelerated blits with SW- ->SW with Colorkey" << endl;
if (vInfo->blit_sw_A)
cout << "blit_sw_A, supports accelerated blits SW-->SW with Alpha" << endl;
else
cout << "blit_sw_A, DOES NOT support accelerated blits with SW-- >SW with Alpha" << endl;
if (vInfo->blit_fill)
cout << "blit_fill, supports accelerated color fill" << endl;
else
cout << "blit_fill, DOES NOT support accelerated color fill" <<
endl;
cout << "Total number of video memory: " << vInfo->video_mem << endl; writePixelFormatInfo (vInfo->vfmt);
cout << "Video mode width: " << vInfo->current_w << endl;; cout << "Video mode height: " << vInfo->current_h << endl;
}
void writePixelFormatInfo(SDL_PixelFormat* format) {
cout << "BitsPerPixel: " << format->BitsPerPixel << endl; cout << "BytesPerPixel: " << format->BytesPerPixel << endl;
}
Add code in the main function to invoke writeVideoInfo
Compile and run
Check the file stdout in the same directory as the executable
Loading Images
SDL provides a function to load bmp images – SDL_LoadBMP.
Function Name: SDL_LoadBMP
Format:
SDL_Surface *SDL_LoadBMP(const char *file);
Description:
The function opens a file image saved as a windows bmp file (*.bmp). Note: When loading a 24-bit Windows BMP file, pixel data points are loaded as blue, green, red (not the expected red, green and blue). The function returns a pointer to an SDL_Surface or NULL if an error occurred.
91
December 15, 2011 [LEARNING SDL – A BEGINNER’S GUIDE]
There are several things to remember when using this function:
You will need to copy the image to the screen in order to see it
You must release all surfaces before exiting the program
The second point is easy to do since we already know how to use the SDL_FreeSurface function.
The first point requires that we use do what is referred to as blitting which stands for bit blit or bit-block (image) transfer. The operation is used to move a bitmap image from a source to a destination. The SDL function we will use is SDL_BlitSurface.
Function Name: SDL_BlitSurface
Format:
int SDL_BlitSurface(SDL_Surface *srcSurface, SDL_Rect *srcRect, SDL_Surface *destSurface,
SDL_Rect *destRect);
Description:
This function performs fast blit from the surface to the destination surface. The w and h is srcRect determine the size of the copied rectangle, only the position is used in destRect. If the srcRect is NULL, then the entire srcSurface is copied. If destRect is NULL, then the destination position is (0,0).
If the function is successful it returns 0, otherwise it returns -1.
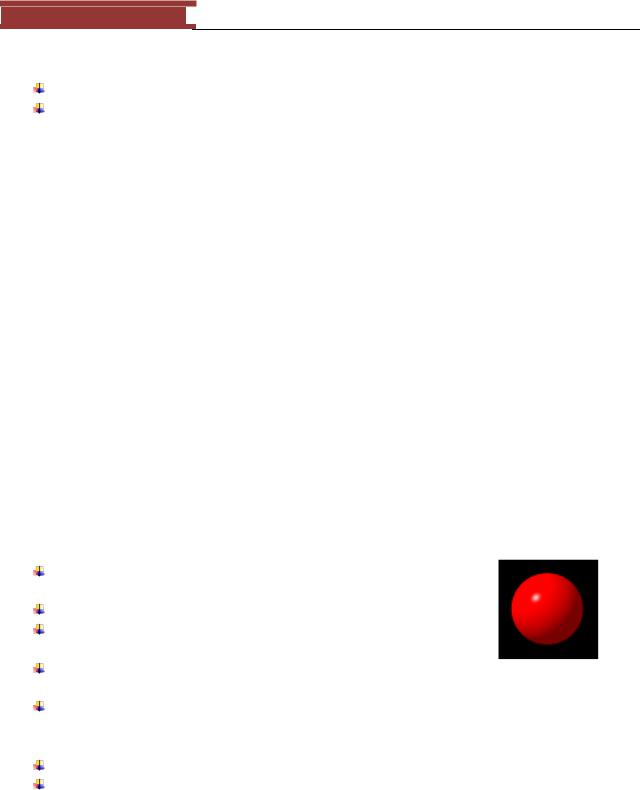
LAB #10: Program 2_10 – Displaying a ball.
Create a new project named Program2_10 using the template Simple SDL Project template.
Change the window caption to ―Showing a Ball‖
Add code to load the image smallball1.bmp into an SDL_Surface variable named pBallImage and test if loading was successful
Create a Uint32 variable named backgroundColor that will be set to the color white (255,255,255) using SDL_MapRGB
Add code within the loop (if SDL_PollEvent(&event) == 0 is true) to o first make the screen background white using SDL_FillRect o display the ball using SDL_BlitSurface to the screen
Add code at the bottom (before SDL_FreeSurface) that frees the pBallImage. Compile and run
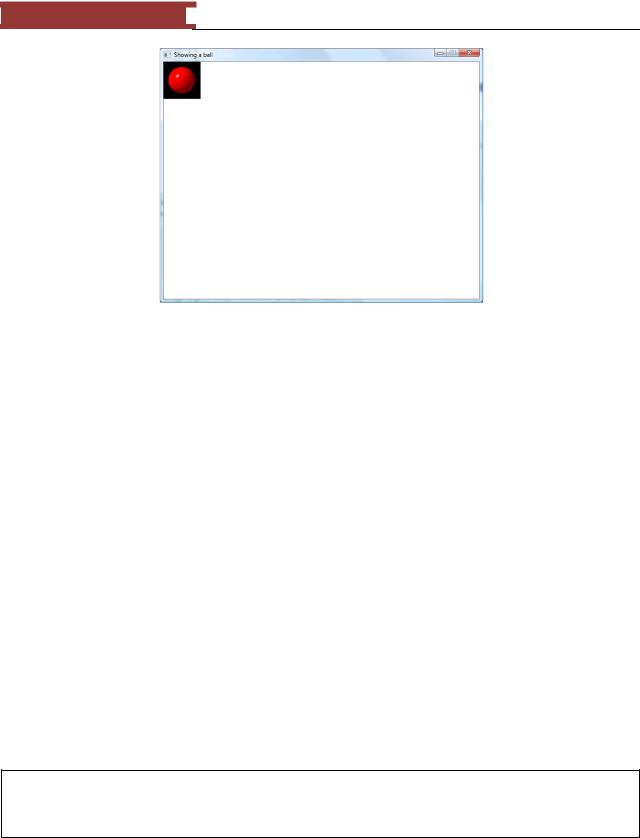
You should see a screen similar to the one below:
92
December 15, 2011 [LEARNING SDL – A BEGINNER’S GUIDE]
Figure 79 - Displaying the ball - Yuck!
Yuck! We really don‘t want to see the black portion of the ball image. This should be transparent that is invisible when drawn on the screen. This will require that you specify what the transparency color is on your image, that is, you must tell SDL what portions of your image should not be drawn to the screen.
When the image gets drawn or blit to the screen the transparency colors will be ignored so that the background color shows through. The function to use to inform SDL what the transparency color for an image stored in an SDL_Surface is SDL_SetColorKey.
Function Name: SDL_SetColorKey
Format:
int SDL_SetColorKey(SDL_Surface *surface, Uint32 flag, Uint32 key);
Description:
This function sets the color key (transparent pixel) and allows you to enable or disable RLE bit acceleration – that is the flag value can be set to SDL_SRCCOLORKEY and/or SDL_RLEACCEL or both. The function returns 0 if successful or -1 if an error occurs.
RLE acceleration ―is a process used to decrease the time required to draw a color keyed image to the screen.‖
RLE stands for run-length encoding. RLE is a simple form of data compression (e.g. like what you do when you zip a file). The way is works is that runs of data – a sequence where the same data value appears (e.g. AAAAAABBBBBAAAAAAA) are stored as a single data value and count (e.g 6A5B7A will represent the previous string).
Example Usage:
93

December 15, 2011 [LEARNING SDL – A BEGINNER’S GUIDE]
int retValue = SDL_SetColorKey(pImageSurface, SDL_SRCCOLORKEY | or SDL_RLEACCEL, transparencyColor);
LAB #11: Program 2_11 – Displaying a ball using SetColorKey
Create a new project named Program2_11 using the template Simple SDL Project template. Copy the code from the previous lab (LAB #10)
Add the following lines after reading in the image:
// Set the transparent color
Uint32 transparentColor = SDL_MapRGB(pDisplaySurface->format, 0, 0, 0); SDL_SetColorKey(pBallImage, SDL_SRCCOLORKEY, transparentColor);
Compile and run
The program now looks like this:
Figure 80 - Setting transparent color
Moving a “Ball” around on the screen
In the next program we will move a ball (actually a bmp image). The image will be slightly smaller ball from the image used in the previous two programs. We plan on evolving this program into a pong game. We will not worry about the details of using a more object-oriented style just yet. We will discuss a more ideal style and better way to organize our programs22 in the upcoming chapters.
22 The better style comes from the web site sdltutorials.com
94
December 15, 2011 [LEARNING SDL – A BEGINNER’S GUIDE]
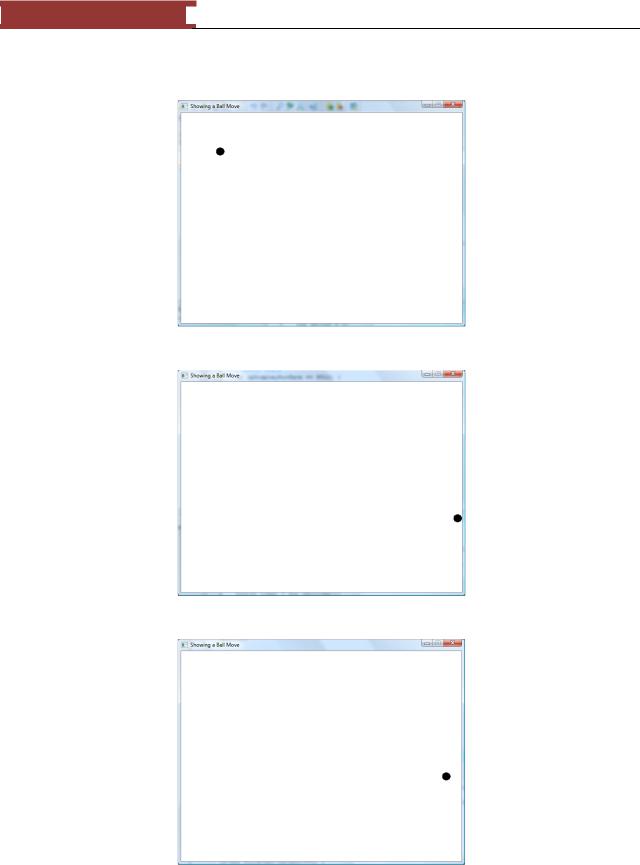
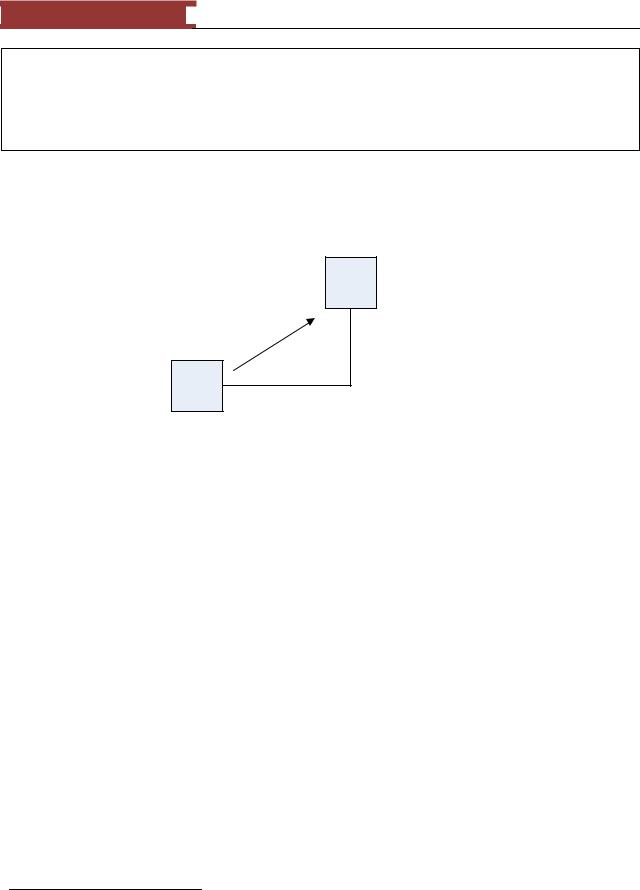
The program moves a ball around the screen. When the ball hits one of the walls (end of the screen) the ball will bounce off and change direction.
Figure 81 - The ball moving south-east on the screen
Figure 82 - The ball coming off the wall
Figure 83 - The ball bounces off the wall
95

December 15, 2011 [LEARNING SDL – A BEGINNER’S GUIDE]
The program will require that we do the following:
Place the ball at location (0,0) on the screen
Set the speed in which the ball will travel on the screen Detect when the ball hits the wall
o Reverse the direction the ball is moving
You actually have all the tools to create this program. You will need to add two new constants to your program FRAMES_PER_SECOND and FRAME_RATE. The program will be drawing and erasing the ball on the screen. We don‘t want the screen to update so fast that we never really see the ball moving
(what fun is that!). We will initially set the value to:
// refresh rate
const int FRAMES_PER_SECOND = 30;
const int FRAME_RATE = 1000 / FRAMES_PER_SECOND;
The value of 30 will be used to delay the actions of drawing and erasing by having the computer refresh the screen 30 times per second. If we want to refresh the screen 30 times a second then in milliseconds it will be required to update the screen every 1000 / 30 or 33.34 milliseconds.
From Wikipedia: Everything you wanted to know about frame rates but were afraid to ask! s
A common term that is mentioned with respect to games is frame rate. This is the frequency in which the image on the computer screen is being updated. The frame rate is usually expressed as frames per second (fps).
Frame rates are considered important in video games. The frame rate can make the difference between a game that is playable and one that is not. The first 3D firstperson adventure game for a personal computer, 3D Monster Maze, had a frame rate of approximately 6 fps, and was still a success, being playable and addictive. In modern action-oriented games where players must visually track animated objects and react quickly, frame rates of between 30 to 60 fps are considered minimally acceptable by some, though this can vary significantly from game to game. Most modern action games, including popular first person shooters such as Halo 3, run around 30 frames a second, while others, such as Call of Duty 4, run at 60 frames a second. The frame
rate within most games, particularly PC games, will depend upon what is currently happening in the game.
QUESTION: If we are moving the ball every 60 milliseconds on the screen, what is the perceived frame rate?
A culture of competition has arisen among game enthusiasts with regards to frame rates, with players striving to obtain the highest fps count possible. Indeed, many benchmarks released by the marketing
96
December 15, 2011 [LEARNING SDL – A BEGINNER’S GUIDE]
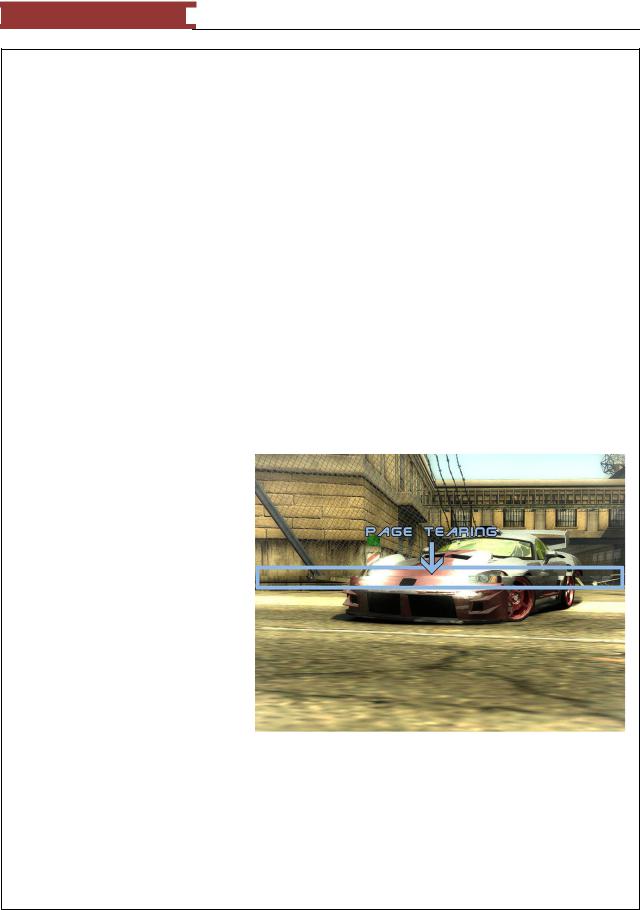
departments of hardware manufacturers and published in hardware reviews focus on the fps measurement. Modern video cards, often featuring NVIDIA or ATI chipsets, can perform at over 160 fps on graphics intensive games such as F.E.A.R. One single GeForce 8800 GTX has been reported to play F.E.A.R. at up to 386 fps (at a low resolution). This does not apply to all games: some games apply a limit on the frame rate. For example, in the Grand Theft Auto series, Grand Theft Auto III and Grand Theft Auto: Vice City have a standard 30 fps (Grand Theft Auto: San Andreas runs at 25 fps) and this limit can only be removed at the cost of graphical and gameplay stability. It is also doubtful whether striving for such high frame rates are worthwhile. An average 17" monitor can reach 85 Hz, meaning that any performance reached by the game over 85 fps is discarded. For that reason it is not uncommon to limit the frame rate to the refresh rate of the monitor in a process called vertical synchronization. However, many players feel that not synchronizing every frame produces sufficiently better game execution to justify some "tearing" of the images.
It should also be noted that there is a rather large controversy over what is known as the "feel" of the game frame rate. It is argued that games with extremely high frame rates "feel" better and smoother than those that are just getting by. This is especially true in games such as a first-person shooter. There is often a noticeable choppiness perceived in most computer rendered video, despite it being above the flicker fusion frequency (as, after all, one's eyes are not synchronized to the monitor).
This choppiness is not a perceived flicker, but a perceived gap between the object in motion and its afterimage left in the eye from the last frame. A computer samples one point in time, then nothing is sampled until the next frame is rendered, so a visible gap can be seen between the moving object and its afterimage in the eye. Many driving games have this problem, like NASCAR 2005: Chase for the Cup for Xbox, and Gran Turismo 4. The polygon count in a frame may be too much to keep the game running smoothly for a second. The processing power needs to go to the polygon count and usually takes away the power from the framerate.
The reason computer rendered video has a noticeable afterimage separation problem and camera captured video does not is that a camera shutter interrupts the light two or three times for every film frame, thus exposing the film to 2 or 3 samples at different points in time. The light can also enter for the entire time the shutter is open, thus exposing the film to a continuous sample over this time. These multiple samples are naturally interpolated together on the same frame. This leads to a small amount of motion blur between one frame and the next which allows them to smoothly transition. An example of afterimage separation
can be seen when taking a quick 180 degree turn in a game in only 1 second. A still object in the game would render 60 times evenly on that 180 degree arc (at 60 Hz frame rate), and visibly this would separate the object and its afterimage by 3 degrees. A small object and its afterimage 3 degrees apart are quite noticeably separated on screen.
The solution to this problem would be to interpolate the extra frames together in the back-buffer (field multisampling), or simulate the motion blur seen by the human eye in the rendering engine. When vertical sync is enabled, video cards only output a maximum frame rate equal to the refresh rate of the monitor. All extra frames are dropped. When vertical sync is disabled, the video card is free to render frames as fast as it can, but the display of those rendered frames is still limited to the refresh rate of the monitor. For example, a card may render a game at 100 FPS on a monitor running 75 Hz refresh, but no more than 75
97
December 15, 2011 [LEARNING SDL – A BEGINNER’S GUIDE]
FPS can actually be displayed on screen.
Certain elements of a game may be more GPU-intensive than others. While a game may achieve a fairly consistent 60 fps, the frame rate may drop below that during intensive scenes. By achieving frame rates in excess of what is displayable, it makes it less likely that frame rates will drop below what is displayable during stressful scenes.
The ball needs to be adjusted or moved. The two variables the program uses to perform this is deltaX and deltaY. The two variables indicate how fast the ball is moving in the x and y direction. The larger the values the faster the ball is moving in the x or y direction.
15,2
-2 units in y direction
12,4
3 units in x direction
Figure 84 - moving the ball on the screen
In the figure depicted above the ball is at position 12,423 on the screen. The deltaX value is +3. That is the x position will be adjusted by adding +3 units to the current x position of the ball. This translates to the ball moving towards the left. The deltaY value is -2 which means it is moving up the screen that is the y position of the ball will decrease. This is how we would see the ball moves up and to the right on the screen. The problem is we have to check and adjust for when the ball hits the edge of the screen, that is, the x position value is below 0 or greater than SCREEN_WIDTH or the y position value is below 0 or greater than SCREEN_HEIGHT. In order to prevent this we will need to move the ball and make adjustments if the ball has fallen off the screen. The adjustment we will make will be to position the ball back to the screen and reverse the deltaX and deltaY value (whichever one needs adjusting) so the ball starts moving back on the screen.
So for example let‘s suppose the ball is at (18, 0) and the deltaX is +3 and deltaY is -2. The program will compute the next position of ball should be ( 21, -2). But, (21,-2) is off the screen due to the negative y coordinate value. The code will readjust the position to (21, 0) and change the deltaY value to +2. So on the next screen update for the ball the new position will be ( 24, 2), that is, the ball at first move up, moves off the top and get readjusted back to the screen and the deltaY changed so the ball starts moving down again. It will look to the user as if the ball bounces off the top.
We will use the SDL_Rect struct to hold the position of the ball.
The code to change and adjust the ball position follows:
23 This (X,Y) value is the coordinate for the top-left position defining the rectangle the ball image occupies.
98
December 15, 2011 [LEARNING SDL – A BEGINNER’S GUIDE]
// move the ball |
|
|
|
|
newBallLocation = |
ballLocation; |
// copy current ball loc |
||
newBallLocation.x |
+= deltaX; |
// move x |
||
newBallLocation.y |
+= deltaY; |
// |
then y |
|
if (newBallLocation.x |
< 0 ) { |
|
|
|
// we are |
off |
to the left – adjust the ball (x) |
||
newBallLocation.x |
= 0; |
|
|
|
deltaX = -deltaX; |
|
|
|
|
}
if (newBallLocation.x > SCREEN_WIDTH - pBallImage->w ) { // are we off to the right – adjust the ball (x)
newBallLocation.x = SCREEN_WIDTH - pBallImage->w; deltaX = -deltaX;
}
if (newBallLocation.y < 0 ) {
// are we off the top – adjust the ball (y) newBallLocation.y = 0;
deltaY = -deltaY;
}
if (newBallLocation.y > SCREEN_HEIGHT - pBallImage->h ) { // are we off the bottom – adjust the ball(y) newBallLocation.y = SCREEN_HEIGHT-pBallImage->h; deltaY = -deltaY;
}
ballLocation = newBallLocation;
}
We save the current location of the ball in an SDL_Rect, ballLocation, where the x and y members of this struct hold the top left location of where the ball is drawn on the screen. The newBallLocation is also an SDL_Rect and every time we have waited REFRESH_RATE time we do the following in the above code:
Copy the ballLocation into newBallLocation
Adjust the x and y with deltaX and deltaY, respectively
Check if the ball has bounced off the wall and adjust
Copy newBallLocation into ballLocation
Compare the above list with the code above the third dot point actually accounts for most of the code to determine if the ball has moved off the left, right, top or bottom and adjust.
if (newBallLocation.x < 0 ) {
// we off to the left – adjust the ball (x) newBallLocation.x = 0;
deltaX = -deltaX;
}
The above checks if the newBallLocation.x position is off to the left (less than 0) if so then we have to get that ball back on the screen by resetting the x location to 0 and reversing the deltaX.
99
December 15, 2011 [LEARNING SDL – A BEGINNER’S GUIDE]
The check for going off the right is a bit more involved.
if (newBallLocation.x > SCREEN_WIDTH - pBallImage->w ) { // are we off to the – adjust the ball (x)
newBallLocation.x = SCREEN_WIDTH - pBallImage->w; deltaX = -deltaX;
}
We always want to see the ball on the screen so we are not going to wait for it to partially go off to the right. We check if the newBallLocation.x leaves enough room for the ball‘s current width to display entirely on the screen, if not, we adjust the x location and reverse deltaX. The code for checking the top and bottom are similar in spirit.
LAB #12: Program 2_12 – Bouncing a ball around the screen
Create a new project named Program2_12 using the template Simple SDL Project template. Obtain the new ball image smallball1.bmp
Copy the code from the previous lab (LAB #11)
After the screen dimension consts at the top of the program add two new const int named FRAMES_PER_SECOND and FRAME_RATE. Initialize as discussed in the last section.
Change the caption for the program to ―Showing a Ball Move‖
Change the SDL_LoadBMP argument to get the smallball1.bmp (black ball with a white background)
Change the transparent color to black (255, 255, 255)
After the code that creates the creates and initializes the backgroundColor to white use the SDL_FillRect function to set the entire display to the background color:
SDL_FillRect(pDisplaySurface, NULL, backgroundColor);
Create an SDL_Rect variable named ballLocation that will be initialized to {0,0,0,0} Create the int variables deltaX and deltaY and initialize to 2
You now need to record the current time. How?
SDL has a function named SDL_GetTicks() that proves useful for managing the frame rate.
Function Name: SDL_GetTicks()
Format:
Uint32 SDL_GetTicks(void);
Description:
This function returns the number of milliseconds since the SDL library initialization. It will wrap around if the program runs for more than 49 days.
We will use this function to get the current time and check in the for loop to determine if the current time
– the old time exceeds the FRAME_RATE (transalation: check if 33.34 milliseconds has elapsed).
100