

2 Operation


2.1 Software installation & cable connection
2.1.1 Diagnostic software installation
Steps for installation of PC-MAX diagnostic software:
(1). Put the PC-MAX CD into CD driver in PC. Installation information will popup. Click on [Next] to continue.
(2). In PC-MAX installation interface, click on
[I agree this license] and then [Next].
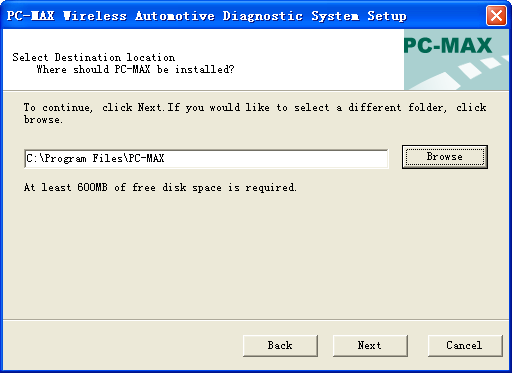
(3). Choose the path for installation. The default path is C:\Program Files\PC-MAX.
To continue, click on [Next].
(4). Click on [Finish] to complete Installation.
.
2.1.2 Cable connection
Please check the following chart for connection instruction:
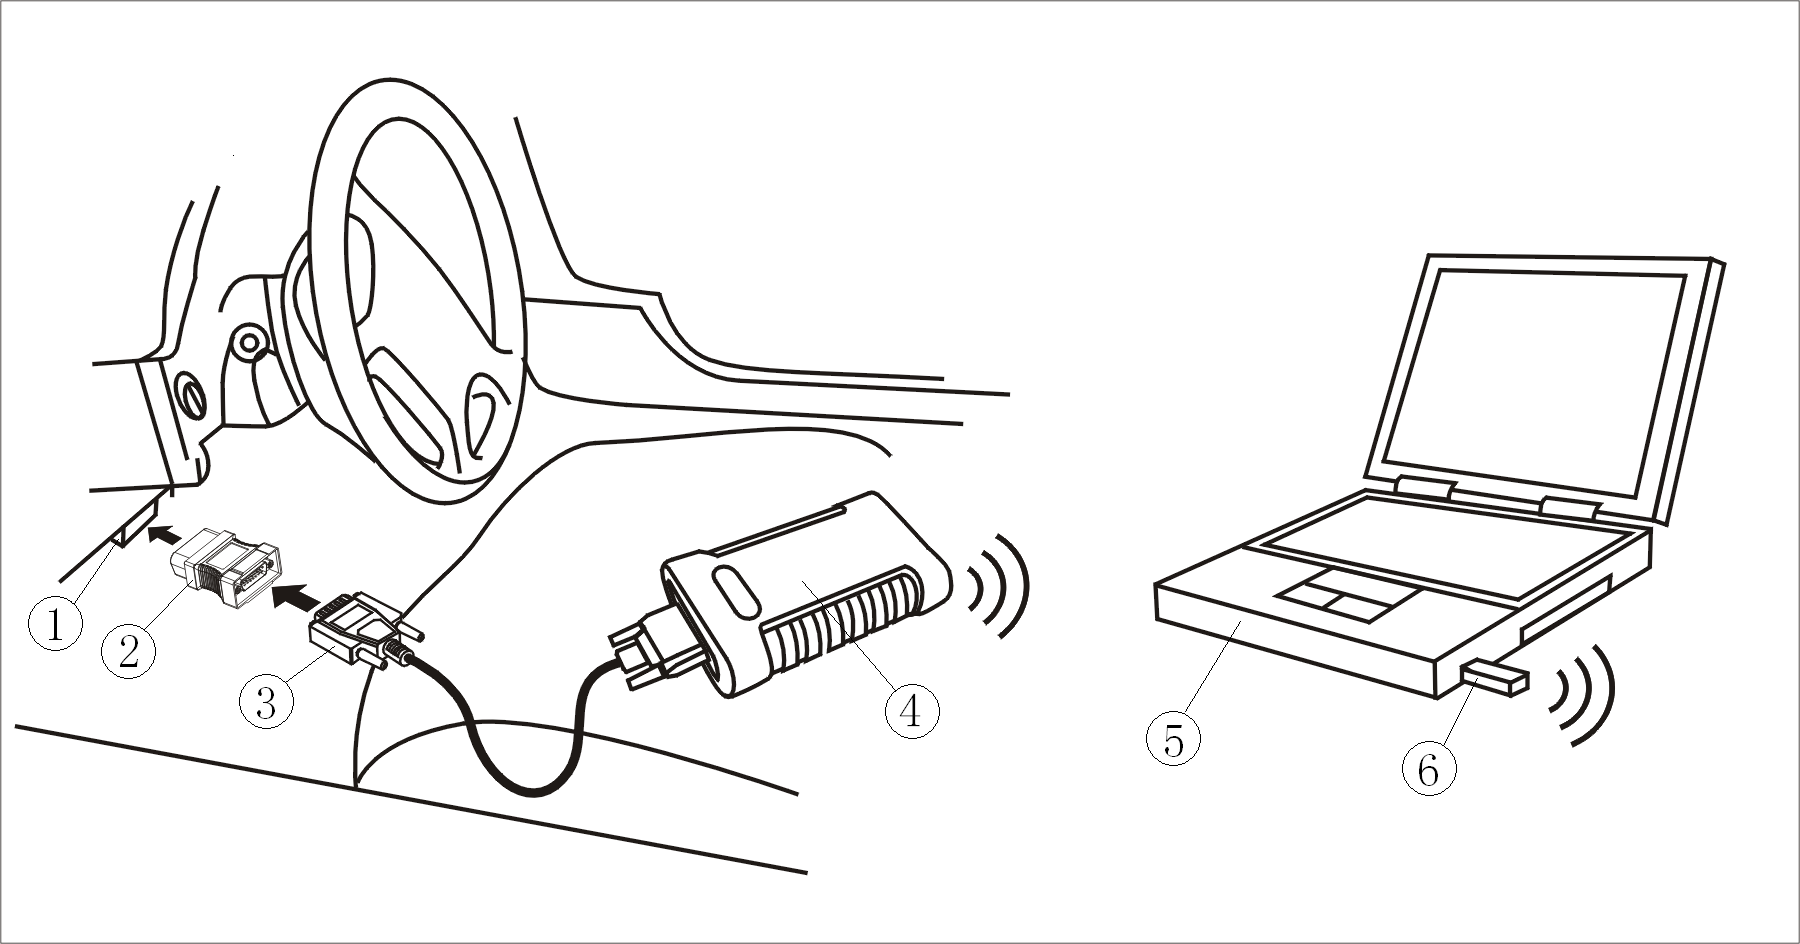
1. DLC
2. Connector
3. Main cable
4. Main unit of PC-MAX
5. PC/laptop
6. Wireless adaptor
Diagnostic connection:
-
Check the position of DLC and see if it is OK.
-
Select corresponding connectors for car make and DLC.
-
Connect one end of main cable to the main unit and the other end to the connector.
-
Wireless adaptor is connected with USB port in PC
-
Connect the diagnostic connector with vehicle DLC after connecting with main cable.
-
Make sure the indicator of PC-MAX power is on and wireless working indicator is flashing. If power is not on and working indicator is not flashing, please make sure the DLC has power supply. If it has no power, please connect the vehicle with PC-MAX power port (+12V) with a cigarette lighter power cable.
-
When power indicator of PC-MAX main unit is on and wireless working indicator is flashing. Cable connection is finished.


2.2 Interface Instruction
2.2.1 Starting Interface
The interface shown on the left picture will appear on the screen after the PC-MAX software is run on PC.
2.2.2 Diagnostic Program
In the diagnostic interface you can select regional vehicle makes including: China, Europe, Asia, America and Others (OBDⅡ/EOBD).
Europe: This section includes diagnostic programs for European vehicles.
Asia: This section includes diagnostic programs for Asian vehicles.
America: This section includes diagnostic programs for American vehicles.
China: This section includes diagnostic programs for Chinese vehicles.
Others: This diagnostic program can test all vehicles with OBDⅡ/EOBD and CAN-OBD.


2.2.3 System Setting
Click on the button [Option] to enter settings for language, Compulsive download MCU software and communication port selection.
.2.2.3.1 Language Setting
PC-MAX supports Multilanguage. Choose any language needed under [working language] and press [OK] to finish language setting.
2.2.3.2 Compulsive download MCU software
If you choose this option, it will download the program again every time when you choose a car for testing in order to insure the success of test.
2.2.3.3 Select communication port
After connecting with wireless adaptor, you will see different options for communication port selection. If there is more that one port, please choose the right one.


2.2.4 Self check
This is for hardware checking. Click on the button [Self check] in [Option] and any hardware faults will be displayed. Please contact local distributor if a hardware problem is reported. If there are no hardware errors, the checking result will be like the left photo. Note: The main cable should be disconnected when self checking. And PC-MAX main unit is connected with power supply.
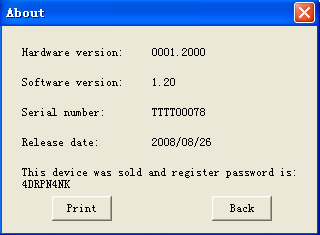
2.2.5 Version Information
Click on the button [About] in [Option] to get the version information of Hardware, Software Serial number, Release date, etc You will also see the register password at the bottom. Note: Every time when you enter “PC-MAXClient.exe”, you will need the serial number and password to login.
2.2.6 Homepage
Due to certain reasons, the operating interface may freeze up. You could click on the button [Home] to exit and continue testing.
2.2.7 Print
Every time when you click on [Print], the information will be saved in the folder named ”print” in your PC. To print the information, please refer to the relevant path.

2.2.8 Exit
Click on [Exit] of main menu and choose [OK] to exit from the operating program and choose [Cancel] to continue the diagnosis.
 Fig 2-1 update client
starting
interface
Fig 2-1 update client
starting
interface

Fig 2-2 login interface
2.3 Software update
2.3.1 Upgrading Instructions
2.3.1.1 Run PC-MAX update client program Double click to run the “PC-MAXClient.exe” program under the folder named “tools” in the CD program. You will go to update interface as shown in Fig 2-1.
2.3.1.2 Login the Server
(1) Input the serial number and click on [Connect to server] to enter the Fig 2-2 interface.
(2) Server. The default server is ‘www.autoboss.net’. Normally you do not need to change the server.
(3) Input the password (see 2.2.5) and click on [OK].
Note:
① Be sure that both S/N and password are correct. Please pay attention if the letters are capitalized or not.
② If login takes a long time because of low internet speed, you can exit and retry;
③ Internet firewall might affect the login. If login fails, please make sure you have an internet connection, and ensure any installed firewall is not blocking the connection to the server. You may contact your local distributor for further operating instructions.

Fig2-3 Program list interface

Fig2-4

Fig2-5 Modify password interface
(4) After login succeeds, the diagnosis program for the different manufacturers will be displayed as shown in Fig2-3, please wait for a short time for complete download.