

- •About the Author
- •Credits
- •Foreword
- •Preface
- •Acknowledgments
- •Contents at a Glance
- •Contents
- •Introduction to Linux
- •Installing Debian
- •Choosing a GUI
- •Networking
- •Setting Up for the Internet
- •Applications
- •Essential Tools
- •Multimedia
- •Games
- •Scripting
- •Shells
- •Linux Kernel
- •Hardware
- •Backups
- •Security
- •Firewall
- •Web Server
- •FTP Server
- •File Server
- •Linux Commands
- •Index
- •GNU General Public License
- •CD-ROM Installation Instructions

File Server 24C H A P T E R
Whether you work in a corporation, a small office, or at home with just two computers networked, sharing files across those computers is desirable. No longer must
you use the sneaker-net to transfer a file from one computer to another via a floppy disk. Using a single server to store communal files, share printers, and enable remote connections is what a file server is all about.
Some of the most compelling reasons to use a file server in your environment include the following:
Centralized files enable better backups. With everyone’s import files saved on the file server, those files can be saved to tape for later recovery if needed.
Shared files enable employees to collaborate on documents. In business environments where documents are created by one person, reviewed by another, and processed by still others, having a central location to store those files helps speed the process.
Shared files enables remote and diskless workstations to use a common application. For some locations, managing applications becomes an overwhelming task. Setting up a common server where those applications can be accessed and used reduces the need to duplicate applications from machine to machine.
There are many applications for which sharing files, printers, and other resources makes good sense. This chapter covers the two main services used to share resources:
Network File Systems, for file sharing in a mainly UNIX environment
Samba, for incorporating Linux with Windows machines
In This Chapter
Linux file-sharing using NFS
Setting up NFS
Sharing files in a Windows environment
Setting Up Samba
Configuration and usage tools
496 Part V Linux Server
Using the Network File System
The most commonly used method for sharing files among UNIX-like systems is the Network File System (NFS). NFS enables clients to connect to a remote server, and to mount part of that remote server’s file system into the client’s file system as if it were just another drive on the machine. Based on the client’s permissions access, the client can then read and write files to the NFS server.
NFS, originating with UNIX systems, has now been ported to nearly every operating system, making it usable in a heterogeneous environment. This enables Windows machines (and others) exist in the same network and share files with other systems, which enables you to maintain a uniform interconnecting protocol.
NFS uses the User Datagram Protocol (UDP) to make connectionless transfers of information. This enables it to survive failures in the network. Once a server becomes available again, the transfer of data continues where it left off. With connected protocols like TCP, a failure in the network means the service also fails. Since its creation, though, NFS has been modified to use both UDP and TCP protocols.
Installing and running NFS
Three components must be installed to make an NFS server work properly:
Portmap — This is installed by default as part of the base system and is included in the netbase package. The /usr/sbin/portmap script is started as a daemon when the system starts through the /etc/init.d/mountnfs.sh script, which runs at boot time to mount any remote file systems. The portmapper then translates between the service numbers and the available port numbers.
rpc.mountd — This daemon, which is started by the /etc/init.d/ nfs-kernel-server script at boot time, only handles mounting requests. It verifies that the requesting client has access to the system and to the
requested file system, and passes a file handle to the client for the requested file system.
rpc.nfsd — This daemon is started by the /etc/init.d/nfs-kernel-server script at boot time as well. This daemon handles the transfer of information between the client and the server after the mount connection has been made.
At most, you need to have the netbase and nfs-common packages installed for NFS clients. Servers also need the nfs-kernel-server package. Once these packages are installed, they will set themselves up to run as daemons when the system starts.
Note For more security, add portmap to the hosts.allow and hosts.deny files to limit access to it. The portmapper daemon uses these files to control access concerning its use. For more information about security, see Chapter 19.

Chapter 24 File Server 497
With the portmapper running, you can query it using rpcinfo to list the registered programs. Using the -p option will output the results to the screen, as seen here:
rpcinfo -p debian |
|
|
|
|
program vers proto |
port |
|
||
100000 |
2 |
tcp |
111 |
portmapper |
100000 |
2 |
udp |
111 |
portmapper |
100024 |
1 |
udp |
757 |
status |
100024 |
1 |
tcp |
759 |
status |
100021 |
1 |
udp |
1025 |
nlockmgr |
100021 |
3 |
udp |
1025 |
nlockmgr |
100007 |
2 |
udp |
770 |
ypbind |
100007 |
1 |
udp |
770 |
ypbind |
100007 |
2 |
tcp |
773 |
ypbind |
100007 |
1 |
tcp |
773 |
ypbind |
100003 |
2 |
udp |
2049 |
nfs |
100005 |
1 |
udp |
1040 |
mountd |
100005 |
1 |
tcp |
1037 |
mountd |
100005 |
2 |
udp |
1040 |
mountd |
100005 |
2 |
tcp |
1037 |
mountd |
100005 |
3 |
udp |
1040 |
mountd |
100005 |
3 |
tcp |
1037 |
mountd |
Note NFS services must be built into the kernel or selected as a module when installed. Use the insmod command to load the nfs.o and nfsd.o modules into the kernel. See Chapter 15 for more details about kernel modules and how to load them.
Setting up the NFS shares in /etc/exports
In order to use NFS shares, each share must be specified in the /etc/exports file. Also specified in that file are clients that grant access to the share. The client can be represented in one of several ways:
Single host — As the name implies, this identifies a single machine. You can use any resolvable name, such as a nickname, fully qualified name, or IP address.
Netgroups — Any NIS netgroup given as @groupname. All hosts belonging to that group are then considered as if they had been listed individually as a single host.
Wildcards — These include host names containing wildcard characters, such as * or ?. These characters do not include the dots in the domain names. For instance, *.bar.com accepts foo.bar.com, but not a.foo.bar.com.
IP networks — Specifies an entire network by indicating the address/net mask combination. Also identifies a specific subnet on the network.
Table 24-1 contains a list of some of the more common options for setting client permissions. Even though some options are set by default, it is important to specify the permission option explicitly. This ensures that those options are set and eliminates potential confusion later. These permissions also set the level of security.

498 Part V Linux Server
|
Table 24-1 |
|
NFS permission settings |
|
|
Setting |
Description |
|
|
secure |
Set by default, this option requires that requests originate on |
|
an Internet port less than 1,024. |
|
|
insecure |
This setting turns off the default secure setting. |
|
|
rw |
This enables clients to both read and write requests on this |
|
NFS volume. The default is to disallow any changes to the file |
|
system, as with the ro setting. |
|
|
ro |
Indicates that clients are to have read-only access to this share. |
|
|
no_access |
This specifies that no access be given to this share. This is |
|
useful when a parent directory gets shared, but a subdirectory |
|
is off-limits. |
|
|
root_squash |
This maps requests from uid/gid 0 (root) to the anonymous |
|
uid/gid. This does not apply to any other IDs that might be |
|
equally sensitive, such as user daemon, bin, or sys. |
|
|
no_root_squash |
This turns off root squashing. This option is mainly useful for |
|
diskless clients. |
|
|
anonuid and anongid |
These options explicitly set the uid and gid of the |
|
anonymous account. Everyone accessing this volume will |
|
appear to use the same account. |
|
|
Taking all this information into account, create a file in the /etc directory called exports. Using an editor, add a line to the file for each file system to export. The format is as follows:
/sharepath client(option)
The sharepath must be a current file system on the NFS server. The client can take the form of anything mentioned earlier. Multiple clients can use the same share path, but must be separated with white space (a space). The options appear in parentheses following each client. Each option must be separated with a comma (,) and no white space. A line containing only the sharepath and options grants anyone access. The following code shows a sample of what an /etc/exports file looks like:
/ |
main(rw) trusted(rw,no_root_squash) |
/code |
dev*.my.domain(rw) |
/usr |
*.my.domain(ro) @trusted(rw) |
/home/jo |
192.168.10.31(rw,anonuid=150,anongid=100) |
/pub |
(ro,insecure,all_squash) |
/pub/private |
(no_access) |

Chapter 24 File Server 499
In this file, root access is given to two hosts. Both can read and write to the NFS server’s entire file system, but only one gets full root privileges. The next line gives all hosts starting with dev and ending with .my.domain read/write access to the /code file system. The third line of the exports file gives everyone with the domain ending in my.domain read-only access; however, those hosts in the @trusted NIS netgroup have read/write access. The fourth line allows only one host matching a specific IP address read/write access. It also forces all accesses to occur as particular users, regardless of the actual user on the client. The last two lines in the file grant everyone read-only access to the /pub file system, but exclude everyone from access to the /pub/private subdirectory.
Mounting an NFS share automatically
In a corporate environment, many of the computers, if not all, will connect to a NFS share for storing common files, configurations, and data. To access those shares immediately without waiting for a console to mount them, the shares need to be set up for automatic mounting at boot time. As with the local file system, the shared NFS file systems need to be added to the /etc/fstab directory.
As with local file systems, remote NFS shares have certain options available for specifying the parameters of the connection. These options, listed in Table 24-2, are not mandatory, but provide greater flexibility and control over the shared volumes.
Table 24-2
Settings for mounting NFS shares in /etc/fstab
Setting |
Description |
|
|
rsize=nnnn |
Specifies the number of bytes in nnnn to read over the network. |
|
The default is 1,024; however, throughput is improved when set |
|
to 8,192. Changing this setting to the incorrect number can |
|
adversely affect performance. |
|
|
wsize=nnnn |
Specifies the number of bytes in nnnn to write over the network. |
|
The default size is 1,024. See rsize for additional comments. |
|
|
Hard |
Sets a hard connection to the NFS server. If the server goes down |
|
or the connection is lost, any processes connected to it using this |
|
setting will hang until the server becomes available again, at |
|
which time the process will continue as if nothing happened. |
|
|
Soft |
Allows a process to time out if the NFS server has gone down or |
|
lost its connection. Use timeo to set the timeout duration. |
|
|
retrans=nn |
Sets the number of minor transmission timeouts, indicated by the |
|
nn, before the process is either aborted (in the case of a soft |
|
connection) or a message is posted to the console (“Server Not |
|
Responding”). |
|
|
Continued

500 Part V Linux Server
|
Table 24-2 (continued) |
|
|
Setting |
Description |
|
|
Intr |
Enables a hard connection to be interrupted or killed while |
|
waiting for a response from the NFS server |
|
|
timeo=nn |
Sets the number of seconds, indicated by nn, to wait after an RPC |
|
timeout occurs before the next attempt is made. Used with the |
|
soft setting. |
|
|
Bg |
If mounting the filesystem fails on the first attempt, then retry |
|
mounting it in the background. This lets the mounting process for |
|
other filesystems to continue. |
|
|
Fg |
If mounting the file system fails on the first attempt, retry |
|
mounting it in the foreground. Use this for mounting file systems |
|
that must be mounted before proceeding, as with /usr. |
|
|
Rw |
Sets the file system as read-writeable. |
|
|
Ro |
Sets the file system as read only. |
|
|
Initially, your /etc/fstab file may only contain the originally configured local file system. That file may look similar to the following:
more /etc/fstab |
|
|
|
|
|
|
# /etc/fstab: static file system information. |
|
|
||||
# |
|
|
|
|
|
|
# <file system> <mount point> |
<type> |
<options> |
<dump> |
<pass> |
||
/dev/hdb1 |
/ |
ext2 |
defaults,errors=remount-ro |
1 |
1 |
|
/dev/hdb2 |
none |
|
swap |
sw |
0 |
0 |
/dev/hda1 |
/win_c |
vfat |
defaults,user,ro |
0 |
0 |
|
proc |
/proc |
|
proc |
defaults |
0 |
0 |
/dev/fd0 |
/floppy |
|
auto |
defaults,user,noauto |
0 |
0 |
/dev/cdrom |
/cdrom |
|
iso9660 |
defaults,ro,user,noauto |
0 |
0 |
To add the NFS share, edit this file using a text editor such as vi. Then add a line to the file in the following format:
server:/share |
/share |
nfs |
options |
0 |
0 |
The server is the name of the host machine followed by the shared NFS volume on the remote host. This information comes from the /etc/exports file. Next is the local mount point, which you can set to be anything you want. nfs specifies that this file system uses an NFS connection. The options are found in Table 24-2. Each option used here must be separated by a comma (,), with no spaces. The last two zeros indicate not to dump the contents or to perform a file system check (fsck) at boot time.

Chapter 24 File Server 501
Here is an example of the /etc/fstab file after adding NFS shares:
more /etc/fstab |
|
|
|
|
|
|
# /etc/fstab: static file system information. |
|
|
||||
# |
|
|
|
|
|
|
# <file system> <mount point> |
<type> |
<options> |
<dump> |
<pass> |
||
/dev/hdb1 |
/ |
ext2 |
defaults,errors=remount-ro |
1 |
1 |
|
/dev/hdb2 |
none |
|
swap |
sw |
0 |
0 |
debian:/etc/remote |
/etc |
nfs |
fg,ro,hard,intr |
0 |
0 |
|
proj:/home/projects /projects |
nfs |
bg,rw,soft |
0 |
0 |
||
/dev/hda1 |
/win_c |
vfat |
defaults,user,ro |
0 |
0 |
|
proc |
/proc |
|
proc |
defaults |
0 |
0 |
/dev/fd0 |
/floppy |
|
auto |
defaults,user,noauto |
0 |
0 |
/dev/cdrom |
/cdrom |
|
iso9660 |
defaults,ro,user,noauto |
0 |
0 |
Now, at boot time, two new remote mounts will be established. The first one connects to host debian and must connect in order to allow the boot to proceed because of the fg option. The next one opens a command area for shared projects. The data from those projects is then stored on the host proj.
Note In order for an NFS share to successfully mount, the directory it mounts to must exist. To create the mount point on the local file system, use mkdir as shown here:
mkdir /mnt/point
Change the path, /mnt/point, to wherever you would like the remote file system to mount.
Mounting an NFS file system manually
Mounting remote NFS file systems doesn’t require having an entry in the /etc/fstab file. Those same file systems can be mounted from a command line:
mount server:/remote/share /usr/share
In this example, server refers to the remote computer that you want to share. The file system on the remote computer is then indicated by /remote/share, which the remote NFS server is sharing. This all gets followed by the mount point for the local file system, /usr/share.
You can also apply to a mounted file system the same options as those applied to file systems contained in the /etc/fstab file. You must add an -o to indicate the list of options for the mount. The following example shows options added to a mount:
mount -o rw,bg,hard,intr myserver:/shares/home /mnt/home

502 Part V Linux Server
Unmounting an NFS filesystem
At some point while using mounted NFS file systems, you may need to remove the mount. If you have ever used mount to add local hard drives, CD-ROMs, or floppies, then you would have unmounted them when done. Unmounting an NFS mount works the same as unmounting one of your local devices. Here is an example:
umount /mnt
This will unmount any file system that you specify. However, if users are still utilizing the files of that file system, the file system cannot be unmounted. You can use umount with the -f option, which forces the selected file system to unmount, but this is far from the best choice. It leaves the programs using those files in a state of uncertainty, leaves the users of those programs confused, and any file data still in memory will be lost.
To determine what files are open in the file system that you want to shut down, use the list open files command (lsof). This command will list all the files in the given filesystem. The following example shows how you would list the open files for the /home directory, and the results:
$ /usr/sbin/lsof +d /home |
|
|
|
|
|
|||
COMMAND |
PID |
USER |
FD |
TYPE DEVICE SIZE |
NODE |
NAME |
||
bash |
14839 |
steve |
cwd |
DIR |
3,65 |
4096 |
47411 |
/home/steve |
lsof |
14878 |
steve |
cwd |
DIR |
3,65 |
4096 |
47411 |
/home/steve |
lsof |
14879 |
steve |
cwd |
DIR |
3,65 |
4096 |
47411 |
/home/steve |
With this information, you can then request that the owner of the processes close them, wait for the processes to finish, or kill the processes. This is a better method, although unpleasant for the user.
Note The methods indicated here for unmounting an NFS file system work for all file systems. The safest way to unmount a local file system, though, is to put the machine into single-user mode first. Unmounting at this point is by far the safest method.
Sharing Files Using Samba
Samba is a highly configurable communication tool that enables Linux boxes to communicate with machines using the NetBIOS networking protocol. NetBIOS is based on Server Message Blocks (SMB), which is the message format that DOS and Windows machines use to share files, directories, and devices. It is the common networking protocol among Windows environments.

Chapter 24 File Server 503
Samba enables a full-fledged Linux server to exist in an entirely Windows environment, all the while speaking the Windows NetBIOS language. Because of the features that Samba offers, it could virtually replace much of the function that a Windows NT server provides — WINS resolution, primary domain controller, and password authentication.
A complete discussion of Samba is beyond the scope of this book, but you can find more information at the Web site, www.samba.org. Once installed, you can also obtain more information from the man pages (man samba). This chapter does, however, provide enough information to adequately get a file server up and running for a community of users.
Installing Samba
The primary package to install is the samba package, but I suggest also installing the samba-doc package as well, for documentation reference. Once selected and installed, the configuration script will ask you the following question:
Run Samba as daemons or from inetd?
Press ‘D’ to run as daemons or ‘I’ to run from inetd: [I]
Running Samba as a daemon forces it to run all the time, whereas using inetd causes Samba to run only when there is activity on the designated port. You can rerun this configuration script at any time with /usr/sbin/sambaconfig.
When initially installing Samba, you are also asked about creating a password file using the system’s password file. The default answer to this question is no. If you choose to answer yes to this question, the Samba password file will include the names of all the services as well as the names of all the system’s users. Choose no, so you can control the accounts for Samba. You don’t want people getting access using default system accounts. You will create accounts later.
When Samba runs, two services will start: nmbd, the NetBIOS service; and smbd, the SMB (Samba)service. These services provide the backbone for sharing files with other Windows machines. The services must be restarted each time the Samba configuration file is changed. When running as a daemon, restart Samba as follows:
/etc/init.d/samba restart
The service reads the configuration file when it starts, applying any new changes.
Configuring Samba
The configuration file provided with the Debian package includes the most common settings. It has been very well commented to help explain many of the settings. The

504 Part V Linux Server
following code is taken from the default install configuration file /etc/samba/ smb.conf. The text in bold is discussed following the code. Note that lines starting with semicolons (;) and pound signs (#) are ignored when the file is read for configuration settings.
This file is included in the chapter to better explain portions of the configuration process and to preserve it for you. Many of the configuration tools discussed later in this chapter remove the commented text from the configuration file. Before making any changes to the file, manually or with a tool, make a backup copy first. Now that you’ve been warned, let’s take a look at the configuration file:
;
;/etc/smb.conf
;Sample configuration file for the Samba suite for Debian GNU/Linux
;Please see the manual page for smb.conf for detailed description of
;every parameter.
;
[global] printing = bsd
printcap name = /etc/printcap load printers = yes
guest account = nobody invalid users = root
;“security = user” is always a good idea. This will require a Unix account
;in this server for every user accessing the server.
security = user
;Change this for the workgroup your Samba server will part of workgroup = WORKGROUP
server string = %h server (Samba %v)
;If you want Samba to log though syslog only then set the following
;parameter to ‘yes’. Please note that logging through syslog in
;Samba is still experimental. syslog only = no
;We want Samba to log a minimum amount of information to syslog. Everything
;should go to /var/log/{smb,nmb} instead. If you want to log through
;syslog you should set the following parameter to something higher. syslog = 0;
;This socket options really speed up Samba under Linux, according to my
;own tests.
socket options = IPTOS_LOWDELAY TCP_NODELAY SO_SNDBUF=4096 SO_RCVBUF=4096
;Passwords are encrypted by default. This way the latest Windows 95 and NT
;clients can connect to the Samba server with no problems.
encrypt passwords = yes

Chapter 24 File Server 505
;It’s always a good idea to use a WINS server. If you want this server
;to be the WINS server for your network change the following parameter
;to “yes”. Otherwise leave it as “no” and specify your WINS server
;below (note: only one Samba server can be the WINS server).
;Read BROWSING.txt for more details.
wins support = no
;If this server is not the WINS server then specify who is it and uncomment
;next line.
;wins server = 172.16.0.10
;Please read BROWSING.txt and set the next four parameters according
;to your network setup. There is no valid default so they are commented
;out.
;os level = 0
;domain master = no
;local master = no
;preferred master = no
;What naming service and in what order should we use to resolve host names
;to IP addresses
name resolve order = lmhosts host wins bcast
;This will prevent nmbd to search for NetBIOS names through DNS. dns proxy = no
;Name mangling options
preserve case = yes short preserve case = yes
;This boolean parameter controlls whether Samba attempts to sync. the Unix
;password with the SMB password when the encrypted SMB password in the
;/etc/samba/smbpasswd file is changed.
unix password sync = false
;For Unix password sync. to work on a Debian GNU/Linux system, the following
;parameters must be set (thanks to Augustin Luton
;<aluton@hybrigenics.fr> for sending the correct chat script for
;the passwd program in Debian Potato).
passwd program = /usr/bin/passwd %u
passwd chat = *Enter\snew\sUNIX\spassword:* %n\n *Retype\snew\sUNIX\spassword:* %n\n .
;The following parameter is useful only if you have the linpopup package
;installed. The samba maintainer and the linpopup maintainer are
;working to ease installation and configuration of linpopup and samba.
;message command = /bin/sh -c ‘/usr/bin/linpopup “%f” “%m” %s; rm %s’ &
;The default maximum log file size is 5 MBytes. That’s too big so this
;next parameter sets it to 1 MByte. Currently, Samba rotates log
;files (/var/log/{smb,nmb} in Debian) when these files reach 1000 KBytes.
;A better solution would be to have Samba rotate the log file upon
506 Part V Linux Server
; reception of a signal, but for now on, we have to live with this. max log size = 1000
[homes]
comment = Home Directories browseable = no
; By default, the home directories are exported read only. Change next
;parameter to “no” if you want to be able to write to them. read only = yes
;File creation mask is set to 0700 for security reasons. If you want to
;create files with group=rw permissions, set next parameter to 0775. create mask = 0700
;Directory creation mask is set to 0700 for security reasons. If you want to
;create dirs. with group=rw permissions, set next parameter to 0775. directory mask = 0700
[printers]
comment = All Printers browseable = no
path = /tmp printable = yes public = no writable = no create mode = 0700
;A sample share for sharing your CD-ROM with others.
;[cdrom]
;comment = Samba server’s CD-ROM
;writable = no
;locking = no
;path = /cdrom
;public = yes
;The next two parameters show how to auto-mount a CD-ROM when the
;cdrom share is accessed. For this to work /etc/fstab must contain
;an entry like this:
; |
|
|
; |
/dev/scd0 /cdrom iso9660 defaults,noauto,ro,user |
0 0 |
; |
|
|
;The CD-ROM gets unmounted automatically after the connection to the
;If you don’t want to use auto-mounting/unmounting make sure the CD
;is mounted on /cdrom
;
;preexec = /bin/mount /cdrom
;postexec = /bin/umount /cdrom

Chapter 24 File Server 507
The Samba configuration file is initially broken down into three main sections: global, home, and printers. These sections are indicated by the brackets enclosing the word, as seen by the first bold text in the file ([global]). The global section sets the configuration for the overall function of the server. More than 160 parameters are available for the global environment. Before you feel overwhelmed, however, note that the ones most commonly used are already in the configuration file.
Jumping down the configuration file, you will see [home], which denotes the beginning of the home share configuration area. It too has a list of parameters. Samba refers to these as service parameters. This section enables users to connect to their own account on the Linux box and read their files. By default, this area is set as read-only. Users can only see their own area; they are prevented from viewing other account areas.
The printer share starts with [printers], and contains settings for the printers. By default, Samba is set up for all printers. As with the other shares, printers can be customized for your environment.
You can add more shares as needed. Commented out are the settings for sharing a CD-ROM from the Linux server. Removing the semicolons will quickly make a share for the CD-ROM.
The parameters for each section then take the following format:
parameter = value
Each parameter has a value such as true or false, yes or no, or a string or path, as in the case of the comment parameter, which looks like the following:
comment = “This is a comment!”
The first parameter I’d like to point out is invalid user (bold in the file listing earlier). This parameter is important because it limits those accounts that can compromise security. By default, only root is listed, but you can add any accounts you think should definitely not have access through Samba. Leave a space between each name added to this parameter.
Next is the workgroup. When Windows first sets up the NetBIOS network, it sets the workgroup to WORKGROUP. Many sites using this feature will change it to some other name. You need to change this parameter to match your environment.
Tip To find the setting for the Windows 95/98 machine workgroup, right-click the Network Neighborhood icon on the desktop. Click the Identification tab after the dialog box opens. The box labeled Workgroup contains the name of your workgroup.
The encrypt passwords parameter enables the use of a separate password file for Samba. This is important because of the different way in which UNIX and Windows encrypt the passwords; therefore, the /etc/passwd file cannot be used to look up

508 Part V Linux Server
passwords at the time of login. Instead, a separate file, /etc/smbpasswd, is used to look up passwords. Use the smbpasswd utility to add users to the password file. Here is the syntax for adding the account tom:
smbpasswd -a tom
You will then receive a prompt for the new account’s password. You will need to enter the password twice to confirm it.
In the [homes] section of the configuration file, the browseable parameter determines whether the clients can browse the share name. From a Windows machine, this means viewing the share names from the Network Neighborhood. By default, Debian configures this to no so that no one can see the home shares.
Debian also configures the home share to be read-only (set by the read only parameter). Changing this to yes enables users to write to the areas of access set by their login privileges.
In the [printers] section of the configuration file, the printable/writable combination enables users to create a spool file for printing purposes, but doesn’t allow users to create or modify files. This is a typical configuration for printing. The public parameter is also set to allow only qualified users printing privileges. No guest printing is allowed on this server.
Table 24-3 lists Samba’s parameters, including the default value and a short description of each. The default values listed in the table are those specified by Samba; the Debian values appear in the configuration file. All the active parameters in the configuration file are listed in this table.
Table 24-3
Samba’s global parameters
Parameter |
Default value |
Description |
|
|
|
browseable |
Yes |
Controls whether this share is viewable from a |
|
|
browse list when the server is queried |
|
|
|
comment |
none given |
Descriptive text that appears next to the service |
|
|
when the client queries the server |
|
|
|
copy |
None |
Allows cloning of services found earlier in the |
|
|
configuration file. Useful when creating multiple |
|
|
similar services. |
|
|
|
create mask |
0744 |
Used when converting DOS permissions to UNIX |
|
|
permissions during file creation |
|
|
|
create mode |
0744 |
Means the same as create mask |
|
|
|

Chapter 24 File Server 509
Parameter |
Default value |
Description |
|
|
|
directory mask |
755 |
Used when converting DOS permissions to UNIX |
|
|
permissions during directory creation |
|
|
|
dns proxy |
Yes |
Determines whether unregistered NetBIOS |
|
|
names should be treated like a DNS name. |
|
|
Debian changes this setting to no, as WINS is |
|
|
disabled. |
|
|
|
encrypt passwords |
Yes |
Specifies whether encrypted passwords are |
|
|
negotiated with the clients. Windows NT 4.0SP3 |
|
|
and Windows 98 expect encrypted passwords. |
|
|
|
guest account |
nobody |
Specifies the user name to use for access to guest |
|
|
access |
|
|
|
guest ok |
no |
A yes value allows access without requiring a |
|
|
password |
|
|
|
guest only |
no |
Specifies that only guests can access the services |
|
|
|
hide dot files |
yes |
Controls whether files beginning with a dot are |
|
|
treated as hidden files |
|
|
|
invalid user |
no valid |
A list of users who are not allowed to log in to |
|
users |
this service |
|
|
|
load printers |
yes |
Defines whether the printers listed in the |
|
|
printcap file are loaded for browsing |
max log size |
5000 |
Specifies the maximum size to which the log file |
|
|
can grow before renaming the file with a .old |
|
|
extension. The number represents kilobytes. A |
|
|
zero value means no limit. |
|
|
|
name resolver |
lmhosts |
Determines the order in which names are |
order |
host wins |
resolved |
|
bcast |
|
passwd program |
/bin/ |
The local password program used for setting |
|
passwd |
UNIX passwords |
|
|
|
passwd chat |
none given |
Controls the conversation between smbd and the |
|
|
local password program to allow changing a |
|
|
user’s password |
|
|
|
preserve case |
yes |
Allows long filenames to remain as is, rather than |
|
|
being forced to a certain case |
|
|
|
printable |
no |
Controls whether a client can write and submit |
|
|
spool files for the service |
|
|
|
printcap name |
/etc/ |
Holds the names and aliases of the available |
|
printcap |
printers on the system |
Continued

510 Part V Linux Server
Table 24-3 (continued)
Parameter |
Default value |
Description |
|
|
|
printing |
bsd |
Controls how the printer status information is |
|
|
interpreted. Currently, eight styles are supported: |
|
|
bsd, aix, lprng, plp, sysv, hpux, qnx, and |
|
|
softq. |
public |
no |
Specifies the access privilege for the service |
|
|
|
read only |
no |
Controls the ability to create or modify files |
|
|
|
security |
user |
The most important setting in Samba, as it affects |
|
|
how clients negotiate a response |
|
|
|
server string |
Samba %v |
A comment string that appears in browse lists for |
|
|
the server. Debian adds the server name as well. |
|
|
|
short preserve |
yes |
This option applies to 8.3 filenames common |
case |
|
among DOS systems. It allows the 8.3 filenames |
|
|
to remain as is, rather than being forced to a |
|
|
certain case. |
|
|
|
socket options |
tcp_ |
Lists the socket options that a server can use |
|
nodelay |
when talking with a client for better performance |
syslog |
1 |
Specifies the logging level. Zero maps to |
|
|
LOG_ERR, 1 maps to LOG_WARNING, 2 maps to |
|
|
LOG_NOTICE, 3 maps to LOG_INFO, and all |
|
|
higher levels map to LOG_DEBUG. |
|
|
|
syslog only |
no |
When set to yes, sends debug messages to |
|
|
syslog only. Not recommended. |
|
|
|
wins support |
no |
Controls whether the nmbd process will act as a |
|
|
WINS server |
|
|
|
workgroup |
WORKGROUP |
Sets the workgroup environment that the server |
|
|
shows up in when checked by the clients |
|
|
|
writable |
no |
Controls the ability to create or modify files |
|
|
|
unix passwornd sync false |
Regulates whether the UNIX passwords are taken |
|
|
|
from the smbpasswd file when changed |
|
|
|
Note More information about Samba parameters can be found in the man pages on smb.conf. There are well over 160 available parameters for use in configuring Samba. If still more information is needed, read the frequently asked question (FAQ) area of the Samba Web site (www.samba.org).

Chapter 24 File Server 511
Testing the Samba server
The best way to start using the Samba service is to make the configuration of Samba as simple as possible. With Samba running on the server, run
smbclient -L server
where server is your server name. This should result in a request for a password. Press Enter to display the listing, as shown here:
Password:
Anonymous login successful
Domain=[WORKGROUP] OS=[Unix] Server=[Samba 2.0.7]
Sharename |
Type |
Comment |
--------- |
---- |
------- |
public |
Disk |
|
IPC$ |
IPC |
IPC Service (bath server (Samba 2.0.7)) |
lp |
Printer |
Generic dot-matrix printer entry |
Server |
Comment |
--------- |
------- |
BATH |
bath server (Samba 2.0.7) |
Workgroup |
Master |
--------- |
------- |
WORKGROUP |
BATH |
You can see from the output that the name of the server and the share names are correct. (Notice that the homes share does not appear here because it is dynamically created based on the user’s ID.) Now try connecting as a user with the following:
smbclient ‘//host/homes’ -U userid
Replace host with the resolvable name or IP address of the machine hosting the SMB service. Then replace userid with a valid account name.
The smbclient will communicate with the smbd service and negotiate a connection. You will then be asked for the password of the account name. Enter the password associated with the Samba account on the server. If all goes well, you will end up with a prompt like the following:
smb: \>
You can now view the files in your account on the server using the ls command. This proves the connection works. You can use q to quit the session.

512 Part V Linux Server
If you receive a connection failure, make sure that Samba is running on the target machine. You should at least get a password request with the server running.
Tip If you having trouble getting Samba to work, check out the Web site us4.samba.org/samba/docs/DIAGNOSIS.html for help in diagnosing your problem(s).
Configuring Samba with SWAT
The Samba Web Administration Tool (SWAT) provides a convenient means of administering Samba through a Web interface. This tool can be used from any operating system with a Web browser. SWAT uses port 901 for a connection request. To get this working on your system after the SWAT package is installed, you must make a few adjustments.
Modify the /etc/inetd.conf file to remove the # off # characters from the beginning of the configuration line. This line is added when SWAT is installed, but needs to be commented out. You then need to restart the inetd service with the following:
/etc/init.d/inetd restart
You can then configure Samba using SWAT via a browser. With the browser open, use the IP address or resolvable name for your server and add the 901 port number, as shown here:
192.168.22.126:901
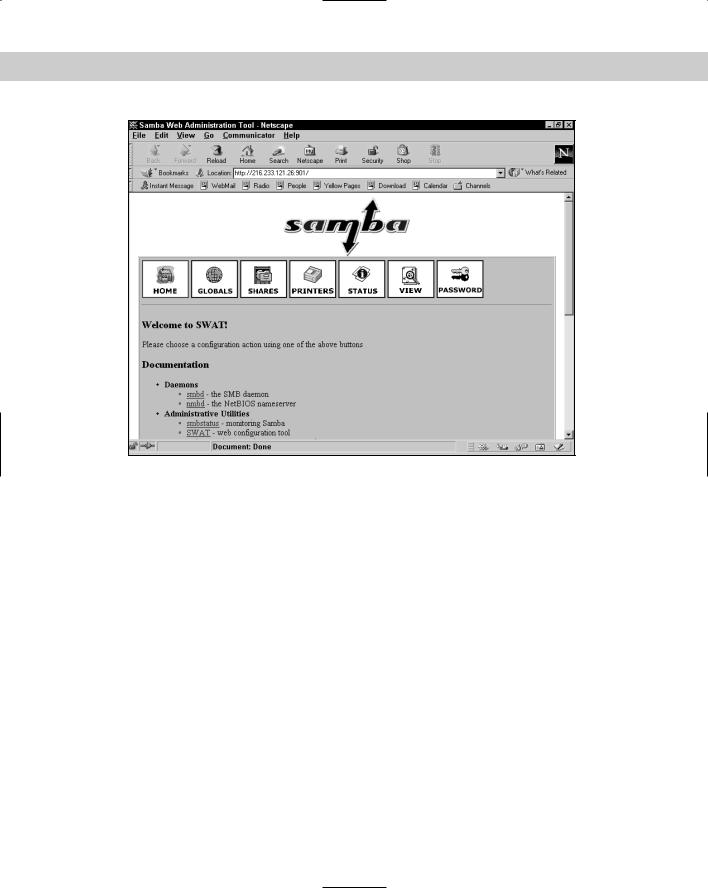
You will then be prompted for a password. To make administrative changes, you need access to the root account. Enter root for the user name and the root password for the server. You will see the control interface, as shown in Figure 24-1.
Clicking the various buttons will take you to different areas that you can configure.
Caution |
Be advised that using SWAT in an open environment can pose a security risk. The |
|
passwords required to log in get sent in clear text format, meaning that someone |
|
could pick them up on the network. This tool should not be used for systems |
|
exposed to the Internet. |
Chapter 24 File Server 513
Figure 24-1: Configuring the Samba server from a Windows machine
Configuring Samba with gnosamba
A useful Gnome tool to configure Samba is gnosamba. This graphical interface, shown in Figure 24-2, enables you to open the configuration file, manipulate the settings, and then save the file. Before using this tool, be aware that all comments contained in the original configuration file are removed when saving. Therefore, if you have tweaked the configuration file before, make a copy to prevent any losses.
You can use this tool to add shares using a built-in wizard, to change permissions, or to create multiple configurations saved to different names for testing. Doubleclicking a parameter brings up a selectable list of options for that parameter. This comes in handy if you are not familiar with all the available options for a parameters. Once you’ve made changes to the configuration, restart the Samba services from gnosamba.
The gnosamba package uses the Gnome environment to run; therefore, Gnome should be installed as well.

514 Part V Linux Server
Figure 24-2: Samba configurations made easy with the use of gnosamba
Checking the network with smb-nat
This tool runs a simple security check on Samba. It runs through a series of checks to ensure that any known vulnerabilities are secure. A misconfiguration can expose a system quickly. You can set this tool to use custom files containing a user list or a password list, and even specify an output file. The smb-nat package includes default lists, which are used if none are specified. To use the default lists, run the program using nat localhost. Otherwise, use the following syntax:
nat [-o output] [-u userlist] [-p passlist] address
At minimum, I suggest using an output file (identified by output) to capture all the data produced, as it exceeds the viewable area of a terminal window. The address for the machine is required for this tool. It can be any resolvable name or an IP address.
Connecting to a Samba server from Linux
You can use the Samba client to connect to any machine hosting a share. The client will connect in text mode and enable you to access the files on the remote machine much in the same way the FTP client works. The following syntax is used:
smbclient //server/share [-U username] [-W workgroup] [-I Ipaddress]
The server refers to the name of the machine hosting the smbd service. Likewise, the share is the share name on that server you wish to connect. For logging in as a specific account, use the -U option with the username. If none is given, the account you are currently using is tried. Likewise, connecting to a specific workgroup or machine uses the corresponding workgroup name or machine’s IP address. The IP address must be in the a.b.c.d format.

Chapter 24 File Server 515
Once you are logged on, you can navigate using the common commands used for the FTP client: ls, dir, cd, lcd, get, put, and so on. Typing a question mark (?) at the prompt will give you a list of the commands. More specific descriptions are obtainable with ? command, where command is the command you have a question about.
Connecting to a Samba server from Windows
Because the NetBIOS protocol broadcasts the server name for the workgroup, finding and connecting to a server may only require you to browse the Network Neighborhood to establish a connection. This assumes, however, that your user ID and password are the same for both your Windows machine and the Samba account.
If the account IDs are not the same, you can connect another way. This means that you must know what share you intend to connect to. To establish a connection, right-click the desktop Network Neighborhood icon and select Map Network Drive from the menu. Enter the share path just as you would with the smbclient on a Linux box, as seen in Figure 24-3.
Figure 24-3: Mapping a drive from a
Windows 98 machine to Debian using
Samba
Once the drive is mapped, you can access the files through regular methods in Windows, such as the My Computer icon, Windows Explorer, and so on. The printers work the same as drives regarding mapping.
Sharing files between Linux and Windows machines
In the world of GUI tools, TkSmb provides a graphic interface to smbclient. You have all the convenience of a point-and-click GUI applied to the remote connection utility of smbclient. The tksmb package does depend on a couple of additional packages, noted when installed through dselect.
Figure 24-4 shows what the interface looks like. In the upper-right area, enter the user ID, the password, and the local path where files will be saved. The left pane lists the servers hosting shares on the network. After entering the correct information in the fields on the right, click the server name to which you want to connect.
516 Part V Linux Server
Figure 24-4: Using a graphical interface to browse the Windows network
A list of available shares will then appear in the center box. Clicking one of these share names will display the names of the files in the lower box. From there, you can navigate through the directories by clicking on the blue text. Right-clicking a filename gives you the option of downloading the file to the specified local directory.
The one drawback to using this tool is that there is no way to send files, only download them. Perhaps this will evolve later.
Summary
When it comes to Linux file servers, two stand out: NFS and Samba. NFS stands out because of its long history in the UNIX environment and because client utilities exist for nearly every platform. This enables mixed-platform environments to use NFS for file sharing.
In the predominantly Windows client networks, Samba stands out for its ability to enter those networks to become a Primary Domain Controller, in addition to becoming a file and print server. Samba definitely has its place among file servers.