

- •About the Author
- •Credits
- •Foreword
- •Preface
- •Acknowledgments
- •Contents at a Glance
- •Contents
- •Introduction to Linux
- •Installing Debian
- •Choosing a GUI
- •Networking
- •Setting Up for the Internet
- •Applications
- •Essential Tools
- •Multimedia
- •Games
- •Scripting
- •Shells
- •Linux Kernel
- •Hardware
- •Backups
- •Security
- •Firewall
- •Web Server
- •FTP Server
- •File Server
- •Linux Commands
- •Index
- •GNU General Public License
- •CD-ROM Installation Instructions

Backups
Debian GNU/Linux has proven itself to be one of the more stable, secure Linux systems available. With a
reputation like this, users can easily develop a false sense that this system is invincible. One day, this false sense of security can come back to bite you.
Unfortunately for some, it takes a devastating event to wake them to the reality that proper precautions can let them rest easy at night knowing that they can recover from the worst events. We rely heavily on computer systems and the supporting infrastructure to perform our daily tasks without even realizing the impact that the failure of those systems would have on us.
This chapter goes into the detail you need to prevent the catastrophic loss or corruption of your system data — or even an important file. It covers methods, strategies, and software used to back up and recover your data.
Planning for Failure
Once you have your system set up with Debian GNU/Linux, you undoubtedly have spent more than a couple of hours getting it just the way you want it. Regardless of the implementation of Debian, the environment, hardware used, and access to the system by others, you can still lose data. This loss can come not only from hardware failure, but also from viruses, accidental file deletion, or a compromised (cracked) system.
To avoid data loss, you must first take some steps to plan for failure. Larger companies have disaster recovery policies because loss of data can cost these companies millions in time and resources. Companies regulated by the government, such as pharmaceutical companies are required by law to have a backup and recovery policy in place. Some institutions even require the archival of data for months and years. The point is to have a plan.
18C H A P T E R
In This Chapter
Planning for system failure
Picking the appropriate backup model
Selecting the tools for backing up
Recovering from boot problems

372 Part IV Maintenance and Upgrade
The strategy of your plan can be straightforward. Here is an example:
Document your system — This includes the hardware configuration, hardware components, filesystem layout, and so on. I keep a three-ring binder with this information on each system. This binder acts as an operator’s manual, revision log, and history keeper all rolled into one.
Have a recovery disk available — When your system is down, it is very difficult to create a recovery disk. You can even use the installation CD-ROM to recover a system. Keep a recovery or boot disk with your system. I keep a recovery disk in my binder, along with the documentation.
Perform regular backups of your system — Whether a large corporation, a small business, or just a single personal computer, regular backups are critical. You cannot recover wanted data unless you first back it up.
Maintain off-site media storage — An important part of a backup and recovery policy is keeping a recent copy of backed up media at an off-site location in the event of a natural disaster such as fire, earthquake, or flood.
As you can see, planning for disaster can be straightforward. As you continue through this chapter, you learn in more detail how to perform the necessary steps to back up your system.
Choosing a Backup Technique
Now that you know that backups are essential, how should you perform them? Although making a backup copy of every file on your system is a safe backup strategy, not every file changes every day. Some never change. There are four backup techniques to consider: full, incremental, mirroring, and through a network.
The full backup — A full backup is a complete copy of all the files on a disk or partition. From a full backup, you can restore to a new disk the entire operating system and all its files. You can use this technique regularly or periodically, depending on the frequency of changes to the system and the volume of data to store.
The incremental backup — An incremental backup copies only those files that have changed or been added since the last backup. Generally, you employ this technique more often as an interim between full backups because it takes less time to complete and uses less backup storage.
Mirroring a disk — Disk mirroring, as its name implies, takes the contents of one disk and copies it to another disk. This is an excellent technique for backing up data when you don’t have time for your system to be out of commission. You can do this through software as well as through the appropriate hardware. See the following Note on Redundant Array of Independent Disks (RAID).
Chapter 18 Backups 373
Backing up over a network — When machines are part of a network, you can share resources from one computer through that network. Networked computers can utilize each of the listed backup techniques. Mirroring disks over a network reduces down time. When one system fails, you simply bring the mirror online. Full and incremental backups allow the use of fewer tape drives for a site by sharing those resources.
Note You can mirror disks in one of two ways: either through software that runs periodically or through hardware known as Redundant Array of Independent Disks (RAID). There are several levels of RAID, although the two pertinent to this chapter are RAID 1 and RAID 5.
RAID 1 uses the hardware controller to write the same information to two identical disks at once. If one fails, then the other disk responds immediately. The system must be shut down for you to replace the failed drive, but you can do it at a non-critical time.
RAID 5 writes the data to at least three disks. If any one of the disks fails, the other two contain the information of the lost disk. You can replace the failed disk; the data originally on the disk is replicated to the new disk from the other two. This produces no down time.
Note that, in most cases, a combination of backup techniques is generally your best strategy.
Knowing what to back up
In the case of a full backup, the issue of what to back up is obvious — everything. However, this may not be possible every time because of limited storage space on the backup device, like with a floppy disk. You should back up only those files that you cannot replace by reinstalling the software. You also should regularly back up files that are original creations or modifications of the originals, such as modified configuration files, letters, graphical creations, and so on.
You can look at key directories to help determine the importance of what to back up. Be sure to check the following directories, from which you are likely to back up the majority of your critical data:
/home — The home directory holds the data for each of the user accounts configured on your system. It holds users’ personal data, their customized settings, and anything else each person may deem important.
/etc — Any software installed on the system has configuration files saved in this directory. This also includes the account information for the user accounts. Losing this information can result in a lot of work for an administrator when recreating all the accounts for the users of the system, let alone when reconfiguring all the software. You can reload the software itself, but the configuration takes time.

374 Part IV Maintenance and Upgrade
/var — Most of the core software uses this directory as a data repository. This includes the database of installed applications for Debian. Many mail servers use this directory to store mail. In addition, the log history for the system activity is stored here.
/(custom) — Some system administrators prefer to customize the directory structure based on the purpose for the server. For instance, administrators of Web servers commonly create /www to store Web pages and related data. Therefore, you cannot easily reproduce this. You should add any directories created outside of the default directories to your list of data to back up.
Knowing what to back up with caution
Granted, a full backup includes all directories, but you should approach some directories with caution. Certain directories are acceptable to include for a full backup, but restoring them can have serious side effects. So, if you choose to make a backup of an entire filesystem, here are some points to consider before you proceed.
/proc — This directory contains the core information used by the kernel. It is dynamic data that the kernel changes constantly. A full backup takes a snapshot of the system at a given point in time, so restoring this data to a new drive works great when recovering from a failed hard drive or making a duplicate system. The problem comes about when trying to restore a partial file that includes the /proc directory path.
/tmp — When the system runs, non-critical data and files occasionally need to be stored temporarily in this directory. Therefore, backing up this directory eats up valuable backup storage space. If storage is abundant, then there is no harm in including this data.
CD-ROMs, floppy drives and remote filesystems — When performing a complete backup of your system, this involves all mounted drives including CD-ROMs. You cannot change the data on a CD-ROM; therefore, there is no need to back it up. You should unmount these devices before executing a full backup. The same is true for floppy drives and any other mounted media. Also, backing up remote files that are backed up on a remote machine is another example of redundant data on storage. Unmounting these remote files also frees potential space for critical data.
Devices and documentation — The documentation doesn’t change after you install the software, so this is probably safe to skip when looking to save storage space. The documentation generally is stored in /usr/doc, and you can reload it with the software. Another example that doesn’t change between installations is the device information found in /dev. This standard information is available when you reinstall the system.
Duplicated data — With a network of a number of systems, you may choose to archive or mirror data from one system to another. Therefore, there may not be any reason to back up that data.

Chapter 18 Backups 375
In most cases, the bottom line when selecting which data to back up is whether or not the data fits on the chosen medium.
Choosing adequate media
Every system and every environment requires different considerations when choosing a medium on which to back up its data. A person with a single computer has different needs than a company with several machines containing missioncritical data. Therefore, choosing how to back up these systems involves considering your needs.
Several forms of backup media are commonly used. Table 18-1 lists and compares the more commons forms of backup media. Following the table, I explain each medium type in more detail.
Table 18-1
Comparison of backup media
Medium |
Capacity |
Speed |
Hardware cost |
Medium cost |
|
|
|
|
|
Tape |
4-280GB |
Medium to fast |
$300–$9000 |
$30–$70 |
|
|
|
|
|
CD-R |
640MB |
Slow |
$150 |
$1 |
|
|
|
|
|
CD-RW |
640MB |
Slow |
$250 |
$4 |
|
|
|
|
|
Hard drive |
2–180GB |
Fast |
$50–$1400 |
N/A |
|
|
|
|
|
Floppy |
1.44MB |
Slow |
$20 |
$0.25 |
|
|
|
|
|
Jaz |
2GB |
Fast |
$340 |
$120 |
|
|
|
|
|
Zip |
100–250MB |
Slow |
$100 |
$10–$20 |
|
|
|
|
|
Tape
The magnetic data storage tape is one of the computer industry’s leading forms of backup media. The drives used for the tape backups may be a little more expensive than other devices, but the media used with the drive more than makes up for that expense. Tape drives and the corresponding media come in all styles, forms, and sizes. Most SCSI tape drives work with Linux, and many of the IDE versions are compatible as well with “SCSI emulation” turned on for the kernel.
Another attractive quality of tapes is their data-holding capacity. In a very small space, they can hold many gigabytes of data. For small systems, this may not be a concern; but for large sites, it can make all the difference in the world.

376 Part IV Maintenance and Upgrade
Tapes are also very well accepted as a backup medium with software supporting the devices. Much of the early software supports tape drives, so finding appropriate software to fit your needs is easy.
The tape media lends itself to making complete backups, backing up and restoring large chunks of data quickly. Each time you add data to a tape, it is added to the end of what you wrote last. Recovering files, on the other hand, is a long, arduous process that takes a lot of time when you do one file at a time. Because files are placed on the tape in sequential order, recovering random files can be a major drawback. The more frequently you perform a single file restore, the less desirable this medium looks.
CD-ROM
CD-ROMs are very affordable forms of backup media. The disks are cheap, and they hold enough data for most systems. The two forms of CDs are writeable and rewriteable. Both are limited to the amount of data they hold; however, the rewritable CD-ROM is reusable, which extends its life tremendously.
For smaller systems and individuals that wish to save only their vital data, CD-ROMs are an excellent choice. The media isn’t very expensive as long as you don’t have to make frequent backups. Software is also available specifically for doing backups on CD.
Restoring files from a CD-ROM is much quicker than tape because of its capability to randomly access files. In this case, a CD makes a great medium to back up frequently changing data such as document drafts, log histories from manufacturing equipment, and source code from programming projects in which making fast restores is important.
The major downfall with this medium is its low capacity. CD-ROMs only hold approximately 650MB. This, compared with some of the other options such as a hard drive, is very small.
Hard drive
As long as your equipment can hold an extra hard drive or two, invest in hard drives because they are fast and relatively inexpensive and they hold several gigabytes of data. This is the best choice when working with a mission-critical system. Hard drives are good when you can’t afford to wait hours for a repair, restore, or rebuild of a system. Minutes of down time can cost you tons of money in lost sales revenue or data.
Hard drives can be removable in some manner, which enables you to replace the drives. Therefore, using hard drives increases the number of historical backup revisions. Non-removable drives fixed inside the case of a computer run the risk of losing all the data if something destroys the entire computer, as with a fire.

Chapter 18 Backups 377
|
For data that you need to back up frequently throughout the day, the hard drive can |
|
serve you well. Using a hard drive increases the chances of the most recent data |
|
recovery. For very critical and not so critical environments where frequent backups |
|
and fast recovery are important, use RAID. |
Tip |
As you look through the various forms of media, remember that you can also use |
|
a combination of backup media. For instance, use a hard drive mirror to provide |
|
the immediate recovery, and use tapes to provide the historical archive of backups. |
|
Combination methods can give you the best of both worlds. |
Other media
There are several other forms of media to use as backup: high-density floppies, Iomega Zip and Jaz, and so on. You can use anything that holds data as backup media; the only hindrance is the hardware’s capability to work with Linux. As long as the hardware can work with Linux, you can use its media.
Choosing a backup method
Generally speaking, the easiest method for backing up the data is to do it all. This is considered a full backup. However, full backups can take a long time and use resources that need to be available for other functions. Therefore, I recommend you perform the full backups on days or at times that the system isn’t used as much (such as weekends or at night).
Your particular needs may not allow you to wait until a period of low system activity to make your backup. Therefore, you can use a combination of full and incremental techniques to accomplish the desired effect of more frequent backups.
Another twist to this method is the use of backup levels. Levels set priorities (weights) on the data that you back up. For instance, a full backup uses a level of zero (0). Every Sunday, a full backup is implemented. All other days of the week, an incremental backup with a level of one (1) is issued. Level 1 means that any data that you added or modified since the last level zero (0) backup is backed up. Therefore, a file that changes on Monday is backed up repeatedly the rest of the week.
To avoid backing up data that hasn’t changed from one incremental backup to the next, you can increase the backup level each day. Table 18-2 shows an example schedule. This method lets data modified after Sunday’s backup to be backed up on Monday. Then on Tuesday, any data that changed after Sunday’s backup also is saved. On Wednesday, the data from Sunday through Tuesday is saved, and so on. This method enables you to back up essentially two sets of data — a full backup of the entire drive and data that changed or is new since the full backup. This method saves time, yet you don’t lose any changes made through the week until the next full backup.

378 Part IV Maintenance and Upgrade
Table 18-2
Example backup schedule
Day |
Technique |
Method |
|
|
|
Sunday |
Full |
Level 0 |
|
|
|
Monday |
Incremental |
Level 9 |
|
|
|
Tuesday |
Incremental |
Level 8 |
|
|
|
Wednesday |
Incremental |
Level 7 |
|
|
|
Thursday |
Incremental |
Level 6 |
|
|
|
Friday |
Incremental |
Level 5 |
|
|
|
Saturday |
Incremental |
Level 4 |
|
|
|
|
In addition to the one-week backup schedule, some larger sites also have a two- |
|
week cycle and a monthly backup cycle. These companies might archive backups |
|
for up to a year or more, depending on the value of their data. |
Tip |
Common practice as part of the disaster recovery plan includes securing a copy of |
|
the full system backup somewhere else. Usually this means taking the media off- |
|
site. Companies with large computer systems have a fireproof media vault where |
|
they store the archived data. Catastrophic disaster includes natural events as well |
|
(such as earthquakes, fires, floods, and tornadoes). |
Selecting Your Backup and Restore Tools
After you choose the medium and method that best works for your environment, the next step is to pick software that goes along with the rest of your choices to complete the package. The available software varies from command-line-based tools with numerous options to highly graphical interfaces.
There are number of software choices to consider. Table 18-3 shows the programs included in this chapter, lists the media the programs work with, and describes the basic functions of the programs. This helps you select the best program for your needs. I then describe each program in detail later in the chapter.

Chapter 18 Backups 379
Table 18-3
Backup tools and features
Program |
Preferred medium |
Description and feature |
|
|
|
amanda |
Tape |
Client/server network backup system |
|
|
making use of dump or tar. Used for |
|
|
mass volumes of data sent to a |
|
|
single, high-capacity networked tape |
|
|
drive. |
dump/restore |
Any media except CD-ROM |
Traditional command-line UNIX |
|
|
backup application. Works with any |
|
|
media, but designed to work with |
|
|
tapes. |
|
|
|
KBackup |
Any media except CD-ROM |
This graphical (terminal) package is |
|
|
highly configurable. |
|
|
|
mirrordir |
Hard drive or remote system |
Used to mirror drivers and |
|
|
directories. This is a very fast means |
|
|
of making a backup. |
|
|
|
Taper |
Any media except CD-ROM |
This graphical (terminal) package |
|
|
reads backup tapes, regardless of |
|
|
format. |
|
|
|
tar |
Any media except CD-ROM |
Commonly used command-line |
|
|
backup tool. Implemented with |
|
|
cron to make an automated backup |
|
|
process. |
|
|
|
If you have a small system, you may even decide that performing manual backups of your data is all that you require. Administrators of larger systems want to automate as much of this process as possible. You can turn command-line applications into a script and include it with cron to set the frequency with which the automation takes place.
Cross- |
For more information on cron and other automation techniques, see Chapter 9. |
Reference |
|
amanda
amanda, short for Advanced Maryland Automatic Network Disk Archiver, uses a network to back up the data to one tape drive. This is an excellent tool for large, networked environments. amanda comes in client/server portions and requires that

380 Part IV Maintenance and Upgrade
one system, the server, contain a large storage disk. The clients simultaneously create backups and send them to the storage disk on the server. The server then sends each file one by one to the tape for backup.
amanda does some simple tape management to prevent writing over the wrong tape. When it recovers a file, amanda tells you what tape is needed and locates the file in the archive. It also supports tape changers through a generic interface. However, Amanda uses only one tape drive, making it a less desirable backup solution for systems with more than one tape drive.
amanda performs a pre-run error check on the server and the clients, and then sends an e-mail in the event that the check finds errors. It also reports backup results in full detail to administrators through e-mail.
Amanda requires three packages for proper functioning. amanda-comman should be installed on each machine you intend to backup. amanda-server should be installed on the machine with the tape drive. Finally, amanda-client should be installed on any machine for which you want a backup that does not have a tape drive. After the packages are installed, you are ready to use amanda. Table 18-4 shows the amanda command syntax and a description of each command.
|
Table 18-4 |
|
amanda commands |
|
|
Command |
Description |
|
|
amdump config |
Performs the actual dump to tape and sends an e-mail of |
|
the results. In the event that a tape cannot be written to, |
|
the backups are sent to a holding disk. config is the |
|
main directory in /etc/amanda where the configuration |
|
files are kept. These files are on the server only. |
amflush [ -f ] config |
In the event that amdump cannot write to a tape, fix the |
|
tape problem and then run amflush to send the |
|
contents of the holding disk to tape. |
|
|
amcleanup config |
This cleans up problems after amdump fails for some |
|
reason, possibly because the server crashed. |
|
|
amrecover [ [ -C ] |
When recovering or restoring a file, this tool provides an |
config ] [ options ] |
interactive interface to help browse the index directories |
|
of the backed up data. |
|
|
amrestore [ options ] |
This searches a tape for a requested backup of |
tapedevice [ hostname |
anything — from a single file to a complete restore of |
[ diskname ]] |
all partitions. |
|
|

Chapter 18 Backups 381
Command |
Description |
|
|
amlabel config label |
All tapes used by amanda must be labeled with |
[ slot slot ] |
amlabel. Unlabeled tapes are not recognized. This is |
|
part of the amanda tape management system. |
amcheck [ options ] |
This program verifies that the correct tape is in the tape |
|
config drive. You can automate to send an e-mail to |
|
someone who can correct any problems before running |
|
amdump. |
|
|
amadmin config command |
Used by administrators of the system backups, this |
[ options ] |
program enables someone to look up tapes needed for |
|
a restore, force hosts to do a full backup, and perform |
|
other administrative functions. |
|
|
amtape config command |
This program controls the functions of the tape |
[ options ] |
hardware, such as ejecting tapes, changing tapes, and |
|
scanning a tape rack. |
|
|
amverify config |
Verifies the contents of an amanda backup tape for |
|
errors. You can only use this with tapes containing tar |
|
backup formats. |
|
|
amrmtape [ options ] |
This removes a tape from a tape list and from a |
config labelamanda |
tape database. |
|
|
amstatus config |
Shows the status of a running dump to tape. |
[ options ] |
|
|
|
Each of the previous commands has a man page describing the options and how to use them. In addition to these commands, amanda uses three editable configuration files:
Main configuration file (/etc/amanda/DailySet1/amanda.conf)
This file contains the server configuration, like who to mail backup reports to, how often to perform a backup, what to backup locally, and so on.
A list of disks and hosts to back up (/etc/amanda/DailySet1/disklist)
A list of active tapes on which the data is placed (/etc/amanda/DailySet1/ tapelist)
You can find these files in /etc/amanda. If you plan to use a method in which one day a week you do a full backup and the other days you perform incremental backups, I suggest you create a separate subdirectory for each type — full and daily. Copy the configuration files into each of the directories (daily and full), and modify them according to the duties of each.

382 Part IV Maintenance and Upgrade
You can also find a sample file of which commands to add to cron in order to automate the backup process on the amanda server only (look in /etc/amanda for crontab.amanda). Here are what the commands look like:
0 16 * * 1-5 /usr/sbin/amcheck -m DailySet1 45 0 * * 2-6 /usr/sbin/amdump DailySet1
From these two lines, amanda first makes sure that the correct tape is in the drive at 4:00 p.m. (denoted by sixteen hundred hours in military time) every weekday afternoon. If not, then amcheck sends the administrator/operator an e-mail stating so (indicated by the –m option). The config file specifies where to send the mail. Then, each night at 12:45 a.m. (denoted as 45 in military time), the system is backed up based on the configuration files.
dump/restore
The most common tool used on UNIX systems for doing backups is dump. dump backs up the Ext2 filesystem to most any type of medium. As with many of the favored UNIX applications, it is available for Linux as well.
Use dselect to find the dump package and install it. restore comes along with it during the install. Once configured, dump reveals that the dump field in /etc/fstab indicates the dump frequencies for those drives. Leaving the default set to zero tells dump that you don’t want to back up that drive. The configuration process also creates /var/lib/dumpdates to record the dates of the dumps and other information about the dump.
To use dump, you must employ options to control what, where, and how backups are performed. These optional parameters control such things as backup level, destination, or device. Table 18-5 lists these options and gives you some idea of what they do.
|
Table 18-5 |
|
dump options and descriptions |
|
|
Option |
Description |
|
|
-0 through 9 |
Dump levels indicate the priority for backing up the files. A level 0 |
|
indicates a full backup, guaranteeing that the entire filesystem is |
|
saved. A level number above 0 indicates an incremental backup, |
|
telling dump to copy all newer files or modified files since the last |
|
dump of a lower level. The default level is 9, which is the lowest |
|
level (the least amount of data is backed up). |
-B records |
This option supersedes the calculation of the tape size based on |
|
the length and density. For the records placeholder, you |
|
substitute a numerical argument for the number of dump records |
|
per volume. |
Chapter 18 Backups 383
Option |
Description |
|
|
-a |
This bypasses all tape length considerations and enforces writing |
|
to the tape until an end-of-media indication is returned. This |
|
option works best with most modern tape drives and is |
|
recommended when appending to an existing tape or when |
|
using a tape drive with hardware compression. |
-b blocksize |
The number of kilobytes per dump record. A dump record is a |
|
block of backup data. Therefore, dump constrains writes to a |
|
maximum of MAXBSIZE (typically 64KB) to prevent restore |
|
problems. |
|
|
-c |
Changes the defaults for use with a cartridge tape drive, with a |
|
density of 8,000 bpi (bits per inch) and a length of 1,700 feet |
|
|
-e inode |
Excludes inode from this dump (You can use stat to find the |
|
inode number for a file or directory.) |
|
|
-h level |
Files marked with a nodump flag are backed up only for dumps |
|
at or above the given level. The default honor level is 1; |
|
therefore, incremental backups omit such files, but full backups |
|
retain them. |
|
|
-d density |
Sets the tape density to density. The default is 1,600 bpi. |
|
|
-f file |
Writes the backup to a file, device, or remote host named file. |
|
For a single argument, you may list multiple filenames separated |
|
by commas. |
|
|
-L label |
The user-supplied text string label is placed into the dump |
|
header, where tools like restore and file can access it. Note |
|
that label is limited to LBLSIZE (currently 16 characters), |
|
which must include the terminating \0. |
|
|
-M |
This option enables the multi-volume aspect for dump. It uses |
|
the name specified with -f as a prefix, then dump writes in |
|
sequence to prefix001, prefix002, and so on. Use this |
|
option when dumping to files on an Ext2 partition in order to |
|
bypass the 2GB file size limitation. |
|
|
-n |
Whenever dump requires attention, a notification is sent to all |
|
people in the operators group (/etc/group). |
|
|
-s feet |
Attempts to calculate the amount of tape needed, in feet, at a |
|
particular density. This option depends on the density (-d) and |
|
dump record options (-B and -b). The default tape length is |
|
2,300 feet. |
|
|
-S |
Determines the amount of space needed to perform the dump |
|
(without actually performing the dump). Then this option displays |
|
the estimated size in bytes. This is useful with full or incremental |
|
dumps in determining how many volumes of media are needed. |
Continued

384 Part IV Maintenance and Upgrade
|
Table 18-5 (continued) |
|
|
Option |
Description |
|
|
-T date |
This option uses the particular date as the starting time for the |
|
dump (instead of the time determined by looking in /var/lib/ |
|
dumpdates). This option is useful for automated dump scripts |
|
that wish to dump over a specific period of time. |
-u |
Updates the file /var/lib/dumpdates after a successful |
|
dump. This is a suggested option when performing incremental |
|
backups. |
|
|
-W |
Tells the specified operator what filesystems need to be dumped. |
|
This information is gathered from /var/lib/dumpdates and |
|
/etc/fstab. Using the -W option ignores all other options and |
|
exits immediately after displaying the information. |
|
|
-w |
This option is like -W, but it prints only those files that you need |
|
to back up. |
|
|
Note On occasion, dump requires administrative intervention on certain conditions. These conditions include end of tape, end of dump, tape write error, tape open error, and disk read error. Use the –n option mentioned in Table 18-5.
A typical application of this utility looks something like this:
dump 0ufL /dev/ftape MyHome /dev/hdax
Here, a full backup is performed on the branch of the directory tree /home, and is sent to the device /dev/ftape because of option f. Then, the backup updates the dump file indicated by the u option. You can exchange the directory path for a partition, such as /dev/hdax. The results of this command are as follows:
DUMP: Date of this level 0 dump: Thu Sep 7 16:33:25 2000 DUMP: Date of last level 0 dump: the epoch
DUMP: Dumping /dev/hdax (/ (dir home)) to /dev/ftape DUMP: Label: MyHome
DUMP: mapping (Pass I) [regular files] DUMP: mapping (Pass II) [directories]
DUMP: estimated 27900 tape blocks on 0.72 tape(s). DUMP: Volume 1 started at: Thu Sep 7 16:33:26 2000 DUMP: dumping (Pass III) [directories]
DUMP: dumping (Pass IV) [regular files] DUMP: Closing /dev/ftape
DUMP: Volume 1 completed at: Thu Sep 7 16:34:12 2000 DUMP: Volume 1 took 0:00:46
DUMP: Volume 1 transfer rate: 609 KB/s
DUMP: 28015 tape blocks (27.36MB) on 1 volume(s)
DUMP: finished in 44 seconds, throughput 636 KBytes/sec

Chapter 18 Backups 385
DUMP: level 0 |
dump |
on Thu Sep 7 |
16:33:25 |
2000 |
|||
DUMP: Date of |
this |
level 0 dump: |
Thu |
Sep |
7 |
16:33:25 2000 |
|
DUMP: Date |
this dump completed: |
Thu |
Sep |
7 |
16:34:12 2000 |
||
DUMP: Average transfer rate: 609 |
KB/s |
|
|
||||
DUMP: DUMP |
IS DONE |
|
|
|
|
|
|
You can schedule backup dumps using cron, or you can perform them manually. When backing up your system, use the backup method described in Table 18-2. This enables you to use a combination of full and incremental backups.
If something happens, such as a disk failure requiring you to restore the filesystem, you can use the restore application to restore your “dumped” data. To restore an entire filesystem, mount the partition you wish to restore using this command:
mount /dev/hdax /restored
With the correct tape in the tape drive, you can restore the saved, full backup to the drive mounted at /restore. You need to change to the destination directory. Then you use the restore program:
cd /restore
restore rf /dev/ftape
This restores the entire dump archive to the current directory, which is /restore from the tape /dev/ftape. You need to make sure that /etc/fstab reflects any drive mountings in the filesystem changes.
Alternatively, if you only need to restore a few files or a directory, you can enter the interactive mode of the restore program. From here, you have commands such as add, ls, and help. To enter the interactive mode, use the following command:
restore if /dev/ftape
This mode enables you to read and move through the archive on the tape to select the files you need to restore. If you only need to restore a specific file, use the
–x filename option to indicate the name of the file. You will need to specify the full path of the file and not just the name. If no filename argument is given to –x, the entire root filesystem will be restored.
KBackup
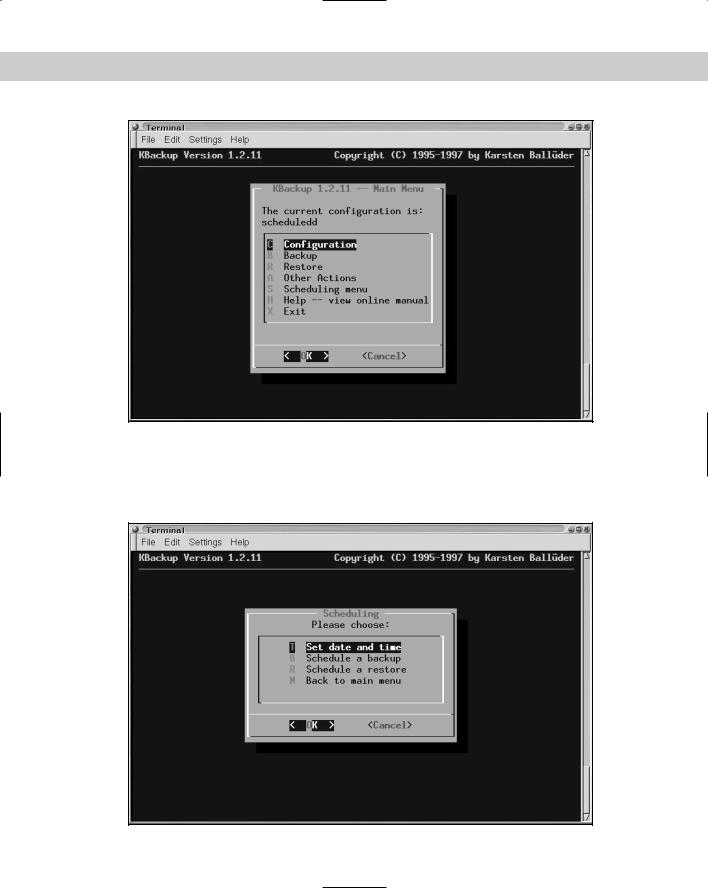
For you more graphical types, KBackup employs a graphical-like interface using a menu system. You can see from Figure 18-1 that its main menu screen includes the general topics needed for a complete package.
KBackup is packaged as a Debian package, so installing it is simple with dselect. Once installed, you’re ready to run it. Make sure that your backup device is available to the system. This program backs up files using afio or tar to any writable device. KBackup also includes other features, such as compression and encryption.
386 Part IV Maintenance and Upgrade
Figure 18-1: The main menu of KBackup
One special aspect of KBackup is its capability to schedule backups and restores (see Figure 18-2). This built-in configurable automation is unique to KBackup. Many other utilities need to use cron for their automation.
Figure 18-2: Use the menus to schedule the backups and restores.

Chapter 18 Backups 387
mirrordir
When you want to mirror drives, you want a utility like mirrordir. This application enables you to make mirrored copies of directories and drives. The advantage to a mirrored drive is that it lets you speed the restoration of a failed drive on the system. In a matter of minutes, you can have everything back up and running with minimal data loss.
mirrordir comes with a collection of other applications that perform different functions when installed. Using dselect, search on mirrordir to find and install the package. Once you have it installed, you’re ready to begin implementing mirrordir.
The following list explains the supporting applications that come with mirrordir:
pslogin is a secure, remote TCP login alternative to ssh (secure shell).
forward-socket performs arbitrary TCP socket forwarding over a secure channel.
copydir and mirrordir copy or mirror a directory tree and its contents by updating only the changes locally, by FTP, or over a secure TCP connection.
recursdir moves through a local or remote directory to find files, execute a command, or create a tar file out of the files it finds.
To use mirrordir to make a clone of a drive or directory requires a destination. Let’s say that you have a second drive or additional partition in your computer. The first step to making a mirror is creating an area where the drive or partition can be mounted. As root, use the following commands:
|
mkdir -p /mirror |
|
mount /dev/hdx /mirror |
Tip |
You can also use mirrordir to mirror over a network. Any device or host that can |
|
be mounted into the source’s filesystem can mirror to the remote host. |
|
Here, a mount point directory is created to mount the destination (/dev/hdb1) for |
|
the mirrored data. Then the drive is mounted to that directory. The filesystem now |
|
has access to the other drive, and you are ready to perform the mirroring. Enter the |
|
following to start mirroring the entire system: |
|
mirrordir / /mirror |
|
This makes a mirror image of all the files in the filesystem, and is equivalent to a full |
|
backup. Because your intention of creating a mirror may not be to create a dupli- |
|
cate of the original drive, you may want to modify these instructions a bit. Instead |
|
of making a copy of the entire drive, you may want to only include critical data, |
|
such as data created in the /home directory. You can then create a script to perform |
|
the step needed to make the mirror. This is how you can create your script. |

388 Part IV Maintenance and Upgrade
># vi /usr/local/sbin/mirror.sh
#!/bin/sh
#
# Creates a mirror image of the /home directory
#
/bin/mount /dev/hdb1 /mirror/home /usr/bin/mirrordir /home /mirror/home /bin/umount /mirror/home
This script mounts the drive into the filesystem, makes the mirror, and then removes the drive from the filesystem. Note that you must create /mirror/home before mounting for the first time. From here on, you can run this script to make the mirror or include it with cron’s jobs.
You may have critical data on one system that needs to be backed up hourly to ensure that minimal data is lost. Performing this task manually is not feasible. For cron to run this script automatically every hour, you need to add a line such as the following to /etc/crontab:
0 * * * * /usr/sbin/mirror.sh
Every hour, cron runs this script to make a mirror of the /home directory. If you find that you need other directories mirrored, just add the commands to the script and cron does the rest.
Tip Using mirrordir to quickly make a copy of vital data and then using dump to make a backup of that data is a great combination for a backup plan.
Taper
Another backup utility that uses a graphical menu is Taper. This application does not have all the scheduling traits that KBackup has, but it still offers an extensible menu (as seen in Figure 18-3). This menu enables you to perform backups and restores as well as to verify the contents of a tape.
Another characteristic available in this tool is the utilities for testing tapes. You can make, erase, and reindex tapes, as well as recover modules. The scripts that Taper uses make the backups behind the scenes.

Chapter 18 Backups 389
Figure 18-3: Taper’s extensively configurable interface
tar
One of the most commonly used applications to create simple backups is tar. This program does more than just backups; you may be familiar with it because many programs are packaged using this tool. Using tar to create a backup is no different than using it to package a program. Using it to create full backups is very simple.
Note When tar receives a directory name to archive, it archives the total contents for that directory.
To perform a full backup of the filesystem (/) and save it to /dev/device, issue:
tar cvf /dev/device /
Performing an incremental backup is a little more involved. You must distinguish the modified files before backing them up. Here is an example command for accomplishing an incremental backup:
tar cvf - ‘find / -mtime -1 ! -type d’ > /dev/device

390 Part IV Maintenance and Upgrade
find sorts out the filenames based on the modification date as indicated by –mtime -1 (changed in the last hour) and excludes all directory names; tar then takes the modified files and archives them to the specified device.
tar has a number of additional options. It is a highly flexible and useful tool to keep in your arsenal.
Restoring files and directories from tar backups is as easy as creating them. To restore the /home directory from a tape, insert the tape into the tape drive and execute a command like this:
tar xvf /dev/ftape /home
You restore individual files by specifying the name of the file in addition to the path the file resides in. If the contents of the tape are in question, you can list the contents of the backup using these options with tar:
tar tvf /dev/ftape
This gives you the contents of the tape and points out the path of any files that the tape contains. tar also includes other options to more closely control the tape device, compression, and many other attributes.
Creating a backup using a CD-ROM
CD-ROMs present an unusual dilemma. Most CD-ROMs can be written to only once, so you only have one shot at making it work. This means that you must prepare the data for the CD before writing it. To accomplish this task, you need space on a hard drive for the data (approximately 700MB). You’ll also need to install two programs: mkisofs and cdrecord. Both are available through deselect. The first program makes images for placement on CD-ROMs. It takes all the data you want on the CD-ROM and turns it into a file using this command:
mkisofs -o /tmp/mydata.cd /home/jo/mydata
After mkisofs creates the image from the data files, you see the statistics from the file creation. Ultimately, it tells you the size of the file. This is the bottom line. Make sure that the last line of the output (bold in the following example) is less than 650MB because that is all a CD-ROM can hold.
Total extents actually written = 126318 Total translation table size: 0
Total rockridge attributes bytes: 0 Total directory bytes: 0
Path table size(bytes): 10 Max brk space used 9024
126318 extents written (246 Mb)

Chapter 18 Backups 391
After you create the image to put on the CD-ROM, you need to send the image to the CD writer. You must know the exact location of the CD writer, which the cdrecord program can determine (as shown here using the -scanbus option):
# cdrecord -scanbus
Cdrecord 1.8.1 |
(i586-mandrake-linux-gnu) Copyright (C) |
|
1995-2000 Jörg Schilling |
||
Using libscg version ‘schily-0.1’ |
||
scsibus0: |
|
|
0,0,0 |
0) |
* |
0,1,0 |
1) |
* |
0,2,0 |
2) |
* |
0,3,0 |
3) |
* |
0,4,0 |
4) |
‘YAMAHA ‘ ‘CRW4416S ‘ ‘1.0g’ Removable CD-ROM |
0,5,0 |
5) |
* |
0,6,0 |
6) |
* |
0,7,0 |
7) |
* |
You see from the output that the desired device (YAMAHA) resides on 0,4,0. You can now send the created image to the CD writer in confidence. The following command sends the image to the desired device:
cdrecord -v speed=4 dev=0,4,0 -data /var/tmp/mydata.cd
The -v option indicates that the program should run in verbose mode. The verbose mode prints lots of information to the screen about what is happening with this burn session. This option then sets the record speed to 4. Here, you should specify the device number you discovered before. Finally, you indicate the location of the data to put on the CD.
Note When using CDRs or CDRWs, the cdrecord program will check the media for the fastest speed the media can use. If the media can only write at 2x, then cdrecord will reduce the speed option to match the speed of the media. This is especially important with today’s burner speeds.
The following output resulting from the verbose mode gives an indication of what is going on during the writing process. Any problems during the process will show up in the verbose output to the screen.
cdrecord: fifo was 0 times empty and 7734 times full, min fill was 96%. [root@drake win_d]# more /var/tmp/cdmessage.txt
Cdrecord 1.8.1 |
(i586-mandrake-linux-gnu) Copyright (C) 1995-2000 Jörg Schilling |
|
TOC Type: 1 = CD-ROM |
||
scsidev: ‘0,4,0’ |
|
|
scsibus: 0 target: 4 lun: 0 |
||
Using libscg version ‘schily-0.1’ |
||
atapi: 0 |
|
|
Device type |
: Removable CD-ROM |
|
Version |
: |
2 |
Response Format: |
2 |
|
Capabilities |
: |
SYNC |

392 Part IV Maintenance and Upgrade
Vendor_info |
: ‘YAMAHA |
‘ |
Identifikation : ‘CRW4416S |
‘ |
|
Revision |
: ‘1.0g’ |
|
Device seems to be: Generic mmc CD-RW. |
||
Using generic SCSI-3/mmc CD-R driver (mmc_cdr). |
||
Driver flags |
: SWABAUDIO |
|
FIFO size |
: 4194304 = 4096 KB |
|
Track 01: data |
246 MB |
|
Total size: |
283 MB (28:04.26) = 126320 sectors |
|
Lout start: |
283 MB (28:06/20) = 126320 sectors |
|
Current Secsize: 2048 |
|
|
ATIP info from disk: |
|
|
Current Secsize: 2048 |
|
|
ATIP info from disk: |
|
|
Indicated writing power: 5 |
||
Is not unrestricted |
|
|
Is not erasable |
|
|
ATIP start of lead in: -11689 (97:26/11) |
||
ATIP start of lead out: 336350 (74:46/50) |
||
Disk type: Long strategy type (Cyanine, AZO or similar) |
||
Manuf. index: 19 |
|
|
Manufacturer: POSTECH Corporation |
||
Blocks total: 336350 Blocks current: 336350 Blocks remaining: 210030 |
||
Starting to write CD/DVD at speed 4 in write mode for single session. |
||
Last chance to quit, starting real write in 1 seconds. |
||
Waiting for reader process to fill input buffer ... input buffer ready. Performing OPC...
Starting new track at sector: 0
Track 01: 246 of 246 MB written (fifo 100%).
Track 01: Total bytes read/written: 258699264/258699264 (126318 sectors). Writing time: 437.780s
Fixating...
Fixating time: 67.876s
cdrecord: fifo had 7895 puts and 7895 gets.
cdrecord: fifo was 0 times empty and 7734 times full, min fill was 96%.
After a successful creation of a CD-ROM, the prompt returns to the screen. You can test the CD by trying to read data from it. If you can read a couple of random files, the data is good. Now you can delete the image file you created for the CD to prevent anyone else from getting at the data.
Cross- |
To learn more about the CD writer hardware, turn to Chapter 17. |
Reference |
|
Recovering from a Crashed System
If your system ever crashes due to hardware failure, file corruption, or any other reason, you need to know how to recover your system. Often times, the only boost needed to get a system back up and running is having access to that system. Now is the time for that boot disk you saved for this system.
Chapter 18 Backups 393
Tip |
To create a boot disk using your kernel (if you made changes to your kernel), insert |
|
a blank, formatted disk in the floppy drive. Issue the following three commands as |
|
root: |
|
dd if=/vmlinuz of=/dev/fd0 |
|
rdev /dev/fd0 |
|
rdev -R /dev/fd0 1 |
|
This is the same thing that happens when you first install Debian on your com- |
|
puter and you are asked to create a boot disk. |
|
Slip the boot disk into the floppy drive and power on the computer. (Make sure that |
|
the BIOS is set to boot to the floppy first.) This disk bypasses the LILO boot infor- |
|
mation on the hard disk, but it still boots to your system. You can then fix any |
|
problems affecting LILO, the kernels, or any of the initial boot parameters. |
Rescue disk boot options
When you boot your computer using either the installation CD-ROM that comes with this book or the rescue disk you create from the Debian floppy image, you have some options at the boot prompt.
Pressing F1 lists the help keys. Pressing F3 shows the different ways you can start up using linux, ramdisk, floppy, or rescue. Loading linux starts the installation process. If you already have your system loaded, use this as a last resort. First try to use rescue and point it to the root partition, as shown here:
boot: rescue root=/dev/hdxx
This starts the filesystem and establishes a shell where you can begin to repair any mistakes made. If this doesn’t work, try booting using floppy instead. This should load a small Linux environment in which you have very limited, rudimentary access and control.
You can also start the system with a rescue disk and enter single. This takes you into single user mode. You have root access to the basic system to check the hardware, make basic tests on the system, and determine what changes you need to make to get your system back up and running.
Fixing disk problems
If something does happen to the disk filesystem, you can check out the filesystem for any errors. The e2fsck program performs this check on the disk. It scans the disk for physical errors, misplaced data, and any other problems. An equivalent program for DOS is chkdsk; for Windows, use scandisk. Here is the syntax for this command:
e2fsck [options] filesystem

394 Part IV Maintenance and Upgrade
You should always use this program on filesystems that are unmounted or mounted in read-only mode, as in the case with the root filesystem. If not, you could possibly corrupt data on the filesystem. You can use a boot floppy to start the system in single user mode, and then run this check on the filesystem disks.
Summary
Like any good Boy Scout or Girl Scout, you always want to be prepared. Being a good administrator is no different. Life can get hot in a hurry when the spotlight is on you to repair a failed disk, fix a defective system, or just find those lost fishing pictures for the boss. I hope that this chapter gives you every reason to create a backup plan for your system.
From this chapter’s examples, you should have an idea of what software to use to meet your environment’s needs. Whether you are mirroring a disk on the same machine or across the network, using a single tape drive for the entire system of machines, or making a periodic CD of just the important files, you now have a sound place to start.
Sometimes you may run into trouble starting a system because of a simple mistake, a corrupt boot loader, or something a little more serious. Save reformatting and reinstalling for later. Generally, you can recover a system before going to that extreme. At worst case, you have a backup of your system from which you can recover.

P |
A |
R |
T |
Linux Server |
V |
|
|
|
|
|
|
In This Part
Chapter 19
Security
Chapter 20
Firewall
Chapter 21
Web Server
Chapter 22
FTP Server
Chapter 23
Network Information
System
Chapter 24
File Server
Chapter 25