Games
Everyone needs time to play — what better way to take a break than with Linux? To some, gaming means taking a few minutes out of the day to play a little solitaire. To others,
it means hours spent mastering a game to do battle with multiple players. Both can find satisfaction with Linux, as it offers something for everyone.
This chapter covers the games included as Debian packages, as well as commercially sold games suited for the abilities, interests, and skill levels of various users. The games range from simple text games to highly complex, beautifully designed games with intense action.
System Considerations for Gaming
Let’s face it, the gaming industry drives the computer hardware industry. The demand for increasingly realistic games has produced sophisticated 3-D graphic cards and sound cards. Gone are the days when a game’s graphics entailed images made up of a grid of ASCII characters on the screen. Today, smooth 3-D rendering of images through hardware graphic processors and software modeling produces some of the most outstanding game play.
The result of this sophistication is the prodigious hardware requirements you must meet in order to enjoy such works of art. That means you need 3-D graphic cards, compatible sound systems, more hard drive space and system memory, and even faster processors to get the most out of a game.
Graphical interfaces
Graphical interfaces are the heart of today’s games. As developers include more graphical content with games, the attraction to those games increases. Linux has kept pace with this ever-changing technology. Currently, the Graphical Use Interface (GUI) environments consist of three primary areas: X Window System, SVGALIB, and GGI.
11C H A P T E R
In This Chapter
Setting up your system for games
Playing various games made for Debian
Playing popular commercial games ported to Linux
218 Part II Working with Debian
X Window
The X Window System, or X, is the normal graphical environment for most applications using graphical display. This environment consumes a majority of resources to manage the desktop environment, leaving less for the game itself. Game performance may suffer as a result.
The Super VGA Library
The Super VGA library interface (SVGALIB) for Linux enables games to run in their own environment. It controls both the graphics and mouse for the game application. This enables the game to run faster than in the X environment. Some games include the SVGA package, or it can be installed separately with the svgalibg1 Debian package.
Tip If you find that you don’t have mouse control when using SVGA, edit the /etc/ vga/libvga.conf file. This configures the mouse control for the SVGALIB interface.
Currently, support for this interface is lagging behind other technologies. Eventually, it may be replaced altogether by one of the newer technologies such as GGI. You can find out more about this interface at www.svgalib.org.
General Graphics Interface
The General Graphics Interface (GGI) provides an alternative to the older versions of the graphical interface — X and SVGALIB. It can actually run under the other interfaces and still provide the higher graphic performance. You can find out more about GGI at www.ggi-project.org.
You can install the libggi2 package from the CD, but be aware that this package was made from a beta snapshot. If you are serious about using GGI, get the current version from their Web site.
One specific area where graphics has a large following is in the gamming arena.
Note There is a GGI X server specially designed to take advantage of the performance that makes GGI enticing. This too comes as a Debian package. Look for the xserver-ggi package on the Debian archive.
Sound system requirements
What is a good graphical game without the sounds to go with it? For some games, such as the legendary Doom, the sound gives you hints for the games, such as where the next monster will come from. More recent examples of games providing sound along with the game would be Quake, Quake II, or Quake Arena.

Chapter 11 Games 219
As with graphic technology, sound systems are driven by the gaming industry, though to a lesser degree. Most games work with the Open Sound System (OSS), a set of drivers incorporated into the Linux kernel. A commercial version of the OSS drivers can be found at www.opensound.com. If you check the list of cards that are compatible with their drivers, you’ll see that most are supported by Linux. For more specific information about sound in Linux, go to Chapter 10.
Other system demands
As games grow in complexity, so do the demands on your system. More intricate, detailed games take up more space on the hard drive and demand more memory to run. These demands encourage gamers to upgrade to new hardware, if not entirely new systems.
Because of the way in which Linux manages its resources, Linux games usually can operate with far fewer resources than some other operating systems. Moreover, the game hardware demands have not reached the levels you might see for other operating systems such as Windows. As more games are ported to the Linux platform from the Windows platform, you might start noticing the minimum systems requirements rising as well.
Playing Debian-Packaged Games
|
Games come in all varieties. Some are remakes of popular arcade-style games, oth- |
|
ers are played using only the text console with descriptions, and still others take |
|
advantage of the full graphical capabilities of Linux. Regardless of the type of game |
|
you want to play, there is something available for everyone. |
Tip |
When you install a game, it is generally placed in the /usr/games directory. If you |
|
play games often, you may want to add the directory to your path. That way, you |
|
don’t have to enter the full path each time you want to play. |
|
A veritable smorgasbord of games awaits you, pre-packaged for Debian, and ready |
|
for you to install. The following sections classify the games as you would expect to |
|
find them in the Debian menu once the game is installed. Some of the listed games |
|
are text-based, while others are graphical. |
Note |
Many of the games are packaged in the bsdgames package on the CD. This pack- |
|
age includes games such as Adventure, Arithmetic, atc, Backgammon, Battlestar, |
|
bcd, Boggle, Caesar, Canfiled, Countmail, Cribbage, Fish, Gomoku, Hangman, |
|
Hunt, Mille, Monopoly, Morse, Number, Pig, Phantasia, Pom, ppt, Primes, Quiz, |
|
Random, Rain, Robots, Sail, Snake, Tetris, Trek, Wargames, Worm, Worms, Wump, |
|
and wtf. |

220 Part II Working with Debian
Adventure games
Adventure games existed long before graphical games. Most of these were in the form of a textual adventure. A textual adventure works by describing the environment, objects, and possible directions you can go. For instance, the game Adventure starts with the following description of your location:
You are standing at the end of a road before a small brick building. Around you is a forest. A small stream flows out of the building and down a gully.
You then respond with the text of what action you would like to take:
goto building
The game then responds with:
You are inside a building, a well house for a large spring. There are some keys on the ground here.
There is a shiny brass lamp nearby.
There is food here.
There is a bottle of water here.
You can then pick up an object, each of which provides help in completing the adventure. These textual adventure games respond to a number of text commands. Table 11-1 contains many of the adventure games packaged for Debian.
|
Table 11-1 |
|
Adventure games |
|
|
Game |
Description |
|
|
Adventure of Zork |
Text-based adventure through caves. Similar to the first versions. |
|
|
Battlestar |
Text-based |
|
|
GNOMEGNOME Hack |
Graphical version of the Hack adventure game |
|
|
Hunt the Wumpus |
Text-based adventure in search of the Wumpus |
|
|
Net Hack |
Text-based multi-player Hack game |
|
|
Phantasia |
Hack-like text game |
|
|
Rogue |
Alternative Hack game |
|
|
X NetHack |
Graphical multi-player version of Hack |
|
|

Chapter 11 Games 221
Arcade games
Many of the games that some of us grew up with in the arcade are now available for Linux, such as Space Invaders Galaga and Digger. These types of games generally consist of a 2-D graphical display, and are controlled by either the keyboard or the mouse. Table 11-2 describes some of the games packaged for Debian.
|
Table 11-2 |
|
Arcade games |
|
|
Game |
Description |
|
|
Amphetamine |
A two-dimensional scrolling adventure |
|
|
Galaga |
Linux version of the arcade game Galaga |
|
|
Gem DropX |
Match three or more gems before they all fall on top of you. |
|
|
GNOMEGNOME xbill |
Play the role of administrator to save the computer systems |
|
before Bill changes them all to Windows computers. |
|
|
Robots |
Text-based game in which you move around the screen avoiding |
|
the robots. |
|
|
Sabre |
Flight simulator |
|
|
Snake |
Text-based game in which you move around the screen picking |
|
up dollar signs ($), but avoiding the snake |
|
|
Space Invaders |
Linux version of the arcade game Space Invaders |
|
|
Star Trek |
Star Trek adventure game |
|
|
Xabuse |
A side scrolling shoot’em up game. |
|
|
Xbill |
Play the role of administrator and save the computer systems |
|
before Bill changes them all to Windows computers. |
|
|
XBlast |
A multi-player game on the lines of Bomberman. Blast your |
|
opponent with a bomb before you get blasted your self. |
|
|
XDigger |
Linux version of the Digger arcade game. Dig through the dirt to |
|
gather the jewels, but don’t get caught by the monster. |
|
|
XEvil |
A bloody two-dimensional adventure game |
|
|
XKoules |
Push the balls into the wall without hitting it yourself. |
|
|
XPilot |
A multi-player tactical maneuvering game where you blast the |
|
opponents to score points. |
|
|
XScavenger |
Old-style 2-D arcade game in which you pick up gems while |
|
avoiding capture |
|
|
Continued

222 Part II Working with Debian
|
Table 11-2 (continued) |
|
|
Game |
Description |
|
|
XSoldier |
2-D space shooter |
|
|
XTux |
Run the penguin around killing rabbits |
|
|
Xbat |
Scrolling Raptor-like game |
|
|
Xboing |
Advanced pong-like game |
|
|
Xdemineur |
Minesweeper-like game |
|
|
Xjump |
Jump to the next platform before the platform leaves the area. |
|
|
Xkobo |
2-D space shooting game |
|
|
Xoids |
Linux version of the Asteroids arcade game |
|
|
A few of these arcade games are similar to some of the Windows arcade games, such as Minesweeper. Try a few out and see which ones you like.
Board games
In spite of today’s sophisticated software, nothing can replace a classic board game like backgammon or chess. Many of the classic board games are available for Linux. Table 11-3 describes some of the board games packaged for Debian.
|
Table 11-3 |
|
Board games |
|
|
Game |
Description |
|
|
Backgammon |
Text-based backgammon |
|
|
GNOMEGNOME Gyahtzee |
The game of dice |
|
|
GNOMEGNOME Iagno |
Othello-like game |
|
|
GNOMEGNOME Mahjongg |
Tile matching game |
|
|
Go |
The classic Japanese game |
|
|
Monopoly |
Text-based Monopoly |
|
|
Penguine Taipei |
Tile matching game with editor (same as Mahjongg) |
|
|
Pente |
Text-based Pente board |
|
|
Xgnuchess |
X Window Chess game |
|
|
Xarchon |
Chess-like board with different rules |
|
|
Xboard |
X Chess board (same as Xgnuchess) |
|
|

Chapter 11 Games 223
Game |
Description |
|
|
Xgammon |
X Window backgammon |
|
|
Xbattle |
A multi-player military game of conquest. |
|
|
Xvier |
A connecting game |
|
|
Xchain |
Chain reaction game in which squares react to one another |
|
|
If you like the classic board games, something in this list will surely appeal to you.
Card games
If you enjoy card games, a slew of them are available for Linux. Some are text-based, while others are graphical. Whether you want to brush up on the rules for a game or improve your skill, these card games can be a nice diversion for a few minutes before returning to work. Table 11-4 describes some of the card games packaged for Debian.
|
Table 11-4 |
|
Debian card games |
|
|
Game |
Description |
|
|
Canfield |
Text-based Canfield |
|
|
Cribbage |
Text-based Cribbage |
|
|
GNOME Freecell |
Graphical Freecell solitaire |
|
|
GNOME Solitaire Games |
Includes 30 graphical solitaire games |
|
|
Go Fish |
Text-based game of Go Fish |
|
|
Mille Bournes |
Text-based version of the Mille Bournes card game |
|
|
Penguin Freecell |
Graphical Freecell solitaire |
|
|
Penguin Golf |
Graphical Golf solitaire |
|
|
Penguin Solitaire |
Graphical traditional Klondike solitaire |
|
|
Spider |
Graphical Spider solitaire |
|
|
X Solitaire |
Another graphical traditional solitaire |
|
|
Xskat |
A German card game defined by “Skatordnung.” |
|
|
Xmille |
Graphical versions of the Mille Bourne card game |
|
|
Xpatience |
Two-deck version of solitaire |
|
|
Xmahjongg |
Tile matching game |
|
|

224 Part II Working with Debian
The most popular card game is Klondike solitaire. Playing solitaire with a deck of cards just doesn’t seem as much fun after you’ve played it on a computer.
Simulation games
The simulation games are a little different from the classic, arcade, or card games. These games let you control various environments, such as the growth of a city (see LinCity) or the control tower of a busy airport (see Air Traffic Controller). Table 11-5 describes some of the simulation games packaged for Debian.
|
Table 11-5 |
|
Simulation games |
|
|
Game |
Description |
|
|
Air Traffic Controller |
Text-based game in which you are the air traffic controller |
|
|
LinCity |
Linux version of the SimCity game, in which you plan the |
|
expansion and growth of a city |
|
|
Sail |
Text-based sailing adventure |
|
|
Xlife |
A cellular-automation laboratory |
|
|
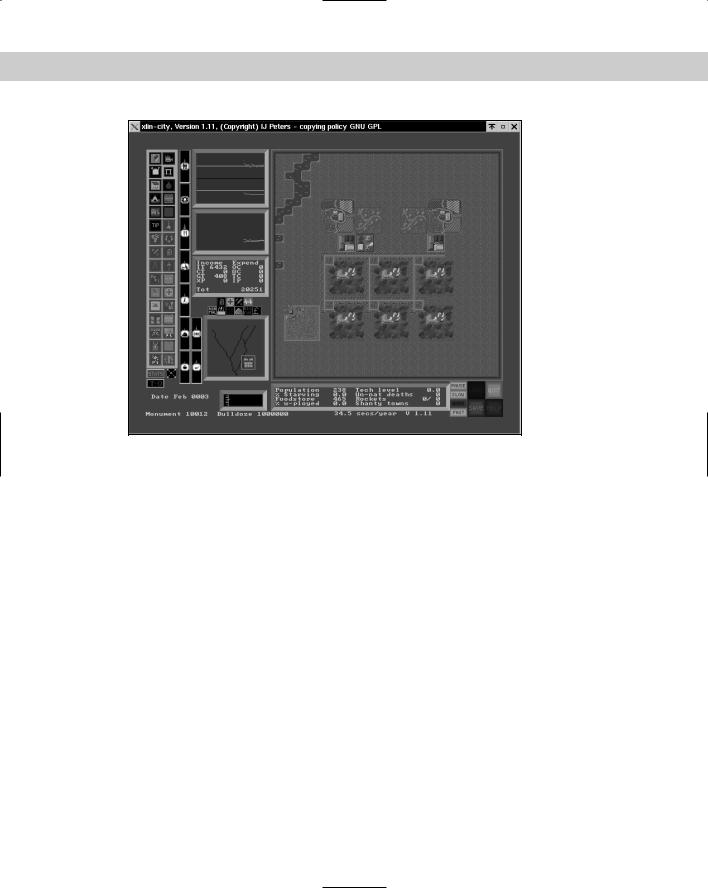
LinCity
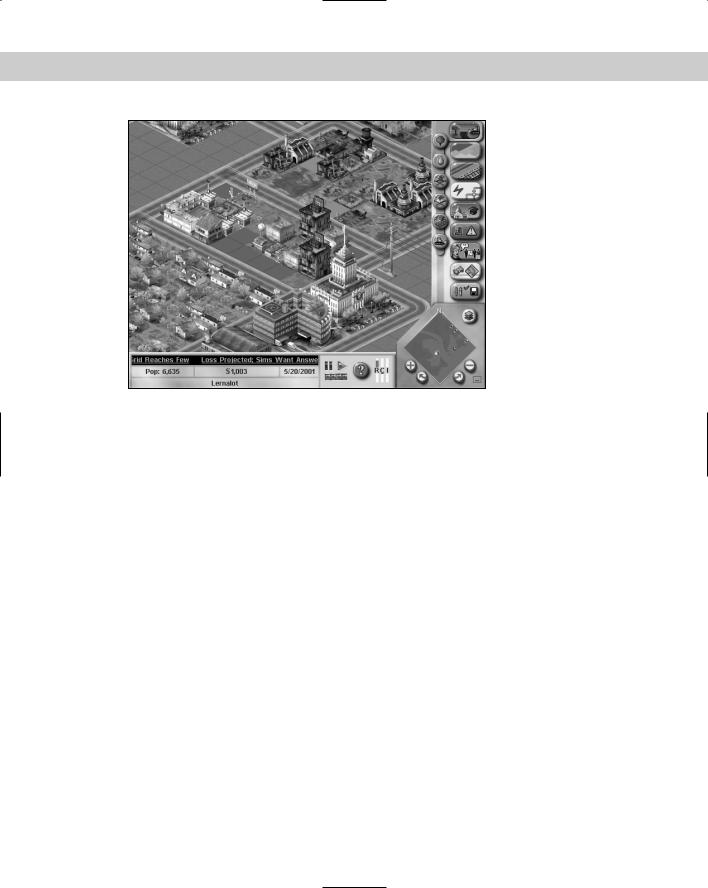
LinCity is a popular simulation game. It is similar to SimCity. Once installed, you can start this game from the menu or from the command line (with /usr/games/ xlincity). Either way, you end up with a screen interface that looks like the one shown in Figure 11-1.
When you start LinCity for the first time, it asks you to create a directory to save your games. You can then read up on how to play the game. You develop your city by adding roads, markets, ore mines, communes, and so on. These elements help the city grow. Following are some tips for playing the game:
Right-click a button to read a description about it before selecting it.
Use the Tips button on the left sidebar to create an area for trash.
Food is important to the community. If you run out of food, people will either move out of the community or die. Have farms create the food or import it.
Mills can create food, but the people running the mills also consume a lot of it.
Chapter 11 Games 225
Figure 11-1: With LinCity, you can develop a virtual community.
Strategy games
If you need a real challenge, play a game of chess against the computer; and not on a single-layer board, but on a three-tiered board, as in 3-D chess. Other strategy games let you build a civilization or battle it out in space. Table 11-6 describes some of the strategy games packaged for Debian.
|
Table 11-6 |
|
Strategy games |
|
|
Game |
Description |
|
|
3D Chess |
Play chess on three levels at once. |
|
|
Batalla Naval |
Multi-player battleship-like game |
|
|
Craft |
A real-time strategy based on a version of WarCraft |
|
|
Freeciv |
A free client/server version of the Civilization game |
|
|
XshipWars |
Space battle game with Star Trek ships |
|
|
Xconq |
Civilization-like game |
|
|
Xlaby |
Complete the maze by tagging the colored squares with your mouse |
|
|
226 Part II Working with Debian
Xlaby
If you like maze puzzles, then you’ll like this fun little game. When you start this game from the Debian menu, a maze appears with your mouse “caught” in the maze. The cursor cannot cross the line of the maze, so you can’t cheat. You must follow the maze to reach the colored dots in a particular order. When you get to the first dot that disappears, go on to the next dot that disappears. After you reach the last dot, the maze is completed and you can use it again.
|
Multi-player games |
||
|
While playing games against the computer can be loads of fun, the fun may not last |
||
|
long as you master the game. However, when you play against other people of like |
||
|
skill, the challenge grows along with the game play. |
||
|
This is where networked, multi-player games enter the picture. There is nothing like |
||
|
playing games with some friends on a network. Not only do you have the challenge |
||
|
of competing against a human, but there is the aspect of the friendly bantering. |
||
|
Table 11-7 lists some of the games available that enable multiple players (some of |
||
|
which are commercial). Some of these have two separate components: a client and |
||
|
a server. Each runs independently, with the exception that in some cases, there |
||
|
must be a server running for the client to connect to. If one doesn’t exist, you can’t |
||
|
use the client to play. |
||
Cross- |
|
Before playing games on a network, you need to have a network up and running. |
|
Reference |
Turn to Chapter 5 to learn how to setup a networking chapter and get the network |
||
|
|
||
|
|
running. |
|
|
|
|
|
|
|
|
Table 11-7 |
|
|
|
Multi-player games |
|
|
|
|
|
|
Game |
Description |
|
|
|
|
|
|
Lxdoom |
First person shooter from the classic Doom game |
|
|
|
|
|
|
Quake |
First person shooter game |
|
|
|
|
|
|
FreeCiv |
Free variant of Civilization |
|
|
|
|
|
|
XshipWars |
Space battle using Star Trek ships |
|
|
|
|
|
|
Batalla Naval |
Battleship-like game played with up to eight players |
|
|
|
|
|
|
Chess |
Multi-player chess |
|
|
|
|
|
|
Net Hack |
Network version of the Hack adventure game |
|
|
|
|

Chapter 11 Games 227
FreeCiv
In this popular game, you develop a civilization with the goal of conquering the world. FreeCiv is a client/server game, although you can play in the single-player mode. The client comes in two versions: Gtk and Xaw3d. Both client versions work in the X environment, but if I had to choose between them, I’d go with the Gtk version because of the interface. Figure 11-2 shows a game in progress using the Gtk client version.
Figure 11-2: Viewing the resource associated with a community in FreeCiv
Once installed, the first step in playing FreeCiv is starting the server. The server appears in a text terminal. As people join the games, their names show up on the terminal and in each client’s text box. Once everyone has joined the server, type start in the server console for the game to begin.
From the client console, the flashing character indicates which player is ready for instructions to move, build, or attack. Clicking on a city shows what the city is producing and lets you control what gets built in the queue.
Quake
This is one of the most popular first-person shooter games of all time. Two forms of this game are included among the Debian packages. One can be played as a single
228 Part II Working with Debian
player fighting monsters. The other is the Quakeworld server with clients. The server gets used when playing against multiple people in Quakeworld. Once installed, both versions can be found in /usr/games — with the first listed starting with quake, and the second listed starting with qw.
Note There are external configuration files for the quake, quakeworld, server and quakeworld client applications. If these files do not exist, the default settings apply. In order for the game to actually work, you need a commercial CD for the data files.
Running the server for a multi-player session, first start the server (/etc/games/ qw-server) from a separate virtual terminal, and then run the quakeworld client for the video driver you wish to use — 3dfx, ggi, or svga. When the screen opens for the client, press the keyboard button with the tilde (~) on it to enter the command shell for Quake. Type connect hostname at the console, where hostname is either localhost on the same machine as the server, the host name, or the IP address for the server. Pressing the tilde key again closes the command console. You should now be connected and able to play Quake in a multi-player session. Both versions only come with the first level, which is the shareware version. You can find more information about this game and other versions at www.linuxgames.com/quake.
GNOME games
Most, if not all, of the games listed in Table 11-8 are also included among the Debian packaged games. These games are both graphical and easy to control. When installed, they show up in main GNOME menu under Games. As with the other games, these are installed in /usr/games by default, and can alternatively be launched from the command line.
|
Table 11-8 |
|
GNOME games |
|
|
Game |
Description |
|
|
Freeciv |
Free variant of the Civilization game (client only) |
|
|
GNOME-Stone |
A Digger-like game |
|
|
Freecell |
Freecell solitaire game |
|
|
AisleRiot |
Solitaire card game |
|
|
GNOMEMines |
Minesweeper game |
|
|
Mahjongg |
Tile matching game |
|
|
Same GNOME |
Match marbles of the same color |
|
|

Chapter 11 Games 229
Game |
Description |
|
|
Gnibbles |
Send the snake to get the diamond |
|
|
GNOMEtris |
Tetris-like game |
|
|
Gnotravex |
A puzzle of matching numbered squares |
|
|
Gtali |
Othello-like game |
|
|
GnobotsII |
Cause robots to collide as they follow you around the room |
|
|
Iagno |
Othello-like game of flipping chips |
|
|
Gataxx |
Conquer the board with your colored chip |
|
|
GNOME xBill |
Play the role of Administrator and save the computer system |
|
before Bill changes them all to Windows computers. |
|
|
GNOME Batalla Naval |
Multi-player battleship-like game |
|
|
GNOMEhack |
Graphical hack game |
|
|
The special thing about GNOME games is that they all work well with the GNOME desktop environment specifically as opposed to KDE games. In addition, these games will show up in the GNOME games menu.
Playing Commercial Games
Most of the popular computer games you find in a game store are produced by independent software companies for the Windows platform. Some of these games are now being ported to the Linux platform by Loki Games (www.lokigames.com). Table 11-9 lists and describes these games.
Because of the commercial effort behind them and their popularity among the Windows gamers, these games are beginning to find their way into the Linux world. Now you can use the Linux platform, with all its stability, to play these high-quality games.
Even though you can find a number of excellent and quality games among the Debian package archives and for Linux in general, the commercial games tend to generate a larger following. In my opinion, the larger following of the commercial games is due to the quality of the graphics and the entertainment factor of the game. Many of the free open source games have a tremendous entertainment value; however, the interface may not have the same polished quality that the commercial competitor maintains.

230 Part II Working with Debian
|
Table 11-9 |
|
Loki games |
|
|
Game |
Description |
|
|
Civilization: Call to Power |
A turn-based game in which you build an empire |
|
through history |
|
|
Myth II: Soulblighter |
A 3-D strategy game in which you command an army to |
|
defeat the Soulblighter’s hordes. |
|
|
Railroad Tycoon II |
Build a railroad empire across America, just as they did |
|
in the 1800s |
|
|
Eric’s Ultimate Solitaire |
Play one of 23 stimulating solitaire card games |
|
|
Heretic II |
Using your magic, help save the world by finding the |
|
cure to the plague. |
|
|
Heroes of Might and Magic III |
Lead a battle against the common foe by organizing |
|
your legions of sorcerers, knights, and beasts. |
|
|
Quake III Arena |
The third generation of the greatest first-person shooter, |
|
where slaughter is the name of the game. |
|
|
Heavy Gear II |
Control a heavily armored robot-like machine as you |
|
infiltrate, recon, and defeat the enemy. |
|
|
SimCity 3000 Unlimited |
As the city official, your job is to plan the growth of a city |
|
over the years by developing zones, roads, and utilities. |
|
|
Soldier of Fortune |
As a soldier for hire, you battle for money and for keeps |
|
in this shooter game. |
|
|
Sid Meier’s Alpha Centari with |
In this game, you are one of several civilizations that has |
the Alien Crossfire expansion |
crash-landed on an alien world. Dominate this world |
|
with your power or diplomacy in this turn-based game. |
|
|
Descent 3 |
Fly your ship in this three-dimensional world, destroying |
|
the robot ships along the way. |
|
|
MindRover |
Build and design roving robots to seek out and destroy |
|
the others before yours get destroyed. |
|
|
Unreal Tournament |
Kill or be killed in this first-person action game. |
|
Designed for multi-player teams. |
|
|
Kohan: Immortal Sovereigns |
A real-time strategy game in which you lead great |
|
armies to fulfill your destiny. |
|
|
Most of these games can be /played with other gamers over a network or on the Internet. This aspect of allowing multiple people to play in the games only adds to their appeal. With commercial versions of these games now available, you can play the same games against and with people using Windows.

Chapter 11 Games 231
Cross-
Reference
If you have a favorite game that only exists in the Windows world, look into using wine in order to play it on your Linux platform. You can find out more about wine in Chapter 7, or go to the Web site www.winehq.com for more information. One game that Linux users use wine to play is StarCraft.
Highlighted in the following sections are two of the more popular commercial games, including the system requirements necessary to play them. This will give you an idea of two very different commercial games. SimCity 3000 lets you act as a city planner, managing the city’s resources as it grows. The other game is a fast action shoot’em up type of game. Both let you play with other people over the Internet.
SimCity 3000 Unlimited
SimCity 3000 is a simulator game in which you manage the development of a city as it grows. You have to be concerned with utilities such as power, water, and trash disposal. In addition to the infrastructure of the city, including roads, highways, subways and railways, you must also manage the economics by balancing residential, commercial, and industrial zoning.
In order to run the game successfully, you need to meet the following system requirements:
Linux Kernel — 2.2.x and glibc-2.1 (both come with Debian 2.2)
Processor — Pentium 233 MHz or faster (300 MHz Pentium II processor recommended)
Video — 4MB graphics card, XFree86 3.3.5 or higher, and 16-bit color depth
CD-ROM — 8x CD-ROM drive (600 KB/s sustained transfer rate)
RAM — 32MB required; 64MB recommended
Sound — 16-bit sound card and OSS-compatible (it works without sound, but isn’t as much fun)
Hard disk — 230MB free hard disk space plus space for saved games
The game comes compiled because the source code is not public. Follow the instructions that accompany the game to get it installed on your system and running. Figure 11-3 shows the game in action. The level of detail in the graphics can be adjusted to show animation. The right side enables control for adding zones, roads, utilities, and such.
232 Part II Working with Debian
Figure 11-3: Watching the neighborhood develop in SimCity 3000
If you want to try the game before purchasing it, you can download a demo version from the Web site at www.lokigames.com/products/sc3k.
Unreal Tournament
If unbelievable action combined with team play is what you have in mind, you need Unreal Tournament. This is one of the fastest action shoot-em-up games around. Enter rooms, pick up weapons, and blast anything that moves (except for teammates).
You’ll need to meet the following minimum requirements in order to get the most out of the game:
Linux Kernel — 2.2.x and glibc-2.1
Processor — Pentium II with 3-D accelerator card
Video — Video card capable of 640×480 resolution, XFree86 version 3.3.5 or newer at 16-bit color
RAM — 64MB required; 128MB recommended
Sound — OSS-compatible sound card
Hard disk — Minimum 550MB free space

Chapter 11 Games 233
All the software requirements are met with Debian 2.2, so the only thing you need to worry about is your hardware. Follow the instructions that come with the software for installing the game and running it. Once you have it installed and running, the fun begins. Being a multi-player game, you can play online or via a network.
This game can be controlled by keyboard, keyboard and mouse, or joystick.
Summary
Everyone likes to have fun. Although Linux is tough enough to be used as a robust server, it can also be used for entertainment. Some of that entertainment can blow your socks off with its high-powered graphics.
If none of the games described in this chapter really appeal to you, you might check out some of the public software sites:
Linux Games (www.linuxgames.com) — The site includes game news, howto’s, and all types of games.
Download.com (www.download.com) — A public site for all platforms, including Linux. Contains more than just games.
Tucows (www.tucows.com) — A general repository for publicly available programs, including games.

Administering
Linux
P A R T
III
In This Part
Chapter 12
System
Administration
Chapter 13
Scripting
Chapter 14
Shells
Chapter 15
Linux Kernel

System
Administration
You work happily along as a client Linux/UNIX user on a network, oblivious to the hard work of the system administrator who’s keeping the system working at peak performance. A large system may have several people working on
different aspects of the administration — accounts, daemon services, network traffic, and more. If you have only one computer running Linux, then you are the system administrator as well as the end user.
The responsibilities of the system administrator cover many aspects of the Linux system, so this chapter describes the scope of these responsibilities. This chapter also offers instructions for some of the basic duties such as setting up accounts, file permissions, and portions of system monitoring. I reference other chapters in this book here in an effort to cover those duties in more depth.
The Roles of the System
Administrator
The success of a stable, secure, and efficient computer system relies on the system administrator to maintain it. It’s a tough job maintaining, tweaking, and updating the system daily to keep it in peak performance.
The occupation of system administrator can be a thankless job of managing the computer system while offering friendly support to the end user. This is a delicate task of diplomacy.
Following is a list of general duties that an administrator (admin) performs. Some of these are covered in this chapter; others are included in other chapters. This should give you an idea of the scope of the administrator’s job — which encompasses a lot.
12C H A P T E R
In This Chapter
Learning the basics of being an administrator
Understanding the root account’s responsibilities
Setting permissions affecting files and directories
Limiting user space with quotas
Monitoring the system

238 Part III Administering Linux
Starting and shutting down (Chapter 3)
This is not a task you want available to just anyone who has an account on the system. For an individual machine or a single user, it can be more convenient. However, when you have processes and services that are expected to be running, limiting this responsibility is mandatory.
User accounts (this chapter)
Creating accounts is another privileged activity. Many systems have special policies for the accounts; therefore, they need an administrator to dole them out appropriately. The wrong privileges in the right hands can turn into a hacker’s paradise, thus spelling disaster for the administrator or even for the system.
Security (Chapter 19)
The most secure system is one that only one person uses. That isn’t practical, so limiting the numbers of accounts that have access to the more powerful functions is the next best solution.
Monitoring the system resources (this chapter)
The system requires constant monitoring. Oftentimes, you can do this through scripts or programs, but occasions arise when someone must intervene. Disks fill with data, programs run away chewing up processor time, and properly running systems get overworked by overloaded use. It’s the administrator’s job to keep it all running.
Automating tasks (Chapter 14)
This is a crucial duty. It involves creating scripts and programs to take over the mundane tasks in an effort to produce more reliability, repeatability, and regularity. These tasks can range from backing up files to searching through log files for anomalies — turning hours of work entering multiple commands and reviewing the results into minutes of issuing only a few simple commands that produce only the results you preprogrammed.
System configuration (Chapters 5, 6, 9, 19, 23, 24, and 25)
Most all of the aspects of the daemons — such as printing, networking, e-mail, and so on — need some configuration for their environment and purpose. Most of these applications require special account privileges to run like those that come with root. These configuration files range in complexity from a simple test file with a dozen lines of information to text files that contain hundreds of lines.
Filesystems and disk drives (Chapter 3)
The filesystem and, therefore, the disk drives are rudimentary to the whole operating system. Should something happen to the data on the drives, this can affect the performance (not to mention the function) of the system.
Someone must watch the disk drives to make sure there remains room for the data. Set up quotas for accounts to prevent one person from using all the available space.

Chapter 12 System Administration 239
Backups and restores (Chapter 18)
Nothing can take the place of a good backup when data is lost. Hundreds, thousands, and even millions of dollars have been saved because the administrator has faithfully backed up the valuable data. This duty, which can be automated fully, must be a priority for any administrator.
Printing services (Chapter 17)
Any printing services that come through the network fall on the administrator’s shoulders — from setting up the print spooling queues to configuring the printers to even changing the toner cartridges in the printers. I also have seen administrators taking charge of ordering, storing, and replenishing printer paper.
Network management (Chapter 5)
When one or more computers are connected to communicate with one another, you have a network. Someone must monitor that network to keep it in peak performance. Included in this category are firewalls, routing, and Internet access. This is no small task for the administrator.
Mail/Web/and other services (Chapters 20, 21, 22, 23, 24, and 25)
Each machine may function as a server, providing such services as hosting Web pages, sending and receiving e-mail as a central post office, or acting as a repository for a database. The size, demand, and shear volume of usage determine the number of services on one machine. Again, the administrator must manage the load on the computers.
From this list, you can begin to get some idea of the scope of an administrator’s responsibilities. Yes, in an environment of hundreds of people working on workstations accessing servers of all types, the administrator’s job may be spread over a few people. However, when there is only one machine — yours — then these duties fall to you. You get to make all the decisions concerning your machine.
The System Administrator
and the Root Account
When you install Linux on your computer, you are forced to enter a password for the root account. All Linux systems have a root account, which has full rights to all services, functions, and controls. From that account, you can do anything you want — or don’t want. Along with this power comes the accompanying danger — of accidentally replacing a crucial configuration file, deleting needed files, misconfig-
uring systems, and so on. You can see that giving everyone the root password is not the best thing to do for the system. Because of this power, root access should always be limited to the local machine console.
240 Part III Administering Linux
Using the su command
As the administrator, working along as a normal user of a system, you need the same privileges as root from time to time. One approach is to log out from the normal account, and then log back in as the root account. This takes time and disturbs any processes you may have running at the time. Or, you can change identities from the normal user into a superuser with the su command. This enables you to work along in your own account. When you need to perform a task at a higher level, you just issue the su command. This program still uses the root password and offers the same power as the root account, but there is no need to log out of your current terminal and then log back in as root.
Tip I strongly suggest that you get in the habit of using the full path of /bin/su for the superuser privileges. It prevents the implementation of any unauthorized versions of this program, which can compromise the security of the system. You can find more on security in Chapter 19.
You can use this application in several ways. Employing the command without any options logs the person in as the superuser (assuming they know the password). All attempts to use the su command are logged into the /var/log/auth.log file as are all other logon attempts. Here is the syntax for the su command:
su [OPTS] [-] [username [ARGS]]
The su command has more uses than just logging in as the superuser. Adding an account name to the end enables you to log in as that user. This finds its usefulness when a new account is added because you can employ the new name to verify that the account is working. Adding the hyphen (-) between the command and the username requests that the shell assigned to the account be used instead of the current shell.
Using the -c option enables you to temporarily log in as the other account, execute the indicated command, and then return to your original account. Suppose you are logged in as yourself — a regular, unprivileged user. You need to briefly check on the status of the network card in the computer. You can use the su command to log in as root long enough to execute the one command, or you can log in as another user to list the contents of his or her directories. Here are the two examples and the corresponding results:
$ su -c ifconfig |
|
|
Password: |
|
|
lo |
Link encap:Local Loopback |
|
|
inet addr:127.0.0.1 |
Mask:255.0.0.0 |
|
UP LOOPBACK RUNNING |
MTU:3924 Metric:1 |
RX packets:534 errors:0 dropped:0 overruns:0 frame:0 TX packets:534 errors:0 dropped:0 overruns:0
carrier:0
collisions:0 txqueuelen:0
$

Chapter 12 System Administration 241
and
$ su -c ‘ls -l /home/jo’ jo
Password:
docs pics newfiles programs
$
These examples show logging in as the other person long enough to execute the command and returning to the original account. Notice that the passwords don’t get echoed back to the screen. To better prove this, I use the whoami command to display the different account identifications:
$ whoami steve
$ su -c whoami
Password: root
$ su -c whoami jo
Password: jo
$ whoiami steve
$
You can see from this listing that each time the su command runs the whoami command to identify the user, it returns a different name based on who is logging in.
Using the sudo command
If you want some people to only have access to certain programs, then implement the sudo command. (It can be installed using apt-get install sudo.) Some of the administrative duties can be delegated to other privileged users. Give those people access to run only those programs necessary to perform their duties. The syntax looks like this:
sudo -V | -h | -L | -l | -v | -H | [-b] [-p prompt] [-u username/#uid] -s | <command>
This may look a little confusing, but once you set it up it’s really easy to use. Basically, sudo restricts only one command option at a time. Table 12-1 lists some of the available options.

242 Part III Administering Linux
|
Table 12-1 |
|
Options used with Sudo |
|
|
Command |
Description |
|
|
-l |
Lists the commands allowed and forbidden to the user |
-L |
Lists the commands and a short description of the allowed and forbidden |
|
commands |
|
|
-h |
Prints a help message and exits |
-H |
Sets the HOME environment variable to the home directory of the user |
|
logging in |
|
|
-v |
Validates the timestamp associated with the user. The timestamp enables |
|
the user to perform commands without needing a password (for a given |
|
period of time). This option does not execute any commands, but it does |
|
prompt for the password (if required) to extend the timestamp period. |
|
|
-V |
Prints the version and exits |
|
|
-u user |
Specifies that the command should be run by another user account, other |
|
than root |
|
|
You can find a complete list of the options through the online documentation. You must edit the configuration file, located in /etc/sudoers, using visudo. This file contains all the users and the respective applications, commands, and features that they are allowed to access.
Administering and Setting up Accounts
Accounts give users access to use the system, so everyone needs one. If you have a large company, this can take quite a bit of time monitoring, setting up new accounts, and removing old ones. On the other hand, just one machine can demand a little account management from time to time. The following sections cover what you need to know to administer accounts.
The passwd file
The passwd file contains all the account information — well most of it, but I’ll get to that in a minute. This file is referenced at the time of login; it verifies the account name, the account password, the home directory path, and the default shell for the account. It can also contain personal information about the account, such as the user’s full name, address, and other information for identification purposes by the administrator. Here is an example of the contents of the passwd file.

Chapter 12 System Administration 243
root:x:0:0:root:/root:/bin/bash
daemon:x:1:1:daemon:/usr/sbin:/bin/sh
bin:x:2:2:bin:/bin:/bin/sh
sys:x:3:3:sys:/dev:/bin/sh
.
.
.
jake:x:1003:1003:jake,101,555-1234,555-4321,waterboy:/home/jake:/bin/bas
...and so on. Colons separate the information. To interpret a line, use this format:
Username:EncriptedPassword:UserIDnumber:GroupIDnumber:PersonalData,Comments, and/or Descriptions:DefaultAccountPath:DefaultShell
You can edit this file manually with your favorite text editor. When you do so, leave the password area blank and assign a password to the account after you finish editing the file. The command to set the password is passwd followed by the new account name.
Note Sometimes you may need to create an account for a process that no one will ever log into. That account belongs only to that process. To keep anyone from accessing the system, use /bin/false for the shell (instead of /bin/sh or /bin/bash). This prevents a shell from activating at log in, thus preventing a live connection by any person.
The purpose of shadow passwords
You may have noticed that the passwords do not appear in the password file. This is so that no one can simply view the passwd file and have access to everyone’s actual passwords. The passwords are actually kept in a separate file called shadow, with the password encrypted (assuming shadow passwords were enabled during the install process).
The group file
The /etc/group file contains group information. This information can apply to one user or many. Generally, each user account will belong to at least one group — often using the same name in the passwd and group files. Here is a sample of the group file contents:
root:x:0:
daemon:x:1:
bin:x:2:
sys:x:3:
adm:x:4:
tty:x:5:
disk:x:6:
Continued

244 Part III Administering Linux
.
.
.
users:x:100:user1,user2
jake:x:1003:jake
As with the passwd file, the pertinent information uses colons to separate the values. Here is the syntax of the lines:
GroupName:Password:GroupIDNumber:User1,User2,...
Yes, groups can have passwords, too. Use the -g option with the passwd command to set group passwords. When a person becomes a member of a group, he or she gains access to the group’s files along with his or her own files. Every account should belong to a group, even if the user accounts all belong to one group account.
Note The Debian distribution creates a separate group account for each user account created when using the adduser command. This helps to lock down the user’s file access. See Chapter 19 for more information about access security.
You can add someone to a group by adding his or her account name to the end of the group name line. Each name assigned to a group must be separated by a comma (,). Again, your favorite editor can edit this text file.
As the administrator, adding a group for each user account can result in management problems. However, lumping all users into one group can also have the same result. If you expect to maintain a large number of accounts, you might consider creating functional groups. For instance, all users working in the engineering department would belong to the engr group, while all users working in the sales department would belong to the sales group. Smaller environments with few users may not need to create such a group, but can follow the one-user-one-group system used with the adduser command.
Employing adduser to add a user account
You now know how to set up accounts the hard way. Let me introduce you to the easy method of adding users to a system. Debian comes with several handy utilities. The adduser tool is no exception. This command takes care of all the responsibilities when creating a new account. Here is the syntax:
adduser [options] user [group]
You can use this tool with just a user name. You can also add the options to modify some of the default information. This information comes from the /etc/adduser. conf file. You can modify the configuration file for your environment, especially if this system will host many accounts. You may find some settings to adjust for your environment. Let’s take a look at what happens when you add a user:

Chapter 12 System Administration 245
$ adduser john
Adding user john...
Adding new group john (1004).
Adding new user john (1004) with group john. Creating home directory /home/john.
Copying files from /etc/skel Enter new UNIX password: Retype new UNIX password:
passwd: password updated successfully Changing the user information for john
Enter the new value, or press return for the default Full Name []: john both
Room Number []: 403 Work Phone []: 555-1234 Home Phone []: 555-4321 Other []: 555-9867
Is the information correct? [y/n] y
$
This tool takes the user name and searches for the next available user ID to assign to the name. adduser takes the same name and uses it as a group name if you do not provide one. Then, it creates a home directory using the user name as the directory name. adduser then copies the essential files from the template directory and requests to set a password. Lastly, adduser requests reference information. This information is optional, but you can use it with other applications such as fingerd.
Note While adding a new user, you are asked for a password for the account. You then are asked to confirm the password by retyping it. If the passwords do not match, then all the files and directories that were created for the new account are removed.
The new user template — skel
To make life even easier when adding a user to the system, a template directory was created called /etc/skel. There may be special settings, startup applications, or customizations that need to reside in the template directory as the skeleton for each new account. The default skel files included with the Debian distribution are shown here:
$ ls -la |
|
|
|
|
|
|
|
total 28 |
|
|
|
|
|
|
|
drwxr-xr-x |
2 |
root |
root |
4096 |
Jun |
2 |
00:48 . |
drwxr-xr-x |
58 |
root |
root |
4096 |
Jun |
15 |
01:53 .. |
-rw-r--r-- |
1 |
root |
root |
266 |
Mar |
7 |
18:18 .alias |
-rw-r--r-- |
1 |
root |
root |
174 |
Feb |
20 |
14:46 .bash_logout |
-rw-r--r-- |
1 |
root |
root |
373 |
Feb |
20 |
14:46 .bash_profile |
-rw-r--r-- |
1 |
root |
root |
504 |
Feb |
20 |
14:46 .bashrc |
-rw-r--r-- |
1 |
root |
root |
375 |
Mar |
7 |
18:18 .cshrc |
$ |
|
|
|
|
|
|
|

246 Part III Administering Linux
You can make changes to these files, add new ones, or leave them as is. Be aware, however, that what resides in this directory is given to every new account set up with the adduser program.
Using userdel to remove a user
As employees come and go, oftentimes the hardest part of administering a system is keeping the accounts up to date. By that I mean removing “dead” accounts from people who have left or no longer need access to the system. To assist with the maintenance comes this nifty utility called userdel. This is the syntax for the userdel command:
userdel [-r] username
The -r option removes all traces of the account, including the user’s directory and mailbox. If you omit this option, the directory remains to be dealt with later. In addition, the user must be logged out of the system and all processes owned by the user must be killed before you can successfully remove the account. As a precaution, you may want to back up /home before completely removing the user’s account and directory. Better safe than sorry.
Restricting access to the root account
In some situations, such as when a machine works as a server, no one needs to access the machine by local or remote means except to make a few adjustments from time to time. In this case, you can limit access to the machine to only the root account. Adding a text file called nologin to the /etc directory allows only the root account to log in. If anyone tries to log in to the machine, the contents of the nologin file are displayed and the connection is closed.
One caveat to using this method is that you are now required to be at the machine to log in as root. For security reasons, root is not accepted as an account name through a Telnet session. Therefore, think carefully before implementing this level of restriction.
Caution |
By default, root does not have remote access to a system. This restriction can be |
|
lifted; however, doing so would be risky from a security standpoint. See Chapter |
|
19 for more information about security. |
Setting File and Directory Permissions
Now that you have accounts set up, take a look at the access these accounts have and what this all means. Permissions essentially define who has access to what files

Chapter 12 System Administration 247
and directories. There are three levels of permission access modes for each file and directory on the filesystem: user level, group level, and other level.
User-level access gives permission to the account user for accessing files and directories. Users are defined in the /etc/passwd file. Group access allows all members of a group access to files and directories. Group members are defined in the /etc/group. Other access means anyone who can log onto that machine who does not currently belong in user or group categories will have access.
Access with chmod
At times, you may need to modify the degree to which a file or directory can be accessed. You accomplish this by changing the rights or permissions for a file or directory. Here is the syntax for the chmod command:
chmod [OPTION] MODE[,MODE] FILE...
To understand how to use this command, you need to have an understanding of the anatomy of the file information. When you list a directory to get a detailed view of the contents (as shown next), the beginning shows a cryptic series of letters and dashes. Take a closer look at the contents of Jo’s directory.
$ ls -l |
|
|
|
|
|
|
|
total 20 |
|
|
|
|
|
|
|
drwxr-sr-x |
2 |
jo |
jo |
4096 |
Jun 14 16:00 |
docs |
|
drwxr-sr-x |
2 |
jo |
jo |
4096 |
Jun 14 16:01 |
misc |
|
drwxr-sr-x |
2 |
jo |
jo |
4096 |
Jun 14 |
16:01 |
newfiles |
drwxr-sr-x |
2 |
jo |
jo |
4096 |
Jun 14 |
16:00 |
pics |
drwxr-sr-x |
2 |
jo |
jo |
4096 |
Jun 14 |
16:01 |
programs |
-rw-r--r-- |
1 |
jo |
jo |
0 |
Jun 15 |
03:26 |
test |
$ |
|
|
|
|
|
|
|
The first column contains the permission levels. In detail, reading the first line for the docs file, you have drwxr-sr-x. The d stands for directory and refers to the type of entry. The next three, rwx, refer to the user mode. From here, you can tell that the user can read (r), write (w), and execute (x) these files and directories. The second set of three characters (r-s) refers to the group’s mode, which has access to read (r), and no write access (indicated by the dash). All files created inside the directories inherit the directories’ group identity. The last set of three characters refers to the rights other users have to the files. Here, others can read (r), cannot write (w), and can execute (x). Table 12-2 lists some of the available options for the access modes.

248 Part III Administering Linux
Table 12-2
Identifiers, operators, and permissions modes
Identifier Description
uUser
gGroup
oOther (those not part of the user or group)
aAll (includes user, group, and other)
Operator Description
+Adds
-Removes
=Assigns
Mode Description
rReads
wWrites
xExecutes or accesses directories
sSets user or group ID upon execution
There are other modes, but they are not commonly used. These modes set absolute control for the files. You can also use plus (+), minus (-), and equal (=) signs to modify the different levels. To get an idea of how this works, change a couple of modes for a directory. You just saw the modes for Jo’s directory. Here is the current listing for the program directory:
drwxrws--- |
2 jo |
jo |
4096 Jun 14 16:01 programs |
To change the modes for the program directory, you can add the ability to write for the group and remove all rights for the world. Here is the command string to accomplish this:
$ chmod g+w,o-rx programs
$
This command string says that you want to add write capability to the group access and remove read and execute from the other access. This produces the following:

Chapter 12 System Administration 249
$ ls -l |
|
|
|
|
|
|
|
total 20 |
|
|
|
|
|
|
|
drwxr-sr-x |
2 |
jo |
jo |
4096 |
Jun 14 16:00 |
docs |
|
drwxr-sr-x |
2 |
jo |
jo |
4096 |
Jun 14 16:01 |
misc |
|
drwxr-sr-x |
2 |
jo |
jo |
4096 |
Jun 14 |
16:01 |
newfiles |
drwxr-sr-x |
2 |
jo |
jo |
4096 |
Jun 14 |
16:00 |
pics |
drwxrws--- |
2 |
jo |
jo |
4096 |
Jun 14 |
16:01 |
programs |
-rw-r--r-- |
1 |
jo |
jo |
0 |
Jun 15 |
03:26 |
test |
This looks relatively easy. When changing several things at once, as you just did, be sure not to add a space after the comma (which separates group changes from other changes). You can also make changes throughout an entire directory by using the recursive option (-R). Using the -R option immediately after the chmod command changes all files and directories below the specified directory to the same settings.
Changing user ownership with chown
From time to time, it is important to change the ownership of files and directories. If a file belongs to a certain individual and then gets transferred to another, the ownership of that file needs to change as well. This is the syntax for the chown command:
chown [OPTION] OWNER FILE...
To determine the ownership of a file, you can look at the long listing of a directory for the details. Here you can see that all the items listed belong to user jo. The specified user appears in the third column (in bold).
$ ls -l |
|
|
|
|
|
|
total 20 |
|
jo |
|
|
|
|
drwxr-sr-x |
2 |
jo |
4096 |
Jun 14 |
16:00 docs |
|
drwxr-sr-x |
2 |
jo |
jo |
4096 |
Jun 14 |
16:01 misc |
drwxr-sr-x |
2 |
jo |
jo |
4096 |
Jun 14 |
16:01 newfiles |
drwxr-sr-x |
2 |
jo |
jo |
4096 |
Jun 14 |
16:00 pics |
drwxr-sr-x |
2 |
jo |
jo |
4096 |
Jun 14 |
16:01 programs |
-rw-r--r-- |
1 |
jo |
jo |
0 |
Jun 15 |
03:26 test |
$ |
|
|
|
|
|
|
Suppose that Jo leaves the company and her coworker, Jane, takes over Jo’s responsibilities. You can transfer the ownership of all the files and directories to Jane. This is the command that you use as root or superuser:
$ chown -R jane *
The command string changes ownership recursively (indicated with the –R option) to Jane, thus affecting all contents of the current directory (indicated by the wildcard asterisk); however, the group remains assigned to Jo. This results in the following changes: