Chapter 11
See also
The next two recipes in this chapter will deal with connecting via an HTTP proxy.
Connecting via an HTTP proxy
As stated in the previous recipe, it is not possible to directly connect to an OpenVPN server under certain circumstances. In such cases, OpenVPN can connect to an OpenVPN server via an intermediary host known as a proxy. This recipe will outline how to access an OpenVPN server via an HTTP proxy.
The HTTP proxy used in this recipe is a Linux-based Apache httpd server with the mod_proxy module loaded. This module can be configured to allow CONNECT requests. This type of request is needed to connect to secure web servers (HTTPS) as well as to an OpenVPN server. If the CONNECT request is not allowed, then the HTTP proxy cannot be used to set up an OpenVPN connection.
Getting ready
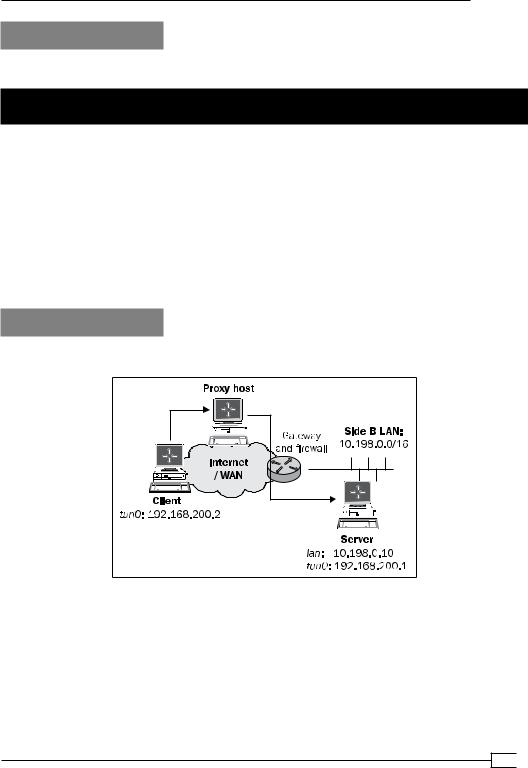
We use the following network layout:
Set up the client and server certificates using the first recipe from Chapter 2, Client-server IPonly Networks. For this recipe, the server computer was running CentOS 5 Linux and OpenVPN
2.1.1. The client was running Fedora 13 Linux and OpenVPN 2.1.1. Keep the configuration file example9-7-server.conf from the Chapter 9 recipe Tuning TCP-based connections at hand, as well as the client configuration file, example9-7.ovpn, from the same recipe.
297
Advanced Configuration
How to do it...
1.Start the server:
[root@server]# openvpn --config example9-7-server.conf
2.Modify the client configuration file, example9-7.ovpn, by adding the lines:
http-proxy http-proxy-host 8888 verb 4
Here, http-proxy-host is either the name or the IP address of the host running the HTTP proxy software. In this recipe, the HTTP proxy was running on port 8888.
Save the configuration file as example11-5.ovpn.
3.Start the client:
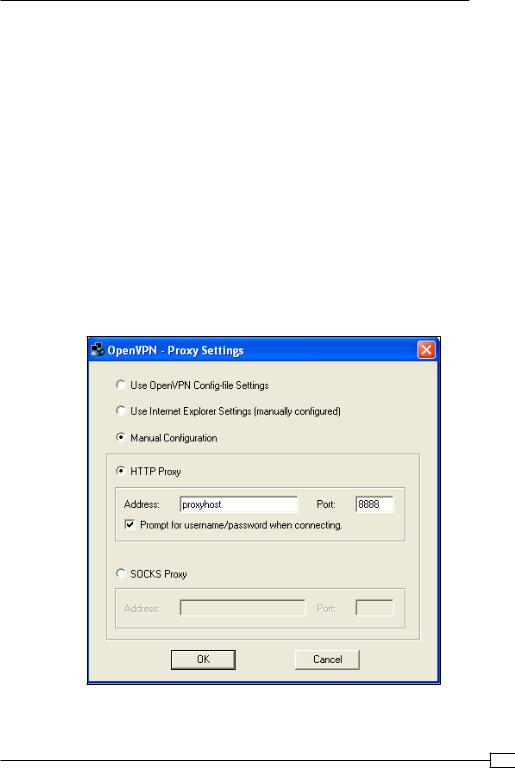
The connection log will show that the OpenVPN client first connects to the HTTP proxy host and then sends an HTTP 'CONNECT' request to connect to the OpenVPN server:
The HTTP proxy host responds with the HTTP code 200 meaning OK, after which the VPN connection is established.
 298
298

Chapter 11
How it works...
An HTTP proxy host acts as an intermediary between the (OpenVPN) client and the server.
HTTP proxies can be configured in most web browsers and are often used to gain access through a hotel or a corporate firewall. The client first connects to the HTTP proxy host and then requests a new connection to the actual endpoint using the HTTP 'CONNECT' request. If the HTTP proxy host allows the CONNECT request, the HTTP code 200 is returned and the connection to the OpenVPN server is granted. From here on, the OpenVPN connection is set up in a similar fashion to a regular TCP-based setup.
There's more...
When using an HTTP proxy host to connect to an OpenVPN server, there are a few caveats:
http-proxy options
There are a few options available in OpenVPN to configure the way in which OpenVPN connects with the HTTP proxy host:
http-proxy-timeout [n]: Sets the timeout when connecting to the HTTP proxy host to [n] seconds. The default value is five seconds.
http-proxy-option AGENT [string]: Sets the HTTP agent to [string] when connecting to the HTTP proxy host. Some proxies allow connections from "well-known" web browsers only.
http-proxy-option VERSION 1.1: Sets the HTTP protocol version to 1.1. The default is HTTP/1.0. OpenVPN 2.1 is not fully HTTP/1.1 compliant when connecting to an HTTP proxy host, causing some proxies to refuse access. This is fixed in OpenVPN 2.2.
Ducking firewalls
Please note that OpenVPN makes no attempt to hide itself from a firewall. Modern firewalls that perform the so-called deep-packet inspection can easily detect the type of traffic that
OpenVPN is using to connect to the OpenVPN server and can block access based on that.
Performance
Similar to SOCKS proxies, HTTP Proxy hosts tend to have an impact on the performance of a VPN setup. Both the bandwidth and the latency are usually affected when proxy hosts are used. This is mostly caused by having to connect to a separate host.
See also
The previous and next recipe in this chapter deal that with connecting via a SOCKS proxy and connecting via an HTTP proxy with authentication.
299
Advanced Configuration
Connecting via an HTTP proxy with authentication
As a follow-up to the previous recipe, where a plain HTTP proxy was used to connect to an OpenVPN server, we will show in this recipe how an OpenVPN connection can be set up when the HTTP proxy server requires authentication.
The HTTP proxy used in this recipe is a Linux-based Apache httpd server with the mod_proxy module loaded and configured for Basic authentication.
Getting ready
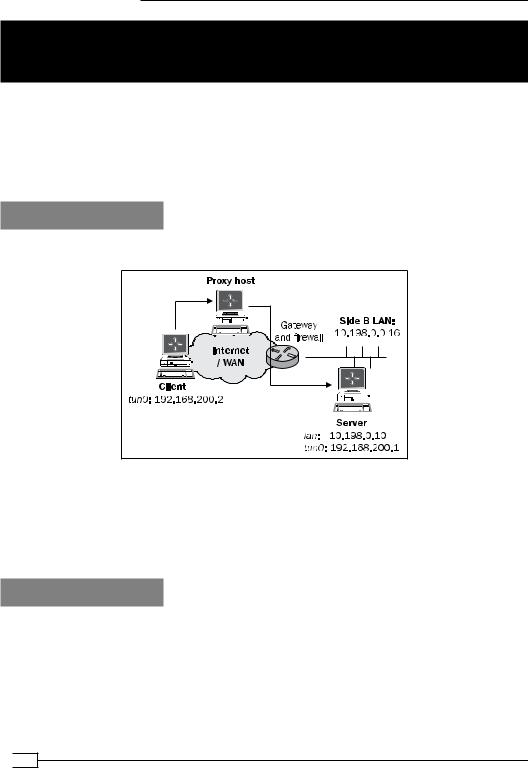
We use the following network layout:
Set up the client and server certificates using the first recipe from Chapter 2, Client-server IPonly Networks. For this recipe, the server computer was running CentOS 5 Linux and OpenVPN
2.1.1. The client was running Fedora 13 Linux and OpenVPN 2.1.1. Keep the configuration file example9-7-server.conf from the Chapter 9's recipe Tuning TCP-based connections at hand, as well as the client configuration file example9-7.ovpn from the same recipe.
How to do it...
1.Start the server:
[root@server]# openvpn --config example9-7-server.conf
2.Set up the HTTP proxy server to support basic authentication. For the Apache httpd server used in this recipe, the following proxy.conf file was used:
LoadModule proxy_module modules/mod_proxy.so
LoadModule proxy_balancer_module modules/mod_proxy_balancer.so LoadModule proxy_ftp_module modules/mod_proxy_ftp.so
 300
300
Chapter 11
LoadModule proxy_http_module modules/mod_proxy_http.so LoadModule proxy_connect_module modules/mod_proxy_connect.so
ProxyRequests On
ProxyVia On
AllowCONNECT 1194
KeepAlive on
<Proxy *>
Order deny,allow Deny from all
Require user cookbook AuthType Basic
AuthName "Password Required"
AuthUserFile /etc/httpd/conf/proxy-password </Proxy>
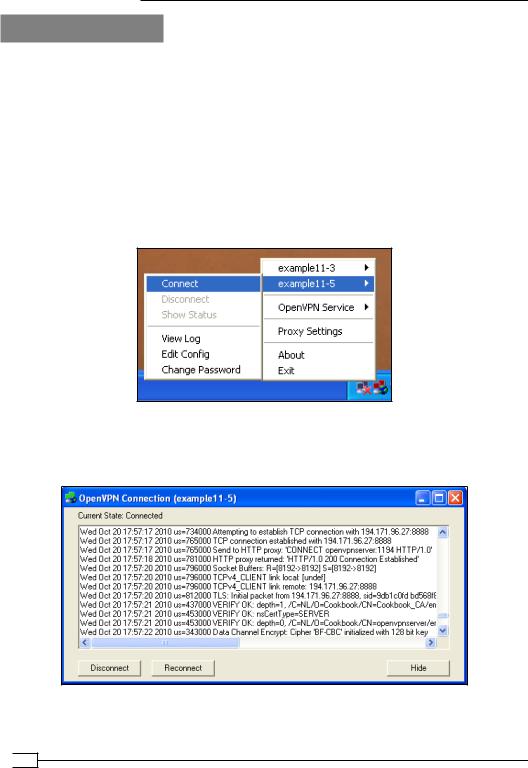
3.Conf gure the OpenVPN GUI to support HTTP proxies: right click on the OpenVPN GUI tray icon and select Proxy Settings. Fill in the dialog as follows:
301
Advanced Configuration
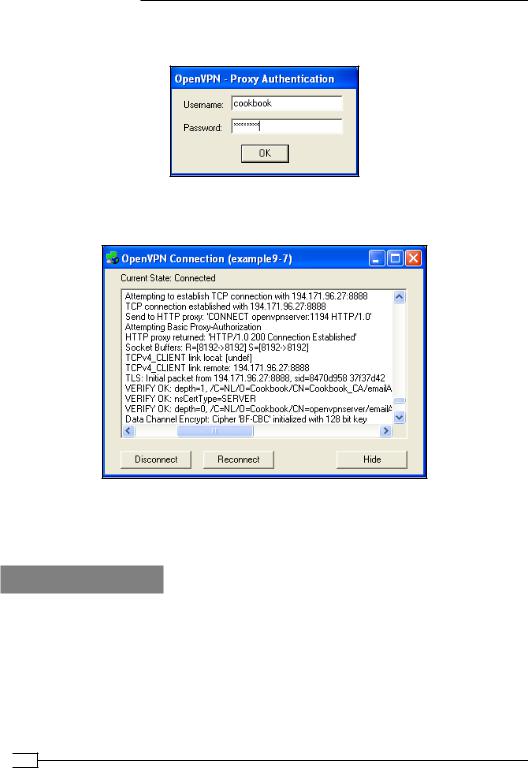
4.Now start the OpenVPN configuration example9-7. You will first be prompted for the
HTTP proxy username and password:
If the right username and password are entered, the HTTP proxy grants access to connect to the OpenVPN server and the VPN connection is established:
As can be seen from the connection log, the OpenVPN client attempts Basic Proxy-Authorization when connecting to the HTTP proxy server. If the authentication is successful, the HTTP proxy grants access to the client to connect to the server.
How it works...
Similar to the previous recipe, the OpenVPN client first connects to the HTTP proxy host. It attempts to authenticate to the HTTP proxy using Basic Authentication, using the username and password supplied in the OpenVPN GUI's Proxy Settings dialog. Note that in this case there is no need to modify the client configuration file itself, as the OpenVPN GUI adds the required lines to the configuration files automatically. After successful authentication, the client then sends an HTTP 'CONNECT' request to connect to the OpenVPN server. From here on, the OpenVPN connection is set up in a similar fashion to a regular TCP-based setup.
 302
302