

APPENDIX
Posing Basics
This section covers the fundamental rules of traditional posing—techniques that are illustrated in many of the images in this book. While these rules are often intentionally broken by contemporary photographers, most are corner-
stones for presenting the human form in a flattering way.
Portrait Lengths
There are three basic types of poses, each defined by how much of the length of the subject’s body is included in the image. Head and shoulders portraits, or headshots, show the subject’s head and shoulders. If the hands are lifted to a position near the face, these may also be included. Waist-up portraits include the subject’s head and shoulders along with at least some of the torso. In portraits of women, these images are often cropped just below the bustline or at the waist. (Waist-up portraits are sometimes considered a type of headshot.) Three-quarter- length portraits show the subject from the head down to the mid-thigh or midcalf. In some cases, one foot may be visible. Full-length portraits that show the subject from the head down to the feet (or at least the ankles). In some cases, only one foot may be visible.
HEAD AND SHOULDERS PORTRAIT BY DAMON TUCCI. |
WAIST-UP PORTRAIT BY REGETI’S PHOTOGRAPHY. |
THREE-QUARTER-LENGTH PORTRAIT BY DOUG BOX. |
120
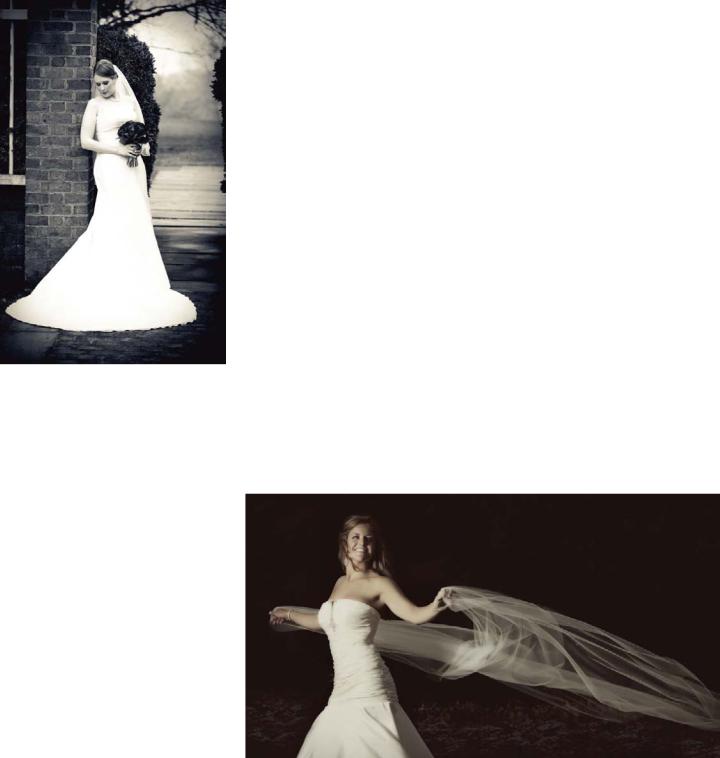
FULL-LENGTH PORTRAIT BY REGETI’S PHOTOGRAPHY.
THE BRIDE’S SHOULDERS ARE AT AN ANGLE TO THE CAMERA. PORTRAIT BY KEVIN JAIRAJ.
When including less than the full body in the frame, it is recommended that you avoid cropping at a joint (such as the knee or elbow); this creates an amputated look. Instead, crop between joints.
Facial Views
The most flattering facial view depends on the bride, the lighting, and the mood you are attempting to create.
In the full-face view, the subject’s nose is pointed at the camera. This is the widest view of the face, so it may not be well suited to brides with rounder faces.
In the three-quarters view (sometimes called the two-thirds view), the subject’s face is angled enough that one ear is hidden from the camera’s view. This is a flattering, slimming view for most faces. In this pose, keep in mind that the far eye will appear smaller than the near eye because it is farther away from the camera. Also, be sure not to turn the head so far that the tip of the nose extends past the line of the cheek or that the bridge of the nose obscures the far eye.
In the profile view, the subject’s head is turned 90 degrees to the camera. When creating a profile, be sure to turn the bride’s face so that the far eye, eyebrow, and eyelashes are obscured.
The Shoulders
The bride’s shoulders should usually be turned at an angle to the camera. Having the shoulders face the camera directly makes her look wider than she really is and can yield a static composition. With a slim bride, however, squaring the shoulders to the camera can give the image an assertive mood that is quite appealing.
The Head
Tilting the Head. Tilting the head slightly produces diagonal lines that can help a pose feel more dynamic. In portraits of women, the head is traditionally tilted toward the near or high shoulder, but this rule is often broken. The best practice is to tilt the bride’s head in the direction that most flatters her.
Chin Height. A medium chin height is desirable. If the chin is too high, the bride may look conceited and her neck may appear elongated. If her chin is too low, she may look timid and appear to have a double chin or no neck.
121
Eyes. In almost all portraits, the eyes are the most important part of the face. Typically, eyes look best when the eyelids border the iris. Turning the face slightly away from the camera and directing the bride’s eyes back toward the camera reveals more of the white of the eye, making her eyes look larger.
Arms
The bride’s arms should be separated at least slightly from her waist. This creates a space that slims the appearance of her upper body. It also creates a triangular base for the composition, leading the viewer’s eye up to her face. Additionally, keep in mind that simply bending the elbows creates appealing diagonal lines in your composition—and placing these carefully can help direct the viewer of the image to the bride’s face.
Hands
Keep the hands at an angle to the lens to avoid distorting their size and shape. Photographing the outer edge of the hand produces a more appealing look than showing the back of the hand or the palm, which may look unnaturally large (especially when close to the face). Additionally, it is usually advised that the hands should be at different heights in the image. This creates a diagonal line that makes the pose more dynamic.
Wrist. Bending the wrists slightly by lifting the hand (not allowing it to flop down) creates an appealing curve that is particularly flattering in bridal portraits.
Fingers. Fingers look best when separated slightly. This gives them form and
definition.
Props. Hands are often easiest to pose when they have something to do— either a prop to hold or something to rest upon. When photographing the bride holding her bouquet, have her grasp it gently, or opt to hid her hands behind the bouquet. When photographing the bride’s rings, give her something to rest her hands upon (her lap, the back of a chair, etc.).
LEAVING SPACE BETWEEN THE ARMS AND THE BODY SLIMS THE TORSO. PORTRAIT BY KEVIN JAIRAJ.
THE HANDS REST GRACEFULLY ON THE BRIDE’S LAP. PORTRAIT BY JEFF AND KATHLEEN HAWKINS.
122

Chest
Selecting a pose that places the torso at an angle to the camera emphasizes the shape of the chest and, depending on the lighting, enhances the form-revealing shadows on the cleavage. Turning the shoulders square to the camera tends to flatten and de-emphasize this area. Good posture, with the chest lifted and shoulders dropped, is also critical to a flattering rendition.
Waist and Stomach
Separating the arms from the torso helps to slim the waist. In seated poses, a very upright posture (almost to the point of arching the back) will help to flatten the stomach area, as will selecting a standing pose rather than a seated one.
Legs
Although most brides wear full-length gowns, posing the legs properly remains desirable because it impacts the posture of the entire body. Asking the bride to put her weight on her back foot shifts the body slightly away from the camera for a more flattering appearance than having the weight distributed evenly on both feet. Having her slightly bend her front knee will also help to create a nice line on the lower part of the gown.
Hips and Thighs
In some gowns, this area will naturally be concealed. If the bride has opted for a gown that is fitted through the hips and thighs, pose her hips at an angle to the camera and away from the main light. In a seated pose, have the bride shift her weight onto one hip so that more of her rear is turned away from the camera.
Feet
Brides are often very proud of their shoes, but pictures of feet with the toes pointed straight at the camera tend to look distorted. Instead, photograph the feet at an angle to the camera—better yet, place them at two different angles to the camera. A good rule of thumb is to ensure that at least one foot is turned enough that the heel is shown.
DETAILS OF EFFECTIVE FOOT POSING. PORTRAITS BY DAWN
SHIELDS (LEFT) AND KEVIN JAIRAJ (RIGHT).
123