


Installing Asterisk
Installing Asterisk
Now, it is time to actually install Asterisk, contained in /usr/src/asterisk, like so:
#cd /usr/src/asterisk
#make clean; make install
This installs the Asterisk PBX's runtimes and some utilities, as well as libraries. This creates the actual PBX, which may depend on (i.e. use) the components we installed earlier.
At this point, it is probably wise to install some sample configuration files so that we can acclimatize ourselves to Asterisk's structure. This is done by running:
# make samples
This creates a sample zaptel.conf in /etc, and sample configuration files in /etc/asterisk. When we change directories to /etc/asterisk, we should see the following files:
•adsi.conf: This file contains the configuration for Analog Display Services
Interface, or ADSI for short.
•adtranvofr.conf: This file contains the configuration for using Adtran's
Voice over Frame Relay.
•agents.conf: This file contains the configuration for using agents, like in a
call center. This allows us to define agents and assign them IDs and passwords.
•alarmreceiver.conf: This file configures the alarm receiver application.
We will not be changing the values from their default settings.
•alsa.conf: This file contains configuration variables for the console's sound
card. We will not be using this.
•asterisk.adsi: Contains Asterisk's default ADSI script. This will be
executed from the telephone if we use ADSI hardware.
•asterisk.conf: This file sets certain variables for Asterisk's use, most of
which we will not need to change. It basically tells Asterisk where to look for certain files and executable programs.
•cdr_manager.conf: This file configures CDR for Call Management.
•cdr_odbc.conf: This is the configuration file for using an ODBC database
connection to store our Call Detail Records (CDRs).
•cdr_pgsql.conf: This configuration file allows us to use a PostgreSQL
database to store our CDR records.
•cdr_tds.conf: This is the configuration file for using FreeTDS, allowing
connections to Microsoft SQL and Sybase.
36

Chapter 3
•enum.conf: This file configures the use of ENUM, which allows us to
resolve telephone numbers over DNS, thereby allowing us to route calls to an IP instead of going over the Public Switched Telephone Network (PSTN).
•extconfig.conf: With this file, we can choose to load our queues via the
database engine.
•extensions.conf: This file configures the behavior of Asterisk. We will be
working with this file extensively.
•features.conf: This file contains options for call parking, as well as a few
miscellaneous features, such as the pickup extension, used for picking calls in each pickup group.
•festival.conf: This file sets parameters for Festival, which is an open-
source program that allows our server to speak text. This is completely optional, and we will not go into configuring this, as Asterisk already includes recordings of the phrases we will need our server to say.
•iax.conf: This file configures our Voice over IP (VoIP) conversations using
the Inter-Asterisk Exchange protocol, or IAX.
•iaxprov.conf: This allows for simple provisioning of Digium's S101I, also
known as an IAXy.
•indications.conf: This is where we configure certain behaviors of our
phone system, such as ring cadences and tones, enabling us to provide the sounds our users are used to, regardless of what country they are from. We can also mimic their previous phone system.
•logger.conf: This file sets up the type of logging we will be using. The
defaults work for most people.
•manager.conf: This file configures remote access to the Asterisk Call
Manager. This will be of utmost importance when we discuss Graphical User Interfaces (GUIs).
•meetme.conf: This configuration file sets up simple conference rooms. We
can optionally define passwords for the conferences, too.
•mgcp.conf: This file configures Media Gateway Control Protocol, or MGCP.
This is a protocol used by some VoIP hardware, mainly from Cisco.
•modem.conf: This file sets certain variables to allow us to use selected
modems with Asterisk. Please note that not very many modems are supported, and as most modems are only half-duplex, they will not perform very well.
•modules.conf: This configuration file selects which Asterisk modules will
be started up. We can enable or disable features of our PBX by changing configuration parameters here.
37

Installing Asterisk
•musiconhold.conf: This configuration file creates Music On Hold (MOH)
instances and defines what music they will play. At this time, it only supports playing MP3s, and only if we installed mpg123.
•osp.conf: We can configure the Open Settlement Protocol subsystem of
Asterisk with this file.
•oss.conf: This configuration is much like alsa.conf, and we will not be
using it.
•phone.conf: This file allows us to use some Linux telephony interfaces,
such as the linejack by Quicknet. We will be focusing on Digium's hardware offerings instead.
•privacy.conf: This file allows us to configure privacy options.
•queues.conf: This configuration file allows us to create queues for callers to
go through, allowing us to handle burst call volumes in an intelligent way. We can also create an escape to allow callers to dial their way out of the line.
•res_config_odbc.conf: This file sets the configuration for storing our
settings in an ODBC database.
•res_odbc.conf: This is another piece of the configuration for storing our
settings in an ODBC database.
•rpt.conf: This file allows us to use a radio repeater.
•rtp.conf: This configuration file sets the ports to use for Real-Time
Protocol, or RTP. Note that the numbers listed are UDP ports.
•sip.conf: This configuration file defines Session Initiation Protocol (SIP)
users and their options. We can also set global options for SIP, such as what address to bind to, what port to use, and what timeouts we are going to impose. SIP is a different protocol for Voice over IP.
•skinny.conf: This file configures the skinny VoIP protocol, which is used
by many of the Cisco phones.
•telecordia-1.adsi: This is another sample ADSI script.
•voicemail.conf: This configuration file creates voicemail users and some
global options for the Comedian Mail, Asterisk's voicemail system.
•vpb.conf: This file configures VoiceTronix hardware. We will be focusing
on Digium's hardware offerings.
•zapata.conf: This file configures Zapata telephony interface settings. We
will be using this to configure Digium's hardware offerings. Digium's hardware is what allows us to communicate with the PSTN.
As you can see, there are quite a few configuration files. Any particular installation of Asterisk may only use a few of these files, but they are all included so that we have the flexibility to use different features and may expand our services easily.
38
Chapter 3
If we wish for Asterisk to start at boot time, we can configure it to do so by typing:
# make config
This will create a script to start the Asterisk PBX after the Zaptel startup procedures have been completed. In Red Hat Linux, this script is placed in /etc/init.d and set to execute when entering the run level we are currently in (which should be 3).
Getting to Know Asterisk
Now that we have installed Asterisk, there are some basic behaviors of Asterisk that we need to explore.
First, the major configuration files that need to be modified are in /etc/asterisk, with the exception of zaptel.conf, which is in /etc. Each file that ends in .conf is a configuration file, which sets parameters for some specific part of Asterisk, as described in the previous section.
The layout of these configuration files is generally simple. Most configuration files will have a variable name, followed by => and its value. For instance, if there were a variable called cat, which was to be set equal to Garfield, it would look like this:
cat => Garfield
In most configuration files, the variables stay set until they are either undefined or set to a new value. You must be careful in what order you set variables, as they may have inherited a different setting than you anticipate. Therefore I suggest we set all needed values for every single instance, in case we make changes in the future that would break a set of lines in our configuration. This will make more sense later.
We should probably take a few minutes and look through all of the .conf files in /etc/asterisk. Most of the files are commented pretty well. We will be going through the key files step by step in the next chapter, but having a general knowledge of what is in there might help us.
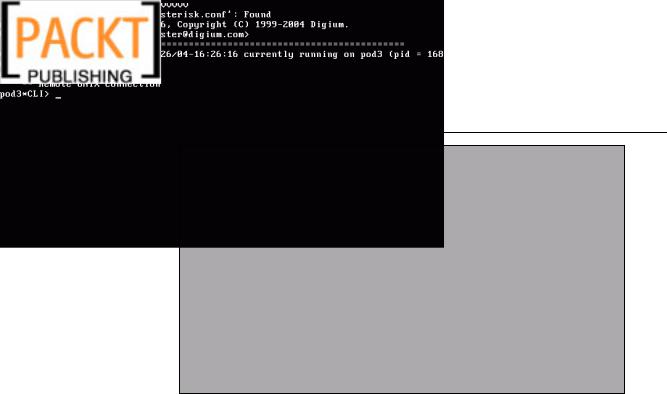
Next, how do we start Asterisk? It's pretty simple, really. If you set Asterisk to start at boot time, you can reboot. If not, the command to start asterisk is asterisk. When starting Asterisk, there are a number of command-line arguments we can specify. The most commonly used are –c, which gives us a console connection, and –v, which gives us a verbose output, with more 'v's giving us more information about activities, status, and errors. When I start Asterisk from the command-line, I usually use:
# asterisk –cvvvvv
which gives me a console connection with plenty of debugging information.
If Asterisk starts at boot time, we can reconnect to the Asterisk console by typing asterisk –r, and we can specify a level of verbosity as above. So, when I reconnect, I often use asterisk –rvvvvv.
39
Installing Asterisk
Although the Asterisk console may not look like much, it is a wonderful tool for checking on the status of Asterisk, as well as diagnosing problems. We can type help to get a list of commands.
One very useful ability of the console is to issue a reload. This is done by:
CLI> reload
This command will re-parse the configuration files and update the changes in most of the modules of Asterisk.
There are some parts of Asterisk that require a restart in order to reflect changes. To restart Asterisk, we first must choose when we will be restarting. We have three main choices:
1.now: This option stops all calls in progress, immediately stops Asterisk and
starts it again.
2.gracefully: This option does not stop calls in progress, but does not allow
any new calls to be started. When all calls that are in progress are completed, the server will restart. Be careful, as a hung channel will basically disable your server.
3.when convenient: This is my favorite option. This option does not end any
calls in progress, and allows new calls to start as usual. When there are no calls in progress, the server will restart. This means that incoming and outgoing calls are not interrupted except for the short period of time in which Asterisk is actually restarting. This would not work, of course, on high-load servers, as there may never be a time when there are no calls in progress, and it will also not work if a channel is "stuck", meaning the server thinks it has a call in progress, but it does not.
40