- •Contents at a Glance
- •About the Authors
- •About the Technical Reviewer
- •Acknowledgments
- •Preface
- •What This Book Is
- •What You Need
- •Developer Options
- •What You Need to Know
- •What’s Different About Coding for iOS?
- •Only One Active Application
- •Only One Window
- •Limited Access
- •Limited Response Time
- •Limited Screen Size
- •Limited System Resources
- •No Garbage Collection, but…
- •Some New Stuff
- •A Different Approach
- •What’s in This Book
- •What’s New in This Update?
- •Are You Ready?
- •Setting Up Your Project in Xcode
- •The Xcode Workspace Window
- •The Toolbar
- •The Navigator View
- •The Jump Bar
- •The Utility Pane
- •Interface Builder
- •New Compiler and Debugger
- •A Closer Look at Our Project
- •Introducing Xcode’s Interface Builder
- •What’s in the Nib File?
- •The Library
- •Adding a Label to the View
- •Changing Attributes
- •Some iPhone Polish—Finishing Touches
- •Bring It on Home
- •The Model-View-Controller Paradigm
- •Creating Our Project
- •Looking at the View Controller
- •Understanding Outlets and Actions
- •Outlets
- •Actions
- •Cleaning Up the View Controller
- •Designing the User Interface
- •Adding the Buttons and Action Method
- •Adding the Label and Outlet
- •Writing the Action Method
- •Trying It Out
- •Looking at the Application Delegate
- •Bring It on Home
- •A Screen Full of Controls
- •Active, Static, and Passive Controls
- •Creating the Application
- •Implementing the Image View and Text Fields
- •Adding the Image View
- •Resizing the Image View
- •Setting View Attributes
- •The Mode Attribute
- •Interaction Checkboxes
- •The Alpha Value
- •Background
- •Drawing Checkboxes
- •Stretching
- •Adding the Text Fields
- •Text Field Inspector Settings
- •Setting the Attributes for the Second Text Field
- •Creating and Connecting Outlets
- •Closing the Keyboard
- •Closing the Keyboard When Done Is Tapped
- •Touching the Background to Close the Keyboard
- •Adding the Slider and Label
- •Creating and Connecting the Actions and Outlets
- •Implementing the Action Method
- •Adding Two Labeled Switches
- •Connecting and Creating Outlets and Actions
- •Implementing the Switch Actions
- •Adding the Button
- •Connecting and Creating the Button Outlets and Actions
- •Implementing the Segmented Control Action
- •Implementing the Action Sheet and Alert
- •Conforming to the Action Sheet Delegate Method
- •Showing the Action Sheet
- •Spiffing Up the Button
- •Using the viewDidLoad Method
- •Control States
- •Stretchable Images
- •Crossing the Finish Line
- •The Mechanics of Autorotation
- •Points, Pixels, and the Retina Display
- •Autorotation Approaches
- •Handling Rotation Using Autosize Attributes
- •Configuring Supported Orientations
- •Specifying Rotation Support
- •Designing an Interface with Autosize Attributes
- •Using the Size Inspector’s Autosize Attributes
- •Setting the Buttons’ Autosize Attributes
- •Restructuring a View When Rotated
- •Creating and Connecting Outlets
- •Moving the Buttons on Rotation
- •Swapping Views
- •Designing the Two Views
- •Implementing the Swap
- •Changing Outlet Collections
- •Rotating Out of Here
- •Common Types of Multiview Apps
- •The Architecture of a Multiview Application
- •The Root Controller
- •Anatomy of a Content View
- •Building View Switcher
- •Creating Our View Controller and Nib Files
- •Modifying the App Delegate
- •Modifying BIDSwitchViewController.h
- •Adding a View Controller
- •Building a View with a Toolbar
- •Writing the Root View Controller
- •Implementing the Content Views
- •Animating the Transition
- •Switching Off
- •The Pickers Application
- •Delegates and Data Sources
- •Setting Up the Tab Bar Framework
- •Creating the Files
- •Adding the Root View Controller
- •Creating TabBarController.xib
- •The Initial Test Run
- •Implementing the Date Picker
- •Implementing the Single-Component Picker
- •Declaring Outlets and Actions
- •Building the View
- •Implementing the Controller As a Data Source and Delegate
- •Implementing a Multicomponent Picker
- •Declaring Outlets and Actions
- •Building the View
- •Implementing the Controller
- •Implementing Dependent Components
- •Creating a Simple Game with a Custom Picker
- •Writing the Controller Header File
- •Building the View
- •Adding Image Resources
- •Implementing the Controller
- •The spin Method
- •The viewDidLoad Method
- •Final Details
- •Linking in the Audio Toolbox Framework
- •Final Spin
- •Table View Basics
- •Table Views and Table View Cells
- •Grouped and Plain Tables
- •Implementing a Simple Table
- •Designing the View
- •Writing the Controller
- •Adding an Image
- •Using Table View Cell Styles
- •Setting the Indent Level
- •Handling Row Selection
- •Changing the Font Size and Row Height
- •Customizing Table View Cells
- •Adding Subviews to the Table View Cell
- •Creating a UITableViewCell Subclass
- •Adding New Cells
- •Implementing the Controller’s Code
- •Loading a UITableViewCell from a Nib
- •Designing the Table View Cell in Interface Builder
- •Using the New Table View Cell
- •Grouped and Indexed Sections
- •Building the View
- •Importing the Data
- •Implementing the Controller
- •Adding an Index
- •Implementing a Search Bar
- •Rethinking the Design
- •A Deep Mutable Copy
- •Updating the Controller Header File
- •Modifying the View
- •Modifying the Controller Implementation
- •Copying Data from allNames
- •Implementing the Search
- •Changes to viewDidLoad
- •Changes to Data Source Methods
- •Adding a Table View Delegate Method
- •Adding Search Bar Delegate Methods
- •Adding a Magnifying Glass to the Index
- •Adding the Special Value to the Keys Array
- •Suppressing the Section Header
- •Telling the Table View What to Do
- •Putting It All on the Table
- •Navigation Controller Basics
- •Stacky Goodness
- •A Stack of Controllers
- •Nav, a Hierarchical Application in Six Parts
- •Meet the Subcontrollers
- •The Disclosure Button View
- •The Checklist View
- •The Rows Control View
- •The Movable Rows View
- •The Deletable Rows View
- •The Editable Detail View
- •The Nav Application’s Skeleton
- •Creating the Top-Level View Controller
- •Setting Up the Navigation Controller
- •Adding the Images to the Project
- •First Subcontroller: The Disclosure Button View
- •Creating the Detail View
- •Modifying the Disclosure Button Controller
- •Adding a Disclosure Button Controller Instance
- •Second Subcontroller: The Checklist
- •Creating the Checklist View
- •Adding a Checklist Controller Instance
- •Third Subcontroller: Controls on Table Rows
- •Creating the Row Controls View
- •Adding a Rows Control Controller Instance
- •Fourth Subcontroller: Movable Rows
- •Creating the Movable Row View
- •Adding a Move Me Controller Instance
- •Fifth Subcontroller: Deletable Rows
- •Creating the Deletable Rows View
- •Adding a Delete Me Controller Instance
- •Sixth Subcontroller: An Editable Detail Pane
- •Creating the Data Model Object
- •Creating the Detail View List Controller
- •Creating the Detail View Controller
- •Adding an Editable Detail View Controller Instance
- •But There’s One More Thing. . .
- •Breaking the Tape
- •Creating a Simple Storyboard
- •Dynamic Prototype Cells
- •Dynamic Table Content, Storyboard-Style
- •Editing Prototype Cells
- •Good Old Table View Data Source
- •Will It Load?
- •Static Cells
- •Going Static
- •So Long, Good Old Table View Data Source
- •You Say Segue, I Say Segue
- •Creating Segue Navigator
- •Filling the Blank Slate
- •First Transition
- •A Slightly More Useful Task List
- •Viewing Task Details
- •Make More Segues, Please
- •Passing a Task from the List
- •Handling Task Details
- •Passing Back Details
- •Making the List Receive the Details
- •If Only We Could End with a Smooth Transition
- •Split Views and Popovers
- •Creating a SplitView Project
- •The Storyboard Defines the Structure
- •The Code Defines the Functionality
- •The App Delegate
- •The Master View Controller
- •The Detail View Controller
- •Here Come the Presidents
- •Creating Your Own Popover
- •iPad Wrap-Up
- •Getting to Know Your Settings Bundle
- •The AppSettings Application
- •Creating the Project
- •Working with the Settings Bundle
- •Adding a Settings Bundle to Our Project
- •Setting Up the Property List
- •Adding a Text Field Setting
- •Adding an Application Icon
- •Adding a Secure Text Field Setting
- •Adding a Multivalue Field
- •Adding a Toggle Switch Setting
- •Adding the Slider Setting
- •Adding Icons to the Settings Bundle
- •Adding a Child Settings View
- •Reading Settings in Our Application
- •Retrieving User Settings
- •Creating the Main View
- •Updating the Main View Controller
- •Registering Default Values
- •Changing Defaults from Our Application
- •Keeping It Real
- •Beam Me Up, Scotty
- •Your Application’s Sandbox
- •Getting the Documents Directory
- •Getting the tmp Directory
- •File-Saving Strategies
- •Single-File Persistence
- •Multiple-File Persistence
- •Using Property Lists
- •Property List Serialization
- •The First Version of the Persistence Application
- •Creating the Persistence Project
- •Designing the Persistence Application View
- •Editing the Persistence Classes
- •Archiving Model Objects
- •Conforming to NSCoding
- •Implementing NSCopying
- •Archiving and Unarchiving Data Objects
- •The Archiving Application
- •Implementing the BIDFourLines Class
- •Implementing the BIDViewController Class
- •Using iOS’s Embedded SQLite3
- •Creating or Opening the Database
- •Using Bind Variables
- •The SQLite3 Application
- •Linking to the SQLite3 Library
- •Modifying the Persistence View Controller
- •Using Core Data
- •Entities and Managed Objects
- •Key-Value Coding
- •Putting It All in Context
- •Creating New Managed Objects
- •Retrieving Managed Objects
- •The Core Data Application
- •Designing the Data Model
- •Creating the Persistence View and Controller
- •Persistence Rewarded
- •Managing Document Storage with UIDocument
- •Building TinyPix
- •Creating BIDTinyPixDocument
- •Code Master
- •Initial Storyboarding
- •Creating BIDTinyPixView
- •Storyboard Detailing
- •Adding iCloud Support
- •Creating a Provisioning Profile
- •Enabling iCloud Entitlements
- •How to Query
- •Save Where?
- •Storing Preferences on iCloud
- •What We Didn’t Cover
- •Grand Central Dispatch
- •Introducing SlowWorker
- •Threading Basics
- •Units of Work
- •GCD: Low-Level Queueing
- •Becoming a Blockhead
- •Improving SlowWorker
- •Don’t Forget That Main Thread
- •Giving Some Feedback
- •Concurrent Blocks
- •Background Processing
- •Application Life Cycle
- •State-Change Notifications
- •Creating State Lab
- •Exploring Execution States
- •Making Use of Execution State Changes
- •Handling the Inactive State
- •Handling the Background State
- •Removing Resources When Entering the Background
- •Saving State When Entering the Background
- •A Brief Journey to Yesteryear
- •Back to the Background
- •Requesting More Backgrounding Time
- •Grand Central Dispatch, Over and Out
- •Two Views of a Graphical World
- •The Quartz 2D Approach to Drawing
- •Quartz 2D’s Graphics Contexts
- •The Coordinate System
- •Specifying Colors
- •A Bit of Color Theory for Your iOS Device’s Display
- •Other Color Models
- •Color Convenience Methods
- •Drawing Images in Context
- •Drawing Shapes: Polygons, Lines, and Curves
- •The QuartzFun Application
- •Setting Up the QuartzFun Application
- •Creating a Random Color
- •Defining Application Constants
- •Implementing the QuartzFunView Skeleton
- •Creating and Connecting Outlets and Actions
- •Implementing the Action Methods
- •Adding Quartz 2D Drawing Code
- •Drawing the Line
- •Drawing the Rectangle and Ellipse
- •Drawing the Image
- •Optimizing the QuartzFun Application
- •The GLFun Application
- •Setting Up the GLFun Application
- •Creating BIDGLFunView
- •Updating BIDViewController
- •Updating the Nib
- •Finishing GLFun
- •Drawing to a Close
- •Multitouch Terminology
- •The Responder Chain
- •Responding to Events
- •Forwarding an Event: Keeping the Responder Chain Alive
- •The Multitouch Architecture
- •The Four Touch Notification Methods
- •The TouchExplorer Application
- •The Swipes Application
- •Automatic Gesture Recognition
- •Implementing Multiple Swipes
- •Detecting Multiple Taps
- •Detecting Pinches
- •Defining Custom Gestures
- •The CheckPlease Application
- •The CheckPlease Touch Methods
- •Garçon? Check, Please!
- •The Location Manager
- •Setting the Desired Accuracy
- •Setting the Distance Filter
- •Starting the Location Manager
- •Using the Location Manager Wisely
- •The Location Manager Delegate
- •Getting Location Updates
- •Getting Latitude and Longitude Using CLLocation
- •Error Notifications
- •Trying Out Core Location
- •Updating Location Manager
- •Determining Distance Traveled
- •Wherever You Go, There You Are
- •Accelerometer Physics
- •Don’t Forget Rotation
- •Core Motion and the Motion Manager
- •Event-Based Motion
- •Proactive Motion Access
- •Accelerometer Results
- •Detecting Shakes
- •Baked-In Shaking
- •Shake and Break
- •Accelerometer As Directional Controller
- •Rolling Marbles
- •Writing the Ball View
- •Calculating Ball Movement
- •Rolling On
- •Using the Image Picker and UIImagePickerController
- •Implementing the Image Picker Controller Delegate
- •Road Testing the Camera and Library
- •Designing the Interface
- •Implementing the Camera View Controller
- •It’s a Snap!
- •Localization Architecture
- •Strings Files
- •What’s in a Strings File?
- •The Localized String Macro
- •Real-World iOS: Localizing Your Application
- •Setting Up LocalizeMe
- •Trying Out LocalizeMe
- •Localizing the Nib
- •Localizing an Image
- •Generating and Localizing a Strings File
- •Localizing the App Display Name
- •Auf Wiedersehen
- •Apple’s Documentation
- •Mailing Lists
- •Discussion Forums
- •Web Sites
- •Blogs
- •Conferences
- •Follow the Authors
- •Farewell
- •Index
Chapter 1
Welcome to the Jungle
So, you want to write iPhone, iPod touch, and iPad applications? Well, we can’t say that we blame you. iOS, the core software of all of these devices, is an exciting platform that has been seeing explosive growth since it first came out in 2007. The rise of the mobile software platform means that people are using software everywhere they go. With the release of iOS 5, and the latest incarnation of the iOS software development kit (SDK), things have only gotten better and more interesting.
What This Book Is
This book is a guide to help you get started down the path to creating your own iOS applications. Our goal is to get you past the initial learning curve, to help you understand the way iOS applications work and how they are built.
As you work your way through this book, you will create a number of small applications, each designed to highlight specific iOS features and show you how to control or interact with those features. If you combine the foundation you’ll gain through this book with your own creativity and determination, and then add in the extensive and well-written documentation provided by Apple, you’ll have everything you need to build your own professional iPhone and iPad applications.
TIP: Dave, Jack, and Jeff have a forum set up for this book. It’s a great place to meet likeminded folks, get your questions answered, and even answer other people’s questions. The
forum is at http://iphonedevbook.com. Be sure to check it out!
What You Need
Before you can begin writing software for iOS, you’ll need a few items. For starters, you’ll need an Intel-based Macintosh running Lion (OS X 10.7) or later. Any recent Intelbased Macintosh computer—laptop or desktop—should work just fine.
D.Mark et al., Beginning iOS 5 Development
©Dave Mark, Jack Nutting, Jeff LaMarche 2011
www.it-ebooks.info
2CHAPTER 1: Welcome to the Jungle
You’ll also need to sign up to become a registered iOS developer. Apple requires this step before you’re allowed to download the iOS SDK.
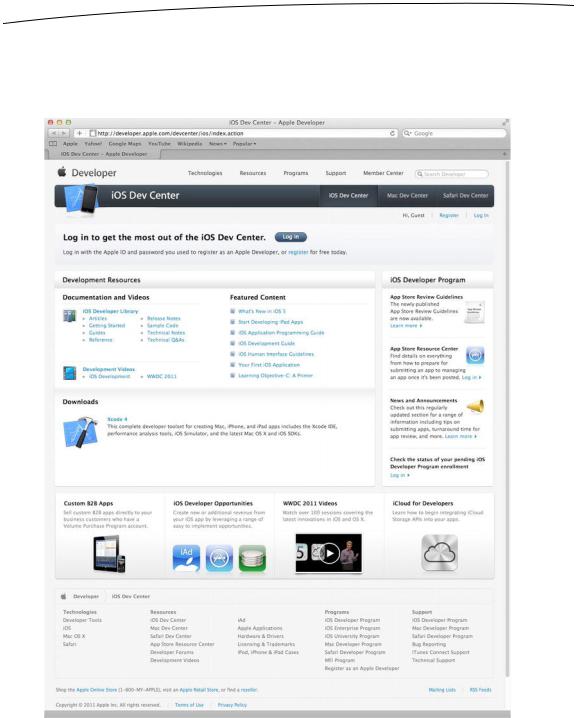
To sign up as a developer, just navigate to http://developer.apple.com/ios/. That will bring you to a page similar to the one shown in Figure 1–1.
Figure 1–1. Apple’s iOS Dev Center web site
www.it-ebooks.info
CHAPTER 1: Welcome to the Jungle |
3 |
First, click the button labeled Log in. You’ll be prompted for your Apple ID. If you don’t have an Apple ID, click the Create Apple ID button, create one, and then log in. Once you are logged in, you’ll be taken to the main iOS development page. Not only will you see a link to the SDK download, but you’ll also find links to a wealth of documentation, videos, sample code, and the like—all dedicated to teaching you the finer points of iOS application development.
The most important tool you’ll be using to develop iOS applications is called Xcode. Xcode is Apple’s integrated development environment (IDE). Xcode includes tools for creating and debugging source code, compiling applications, and performance tuning the applications you’ve written.
You can find a download link for Xcode on http://developer.apple.com/ios/ once you’ve signed up. You can also download Xcode from the Macintosh App Store, which you can access from your Mac’s Apple menu.
SDK VERSIONS AND SOURCE CODE FOR THE EXAMPLES
As the versions of the SDK and Xcode evolve, the mechanism for downloading them will also change. Sometimes the SDK and Xcode are featured as separate downloads; other times, they will be merged as a single download. Bottom line: you want to download the latest released (non-beta) version of Xcode and the iOS SDK.
This book has been written to work with the latest version of the SDK. In some places, we have chosen to use new functions or methods introduced with iOS 5 that may prove incompatible with earlier versions of the SDK. We’ll be sure to point those situations out as they arise in this book.
Be sure to download the latest and greatest source code archives from the book’s web site at http://iphonedevbook.com or from the book’s page on http://apress.com. We’ll update the code as new versions of the SDK are released, so be sure to check the site periodically.
Developer Options
The free SDK download option includes a simulator that will allow you to build and run iPhone and iPad apps on your Mac. This is perfect for learning how to program for iOS. However, the simulator does not support many hardware-dependent features, such as the accelerometer and camera. Also, the free option will not allow you to download your applications onto your actual iPhone or other device, and it does not give you the ability to distribute your applications on Apple’s App Store. For those capabilities, you’ll need to sign up for one of the other options, which aren’t free:
The Standard program costs $99/year. It provides a host of development tools and resources, technical support, distribution of your application via Apple’s App Store, and, most important, the ability to test and debug your code on an iOS device, rather than just in the simulator.
www.it-ebooks.info
4CHAPTER 1: Welcome to the Jungle
The Enterprise program costs $299/year. It is designed for companies developing proprietary, in-house iOS applications and for those developing applications for the Apple’s App Store with more than one developer working on the project.
For more details on these programs, visit http://developer.apple.com/programs/ios and http://developer.apple.com/programs/ios/enterprise to compare the two.
Because iOS supports an always-connected mobile device that uses other companies’ wireless infrastructure, Apple has needed to place far more restrictions on iOS developers than it ever has on Mac developers (who are able—at least as of this writing—to write and distribute programs with absolutely no oversight or approval from Apple). Even though the iPod touch and the Wi-Fi–only versions of the iPad don’t use anyone else’s infrastructure, they’re still subject to these same restrictions.
Apple has not added restrictions to be mean, but rather as an attempt to minimize the chances of malicious or poorly written programs being distributed that could degrade performance on the shared network. Developing for iOS may seem like it presents a lot of hoops to jump through, but Apple has expended quite an effort to make the process as painless as possible. And also consider that $99 is still considerably less than buying, for example, Visual Studio, which is Microsoft’s software development IDE.
This may seem obvious, but you’ll also need an iPhone, iPod touch, or iPad. While much of your code can be tested using the iOS simulator, not all programs can be. And even those that can run on the simulator really need to be thoroughly tested on an actual device before you ever consider releasing your application to the public.
NOTE: If you are going to sign up for the Standard or Enterprise program, you should do it right now. The approval process can take a while, and you’ll need that approval to be able to run your
applications on an actual device. Don’t worry, though, because all the projects in the first several
chapters and the majority of the applications in this book will run just fine on the iOS simulator.
What You Need to Know
This book assumes that you already have some programming knowledge. It assumes that you understand the fundamentals of object-oriented programming (you know what objects, loops, and variables are, for example). It also assumes that you are familiar with the Objective-C programming language. Cocoa Touch, the part of the SDK that you will be working with through most of this book, uses the latest version of Objective-C, which contains several new features not present in earlier versions. But don’t worry if you’re not familiar with the more recent additions to the Objective-C language. We highlight any of the new language features we take advantage of, and explain how they work and why we are using them.
www.it-ebooks.info