

Force_on_Force
.pdfADVANCED RULES FOR INFANTRY COMBAT
|
Iraq, |
2009 |
in |
action, |
|
|
Mortar |
US |
120mm |
|
Medium or Heavy Mortar teams may be placed on the table as part of a scenario. They are normally placed as scenario objectives, because neither type of mortar may normally fire at targets on the table.
If a scenario permits, Medium Mortars may be direct layed at enemy units. Medium Mortars have a No Fire Zone of 24.”
Heavy Mortars on the table are always present as objectives only and may never be fired at on table units.
SPECIAL BATTLEFIELD
HAZARDS
teams can occasionally be fielded on the table as well. Small mortars that are homogenous to an infantry
squad or fireteam, such as the 50mm mortar used by Britain, are treated as normal Medium Support Weapons.
Light mortar teams may be deployed on the table. On table light mortar teams are treated as Weapon Teams. When firing at a target that is out of their LOS, on board mortar teams use the same fire request rules as off-board mortars and artillery. On board mortars may engage enemy units in their LOS without going through the call for fire sequence.
Light mortars have a No Fire Zone of 18.” They may not be fired at enemy units that are18” away or closer.
On board mortar teams may also direct lay their mortars at enemy units within line of sight and beyond the mortar’s No Fire zone of 18.” Direct Lay fire suffers a -1 die Firepower penalty.
If fired upon directly by enemy units, the mortar team may react in the same way as any other unit. If attacked by an enemy unit that is within their No Fire Zone, the mortar team may reply with small arms fire.
On board mortar teams may go on Overwatch but do not receive the +1 bonus to their Reaction Die roll.
NBC Warfare & MOPP Suits
The awful specter of Nuclear, Biological, and Chemical warfare (NBC) continues to hang over the battlefields of the modern era. Beyond the horrifyingly obvious impact of mass casualties (military and civilian), just the threat of these weapons can influence the prosecution and outcome of an operation.
WARPAC troops in NBC gear, somewhere in
Germany, 1980s (Elheim Miniatures)
121
FORCE ON FORCE
A force that believes it may be subjected to an NBC attack will take precautions to provide its troops with as much protection as possible. Unfortunately, this protection is often a hindrance to normal operations and may make their troops more vulnerable to conventional attacks.
NBC protective suits, called MOPP (Mission Oriented Protective Posture) suits in the US military, are hot, cumbersome over-suits with a charcoal lining. When the protective booties, gloves, and mask are added, an uncomfortable ensemble is created which hinders movement, breathing, and vision. The impact on combat effectiveness is obvious.
MOPP Levels
There are five MOPP protection levels. Their effects on unit combat effectiveness are described below:
At MOPP Level 0, troops have their masks handy in carriers and their other MOPP gear is somewhere near at hand – units incur no penalties in this posture.
At MOPP Levels 1 (troops wear their protective suits) and 2 (troops wear their suits and booties), units suffer a -1 to all Reaction Tests.
At MOPP Levels 3 (troops wear mask, suits and booties) and 4 (troops wear entire ensemble), units suffer a -1 to all Reaction Tests and their Optimum Range is reduced by half.
Scenarios will indicate what the current MOPP level is and when/if it will increase. Unless stated otherwise, assume the MOPP level is 0.
Operating in an NBC Environment
Combat in an NBC environment can be extremely lethal. A bad mask filter, a torn suit, a poorly tied boot
– any of these minor mishaps might result in serious injury or death. The plight of the wounded is particularly grave – the same bullet or chunk of
shrapnel that caused their wound has also compromised their protective suit!
If a scenario indicates that it is taking place in an NBC Environment, make a Contamination Test for each wounded figure before resolving their First Aid Check.
NBC Contamination Test
Make a Troop Quality Check for the casualty:
Pass: Move on to appropriate First Aid Check. Fail: Figure is KIA
Mines and IEDs
Throughout the modern era, regular armies have made extensive use of mines and irregular or insurgent forces have shown an even greater reliance on booby-traps and improvised explosives.
Mines and Minefields
Some scenarios will indicate an area of the table has been mined. Fog of War cards may also allow a player to declare an enemy unit has encountered mines. While the scenario or Fog of War card will normally indicate a unit’s chance of detonating a mine, the following rule of thumb applies to units in or moving through a minefield:
Mine Ratings
Light AP Mine: AP 3/AT 0
Heavy AP Mine: AP 5/AT 1 (As Light Gun) Light AT Mine: AP 2/AT 3 (As Light Gun) Heavy AT Mine: AP 0/AT 5 (As Medium Gun) Hybrid Mine: AP 3/AT 3 (As Light Gun)
Infantry units attacked by mines may only claim their Armor Dice against the attack.
122
ADVANCED RULES FOR INFANTRY COMBAT
If a unit enters a minefield or begins a turn in a minefield, it must pass a Troop Quality test or suffer a mine attack (see Mine Ratings above). The following cumulative modifiers are applied to the die roll:
Unit/Vehicle Moved Rapidly this Turn: -1
Unit/Vehicle Stationary this Turn: +1
Light Concentration of Mines: -1
Medium Concentration of Mines: -2
Heavy Concentration of Mines: -3
Mines fall into three categories: Anti-Personnel, Anti-Tank, and Hybrid. Most mines have a separate anti-personnel and anti-tank rating.
Anti-Personnel Mines
The primary purpose of the anti-personnel (AP) mine is to injure enemy combatants. They accomplish their task through a variety of methods, including simple blast fragmentation, “pop-up” attacks, and directed blast fragmentation. While AP mines are very effective against people, they’re not very effective against vehicles.
Anti-Tank Mines
Anti-Tank (AT) mines are designed to hunt vehicles and generally require a larger amount of pressure to detonate than an AP mine. As a result, infantry and even light vehicles can pass over heavier AT mines without setting them off.
Hybrid Mines
Hybrid mines are designed to be equally effective against vehicles and infantry, but are generally less effective against either than a purpose built mine.
IEDs
Improvised Explosive Devices (IEDs) are a favorite weapon of insurgent and rebel forces.
IED Strength
Small IED: AP 2/AT 1 (Light Gun) Medium IED: AP 4/AT 4 (Medium Gun) Large IED: AP 6/AT 5 (Medium Gun) Massive IED: AP 8/AT 7 (Heavy Gun)
They are cheap, effective, and bypass many of the strengths of a regular fighting force. The presence of IEDs in a game may be dictated by a scenario or Fog of War card draw.
IED’s normally attack a random unit or a unit specified by their owning player, as described by the scenario, Asset, or Fog of War Card in play.
There are as many sizes, shapes, and forms of IED as there are people making them. The IED Strength table provides some guidelines for IED effectiveness, however.
MOUNTED UNITS
There are still places in the world where “cavalry” means “men on horses” rather than men in APCs or helicopters. In recent conflicts, even First World units have found themselves literally “riding into battle.”
The following rules describe the peculiarities of mounted combat on the modern battlefield.
Types of Mounted Units
There are two types of mounted units: Mounted Troops and Cavalry.
Mounted Troops use their mounts to transport themselves and their gear to and from the battlefield. They normally picket their mounts a safe distance away from the fighting and walk the rest of the way in on foot
– there’s no percentage in getting your mount killed, after all. You might need it to escape if things go wrong.
123

FORCE ON FORCE
|
|
in |
Afghanistan, |
|
Forces |
|
|
US |
Special |
2001 |
|
12, |
|
||
|
|
||
November |
|
|
|
the most commonly encountered mounted units in
Force on Force.
In most scenarios involving Mounted Troops, their mounts will not be represented on the table, being stabled somewhere off table. Some scenarios might involve Mounted Troops stumbling into the enemy sooner than expected or being caught in an ambush.
Cavalry troops not only ride their mounts to battle, they generally ride them in battle. They fight from their mounts, using the animal’s extra speed and height to their advantage. Unfortunately, on the modern battlefield, those advantages are usually outweighed by their inability to hug cover and avoid being chewed to pieces by enemy machinegun and small arms fire.
Only units with a D8 Troop Quality or higher can qualify as Cavalry units.
Movement for Mounted Units
Like infantry, mounted units have two movement rates: Tactical and Rapid. Tactical movement for most mounted units is 8”. Rapid movement for most mounted units is 16”, slightly faster than that of a foot unit.
Fire Combat and Mounted
Units
Firing from a Mount
It is difficult to fire a weapon accurately while sitting on a stationary animal, much less from a moving one.
Mounted Troops have very little practice in fighting or firing from a mount. Their riding animals are organic taxies, not living, breathing IFVs. As a result, Mounted Troops who attempt to fire while mounted suffer a -1 shift to their Troop Quality die type (from D10 to D8, for instance) and their Optimum Range is reduced to zero.
Cavalry units actually practice firing from their mounts and are capable of slightly more accurate fire. They still suffer a -1 shift to their Troop Quality die type, but they retain the Optimum range associated with their unmodified Troop Quality.
Firing at a Mounted Unit
Mounted units have some definite disadvantages in a firefight. Their height and mass make them easy targets for all but the shakiest of riflemen, easily balancing out any advantage their speed and intimidating stature might provide.
Mounted units (while mounted, of course) may never claim the In Cover bonus. They may claim the Solid Cover bonus from terrain features that are tall enough to cover most of their mount and rider.
All foot units firing at a mounted unit (while it is mounted) receive an extra Firepower Die. Mounted units (while mounted) do not receive this bonus for firing at one another.
When Mounted Troops are fired at, they must immediately make a Troop Quality Check to remain mounted. If they fail, they will dismount immediately. High Confidence Mounted Troops may ignore this check and remain mounted or dismount at their own discretion. Low Confidence Mounted Troops will
124

ADVANCED RULES FOR INFANTRY COMBAT
immediately dismount and are considered Pinned for the remainder of the turn.
Cavalry units are not required to make a check to remain mounted, regardless of their Confidence Level, but they may always dismount immediately when fired upon.
The unit whose fire forces mounted units to dismount receive the +1 Firepower die bonus to their attack, but subsequent units do not.
Any casualties received by either type of Mounted Unit (while mounted) have a 50% chance of being the rider or the mount.
Regardless of which is hit, immediately make a Troop Quality Check for the figure affected. If the Troop Quality Check is successful, the rider remains mounted. If not, he is thrown from his mount.
First Aid Checks are resolved normally on the next turn for riders who remained mounted. Riders who were thrown receive a -1 modifier to their die roll on the First Aid table.
Mounts who become casualties are always considered to be dead or too seriously wounded to ride.
Close Combat and Mounted Units
Horses trained for use by Mounted Troops are not trained to make heroic charges into the enemy ranks. In fact, they find the concept alien and unacceptable. Cavalry mounts, on the other hand, take such things in their stride, literally.
Mounted Troops may not charge into Close Combat while mounted. Moreover, if a unit of Horse Troops is engaged in Close Combat while mounted, they automatically lose the initial Reaction Tests – i.e., they are unable to flee or lay down defensive fire and their attacker automatically gets the first attack as they dismount to defend themselves.
Cavalry units suffer no penalties in Close Combat. Their training, power, and height give Cavalry troops a solid
advantage over foot soldiers in a melee. Cavalry units receive a +1 die type shift to their Troop Quality when making Reaction Tests during Close Combat. Each mounted figure also throws one bonus attack die in Close Combat.
Casualties in Close Combat follow the same rules described for Fire Combat, above.
Casualties, Dependents and Mounted Units
Mounted Troops suffer the same Casualty and Dependent Penalties as an infantry unit.
Cavalry units ignore the Casualty Penalty but suffer Dependent Penalties in the same way as an infantry unit.
COMBAT STRESS
Stress, and the individual soldier’s reaction to it, is an integral part of the combat experience. The cumulative effect of individual stress may eventually have an effect on a unit’s overall combat performance.
Most scenarios represent short, sharp actions where unit stress is less of an issue, but it might be a deciding factor in a longer engagement. The effects of these stressors are simulated through the Combat Stress rules.
Scenarios using Combat Stress will indicate it in their Special Rules section. Players may also opt to use these rules with whatever scenarios they choose.
Background Stress Level
The background stress level of a game is determined by the scenario. Generally, the background stress level will be 0, but if the scenario involves units that have been out in the field too long with too little rest, are cut off, etc., the background stress level might start at 3. Initially, all Regular units on the table will have the same Stress Level, but as time goes by those Stress Levels will begin to vary.
The Stress Modifiers table describes conditions that will raise or lower a unit’s Stress Level (modifiers are cumulative).
125
FORCE ON FORCE
Stress Modifiers
+1 for each turn after the first
+1 for Dependents/Wounded in the unit
+1 for each Insurgent objective achieved
+1 if fired on in last turn
+1 if taunted by mobs in the last turn +X for negative leader within 6”
-1 If unit is in Solid Cover or has no LOS to enemy -1 for each regular objective achieved
-1 for each turn not under fire or taunted -X for positive leader within 6”
X = Positive or negative value of Leader
Modifiers are cumulative.
Positive Leadership & Stress
While most leaders, regardless of rank, are functionally competent, some possess the extraordinary ability to inspire their men. In Force on Force, we refer to this combination of charisma and moral authority as “Positive Leadership.”
Positive Leaders may be of any rank, but most in most games are squad leaders or platoon leaders.
Each Positive Leader has a Leadership rating ranging from 1 to 3. This equates to the level of stress per turn the leader can alleviate for each Regular unit within 6”.
Leaders with Positive Leadership and their leadership rating are noted in Scenario briefs.
Negative Leadership & Stress
While some leaders inspire their men or put them at ease, others have the opposite effect, robbing their men of their enthusiasm and confidence.
Like Positive Leaders, each Negative Leader has a Leadership rating ranging from 1 to 3. This equates to levels of stress per turn the leader can cause for each Regular unit within 6”.
Leaders with Negative Leadership and their leadership rating are noted in Scenario briefs.
Mixed Leadership
Situations may arise where a unit is within 8” of both a Positive and a Negative Leader. To determine the mixed leadership’s effect on the unit’s stress, compare the leaders’ leadership values and subtract the lowest from the highest and apply the difference.
For instance, if a unit was within 8” of a Positive Leader with a Leadership of 1 and Negative Leader with a Leadership of 2, the difference is 1 – so the unit gains 1 level of stress rather than 2. If the situation were reversed (Positive Leadership of 2, Negative Leadership of 1), the unit would lose 1 level of Stress rather than 2.
Stress Test
At the beginning of each turn after the first, each unit on the table will make a Stress Test. Any negative effects resulting from the Stress Test are applied immediately.
To perform a Stress Test, roll 1 Quality die for each figure in the squad. Roll an extra die if a Positive Leader is within 8” of the testing unit and lose one for each Negative Leader within 8”.
Compare each die to the current Stress Level of the game. If more dice are equal to or greater than the current Stress Level, the unit has passed the Stress Test and suffers no effects.
If more dice are less than the current Stress Level, the unit has failed the Stress Test and Loses Confidence.
126
ADVANCED RULES FOR INFANTRY COMBAT
Losing Confidence
A unit that loses confidence due to a failed Stress Test loses a Firepower die and is reduced one Confidence Level – i.e., a unit with a basic Firepower of 6D goes down to a Firepower of 5D and Confident unit is reduced to Low Confidence.
If a unit loses all its Firepower dice through repeated loss of confidence, it becomes “combat ineffective” and is removed from the table.
Regaining Confidence
Under the right circumstances, units may regain lost confidence. Units may not regain confidence in the same turn that they lost confidence.
Units may regain lost confidence if certain conditions apply at the end of a turn.
Regaining Confidence
Roll for regained Confidence if:
Unit is within 8” of Positive Leader
Unit was not fired on in the last turn and is In Cover.
Unit is not in the LOS of any opposing units. Unit received Air Support last turn
Unit has friendly armored vehicles in sight – APC, IFV, or AFV
Unit achieved a scenario objective in the last turn
CIVILIANS ON THE BATTLEFIELD
Some scenarios call for the presence of civilians on the battlefield. While the scenario may have some special rules governing the behavior of these civilians, the following general rules usually apply:
We understand that many players won’t have a collection of civilian miniatures – and unfortunately there aren’t many modern, noncombatant civilian figures out there – so feel free to use substitutes if you wish!
We use 2”x3” paper “stands” to represent civilians and suggest that civilian figures be mounted on stands this size, if you have them (assuming you’re using 15mm figures – if you’re using a larger scale, adjust the stand size accordingly).
The initial location of civilian mobs is usually dictated by the scenario card.
Civilian mobs are moved at the end of each turn. They move 3” towards the nearest gunfire. They will stop when they come within 6” of a unit. Note however, that some scenarios may dictate special movement rules.
Units may not fire or move through a mob (stand) of civilians unless the scenario dictates otherwise.
If a unit shoots at a target with a Line of Fire that passes within 2” of a civilian mob, a check must be made for civilian casualties. Roll the firing unit’s Quality Die. On a die-roll of 1 or 2, the mob has suffered a casualty.
If one of these conditions applies to a unit at the beginning of a turn, it may roll to regain confidence. This is accomplished by performing a Stress Test. If the unit passes the stress test it will regain a die of Firepower.
Regulars and Civilian Mobs
Normally, units may not purposefully engage civilians, but they may attempt to peacefully disperse them.
A unit must be within 6” of a civilian mob to attempt to disperse it. To disperse the mob, the unit must attempt to reason with it. To succeed, the unit
127

FORCE ON FORCE
must roll a Troop Quality die against the scenario’s Insurgency Level (the level defaults to 4 if it is not given in the scenario – see Asymmetric Engagements, pg. 112, for more information).
If the result of the die roll is higher than the Insurgency Level, the mob disperses and is removed from play. If not, the mob remains in place.
A unit may attempt no other actions in a turn in which it attempts to disperse a civilian mob.
Mob Dispersion Modifiers
(All modifiers are cumulative)
If the Force the unit belongs to has caused any civilian casualties: -1
If the scenario indicates that civilians are hostile to the unit’s Force: -1
If the scenario indicates that civilians are friendly to the unit’s Force: +1
If the opposing Force has caused civilian casualties but the unit’s Force has not: +1
If Civilians in the area are friendly according to the Scenario or a Fog of War card: +1
If the unit has an Interpreter or speaks the civilians’ language: +1
“Popular” Leaders and Civilian Mobs
Some scenarios involve insurgent, guerrilla, or other “popular” leaders who attempt to manipulate civilian mobs or convert them into armed Irregulars. To do so, a popular leader (in the form of any of the force’s Irregular leaders) must be in base to base contact with the civilian mob. It must announce whether it’s attempting to manipulate the mob or transform it into an armed Irregular unit. To succeed, the Irregular leader
must roll equal to or less than the current Insurgency Level on a D6.
If the popular Leader’s roll was successful and he was attempting to manipulate the civilian mob, he may immediately move it 6” in any direction. Once the civilian mob has moved, it is no longer under the popular Leader’s influence.
If the popular Leader’s roll was successful and he was attempting to transform the mob into armed Irregulars, he may arm the mob as long as he has at least one figure with him to pass out weapons. The more figures with him, the larger an armed mob he’s able to create.
If the popular Leader succeeds in transforming a civilian mob into an armed mob, roll 1D6 on the table below. Add +1 to the die roll for each armed figure accompanying the Leader:
Die Roll |
Irregular unit Created |
|
1–5 |
1D6 Irregulars w/Small Arms |
|
|
|
|
6 |
1D6 Irregulars w/Small Arms and 1 |
|
Irregulars with RPG |
||
|
||
7 |
1D6+2 Irregulars w/Small Arms and 1 |
|
with RPG |
||
|
||
8 |
1D6+3 Irregulars w/Small Arms and 1 |
|
with RPG |
||
|
||
9 |
1D6+4 Irregulars w/Small Arms and 1 |
|
with RPG |
||
|
||
10 |
1D6+5 Irregulars w/Small Arms and 1 |
|
with RPG |
||
|
Mixed Mobs: Civlilian & Combatant Units
Occasionally a group of armed irregulars may include unarmed “supporters”. Such groups are called “mixed mobs” and will be identified by the scenario description or by the reinforcement table.
When determining the Firepower of a mixed-mob, only count the armed irregulars. For Defense, the mixed-mob counts both armed and unarmed figures.
128
ADVANCED RULES FOR INFANTRY COMBAT
A hostile mob |
When a mixed mob takes casualties, the owning player may freely select which model within the mixedmob will be removed. If the casualties selected are unarmed civilians, they may count against the opposing force’s Victory Points.
US Airborne Fireteam, Vietnam, 1971
Hostile Mobs
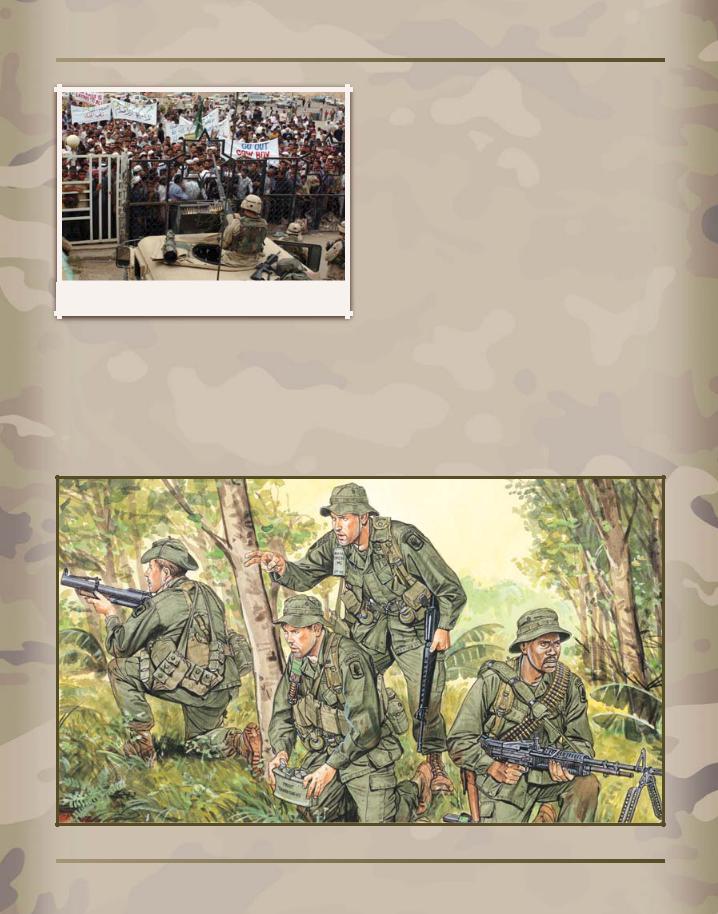
Sometimes civilian mobs are actively hostile but fall short of armed resistance. Instead, they make their displeasure known by hurling taunts and the occasional rock at regular units. Since rules of engagement usually disallow firing on unarmed civilians, this harassment can sometimes add to a unit’s stress level. Hostile mobs will also move to purposefully interfere with a unit’s movement and fire.
Hostile mobs are under the control of a player designated by the scenario. They are activated and moved like any other unit.
Hostile mobs may move to place themselves in a manner that interferes with regular lines of fire.
A hostile mob may also taunt any regular unit within 4”. Each mob may only taunt a single regular unit. Taunting raises the regular units stress level – Combat Stress, pg. 125.
129
TACTICS, TECHNIQUES AND PROCEDURES (TTPS) FOR THE SMALL UNIT LEADER
A key reason cited by many players for the popularity of the original Ambush Alley rule system is that the system allowed them to use, and actively rewarded, real world tactics on the tabletop. For players new to Force on Force or indeed new to wargaming modern historical periods in general, some pointers may be useful to help understand how armies (and insurgents!) operate in reality so that you can experiment with their use in your games. Many of the key rules in Force on Force are based on these fundamental small unit tactics and you will discover that what works in the real world generally works in Force on Force. This holds true for both the attacker and the defender.
OFFENSIVE OPERATIONS
There are two basic types of attack. In a deliberate attack the attacker has a good idea of where the enemy positions are, and what enemy forces he expects to be defending. In a deliberate attack the player can pick the enemy position(s) he wants to focus on and deploy his force accordingly. In a hasty attack or movement to contact, enemy dispositions and strengths are not known. The attacker must be more cautious and attempt to locate enemy positions before committing all his forces. In this case it is best to make contact with the smallest element possible and keep the majority of your forces free to maneuver once the enemy positions are confirmed.
When you are the attacker, the first key technique to master is fire and movement. All first world armies
organize their squads or sections into smaller sub-units known as fire teams or bricks. These fire teams normally consist of four infantry soldiers. A squad leader and two or sometimes three of these fire teams make up a squad or section. Fire and movement (or variously known as bounding, leapfrogging or pepper-potting) is the simple tactic of one fire team providing covering fire or overwatch (scanning for the enemy) whilst its partner fire team moves. It is important to pick an overwatch position which gives line of sight (LOS) to positions from which the enemy may engage the moving element.
In Force on Force, placing one fire team on overwatch allows that team a chance to engage the opposition before they can fire. Once the moving team has reached its destination, the roles can be reversed and the team that has moved provides overwatch and/or covering fire whilst the other team completes its move. Vehicles should also use this tacticoften known as bounding overwatch. One vehicle moves whilst its partner provides overwatch, preferably from cover or at least concealment. This bounding technique is well suited for a hasty attack or movement to contact.
A quick note on infantry movementalways ensure that you move from solid cover to solid cover and if you can’t reach solid coverdon’t move or at least use concealing terrain or chemical smoke to mask your movement. This should also be practiced for vehicles once in contactparticularly soft skins but equally applicable to armor. Players will find that leaving a vehicle in the open (especially soft skin vehicles) to
130