

Blog Design Solutions (2006)
.pdfB L O G D E S I G N S O L U T I O N S
8.Save the file as index.php in the server root (if you decided to follow my setup, you will need to create a new htdocs folder).
9.You now need to restart your computer so that the changes made to the Windows path and startup procedure can take effect. Apache should start automatically unless you opted to control it manually.
10.If there are any mistakes in httpd.conf, Apache will refuse to start. Depending on the version you have installed, you might get a helpful message in a Command Prompt window that tells you what the problem is and which line of httpd.conf it occurred on. Reopen httpd.conf
and correct the error (probably a typo). On the other hand, Windows might display the very unhelpful message shown alongside.
Check the Apache error log for clues about what went wrong. Alternatively, open a Command Prompt window (select Start Run, enter cmd in the Open field, and click OK). Inside the Command Prompt window, change to the appropriate Apache folder by typing the following command and pressing Enter:
cd c:\program files\apache group\apache2\bin
Then type this (followed by Enter): apache
The reason for the failure should appear onscreen, usually with a line number pinpointing the problem in httpd.conf. The following screenshot shows what happened when I mistyped the location of php5apache2.dll.
After you correct any problems in httpd.conf, resave the file and restart Apache using the Apache Service Monitor or choose Control Apache Server from the Apache listing on the Start menu.
36
C R E AT I N G A L O C A L T E S T E N V I R O N M E N T F O R Y O U R B L O G
If you type apache in the Command Prompt window and nothing appears to happen, it doesn’t mean that Apache has hung. It indicates that Apache has started normally. However, while Apache is running, it doesn’t return you to the command line; and if you close the window, Apache will crash. To close Apache gracefully, open another Command Prompt window, change the directory to
the apache2\bin folder, and type the following command:
2
apache -k shutdown
You can then restart Apache using the Apache Service Monitor.
There is also a Test Configuration option on the Apache menu that can be accessed from the Start button. It displays the same information as in the method just described. On some systems, however, it snaps closed after 30 seconds. Opening a Command Prompt window involves more typing, but gives you the chance to read the results at leisure—something that’s often very important if you’re unfamiliar with Apache.
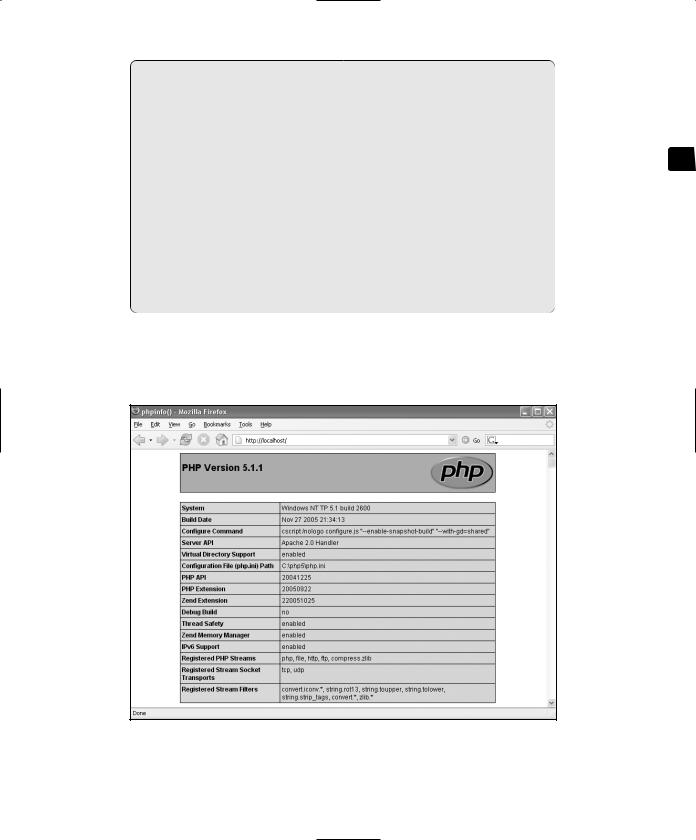
11.After Apache has restarted, open your browser and type http://localhost/ into the address bar (or http://localhost:8080/ if you chose the option to start Apache manually on port 8080). You should see a page similar to the one shown in Figure 2-4. Welcome to the world of PHP!
Figure 2-4. The phpinfo() command displays copious data showing your PHP configuration.
37

B L O G D E S I G N S O L U T I O N S
12.In the unfortunate event that anything goes wrong, check the next section. If that’s not the answer, retrace your steps, and make sure that you have followed the instructions precisely. Check the short piece of code in step 7 and make sure that there is no gap in the opening <?php tag. Try an ordinary HTML page in the same folder (remember that it must be the folder you designated as the server root in step 3). If the ordinary HTML page displays correctly, there’s something wrong with the PHP part of your installation. If it doesn’t display, the problem lies in the way you configured Apache.
13.Assuming that everything is running smoothly, skip ahead to the section titled “Enabling support for CGI scripting on Windows.”
“Cannot load mysqli extension”
This error message is one of the most common that display after installing PHP 5. It occurs because the web server can’t find the correct code library for the PHP MySQL Improved extension (mysqli). It’s located in libmysql.dll, which should be in C:\php5. However, some third-party programs install libmysql.dll directly into the Windows\system32 folder.
The problem arises if the version used by the third-party program is older than the one in C:\php5. Wherever possible, you should avoid littering the system32 folder with DLL files, so remove libmysql.dll from system32. However, if this causes problems with the thirdparty program, you have little alternative but to copy the more recent version from the php5 folder to system32.
Enabling support for CGI scripting on Windows
This section is required only if you plan to test Movable Type on your local computer. Installation is very easy, and can be done at any time as long as you have a working installation of Apache. It involves three stages:
Downloading and installing the Windows version of Perl, the most commonly used language for CGI scripts
Creating a folder outside the Apache server root to store any CGI scripts
Making a couple of small changes to the Apache configuration file
Although Perl itself has a reputation for being difficult to learn, you don’t need any specialist knowledge to configure your computer to support CGI.
Downloading and installing Perl
.com/Products/
Download link. This page, which is entirely register, ActiveState will
updates, but if you prefer not to register, clicking Next will page. Choose the latest version of Perl (currently Windows section, and select the MSI link, as shown
38

C R E AT I N G A L O C A L T E S T E N V I R O N M E N T F O R Y O U R B L O G
2.When you have downloaded the MSI installer, close all other programs, and double-click the Windows Installer icon, as shown alongside.
3.This launches the setup wizard, which is just like any other Windows program. Click Next to start the installation process.
2
4.Accept the license when prompted. You then see a screen that invites you to choose which features to be installed. The default options are fine, so just click Next.
39
B L O G D E S I G N S O L U T I O N S
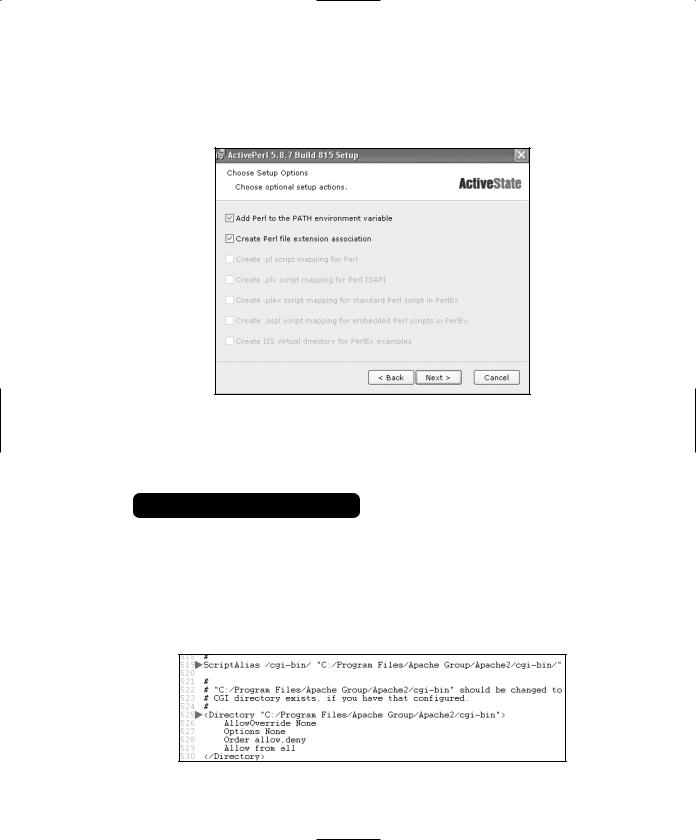
5.You are asked to choose a number of setup options. Some of them are grayed-out if they aren’t applicable to your system, but the others are selected by default. You should accept the options to add Perl to the PATH environment variable and to create a Perl file extension association. This ensures that Windows knows where to find Perl and recognizes Perl scripts correctly. Then click Next.
6.The rest of the installation is automatic, but it might take a few minutes because it generates HTML documentation. If you have a software firewall installed, you might be warned to block the program; if you do, however, the CGI scripts will fail to work.
Configuring Apache to use CGI scripts
1.Although all web files connected with a PHP site must be kept in the Apache server root, all CGI files must be kept in a special folder outside the server root. It’s not important where the folder is located or what it’s called, but the conventional name for it is cgi-bin. I suggest that you create a folder called cgi-bin at the top level of your C drive.
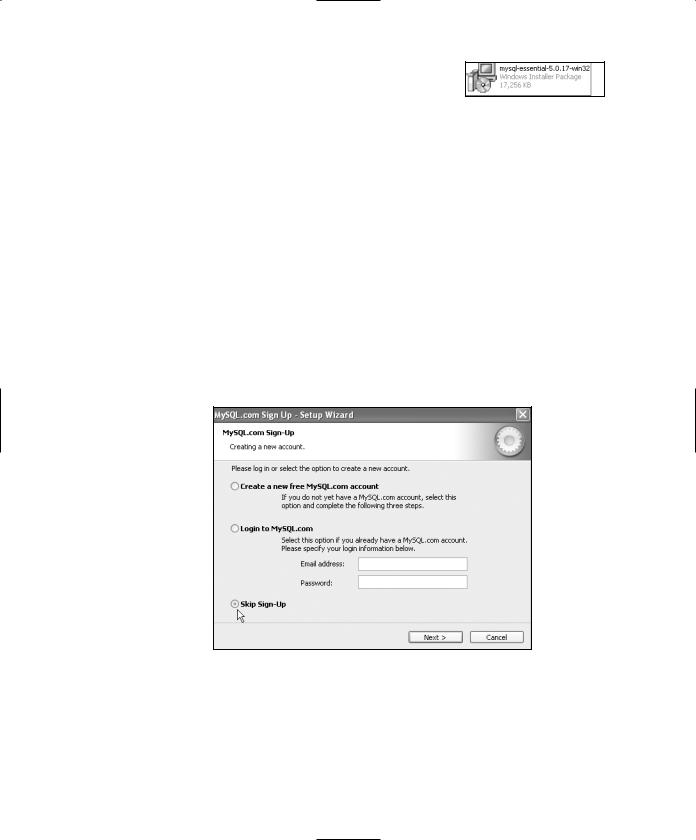
2.Open the Apache configuration file, httpd.conf in Notepad or a text editor, and locate the section of code shown in the following screenshot.
40

C R E AT I N G A L O C A L T E S T E N V I R O N M E N T F O R Y O U R B L O G
3.Change the pathname in both lines indicated by an arrow to the name of the folder you created in step 1. If you followed my suggestion, the lines look like this:
ScriptAlias /cgi-bin/ "C:/cgi-bin/" <Directory "C:/cgi-bin">
4.Save httpd.conf and restart Apache.
5. |
Open Notepad and enter the following script (it’s also available as |
2 |
|
script_test.cgi in the download files for this chapter): |
|
|
#! c:\perl\bin\perl.exe |
|
|
print "Content-type:text/html\n\n"; |
|
|
print "Yes, it really works!\n"; |
|
6. |
Save the file as windows_test.cgi in the C:\cgi-bin folder. |
|
7. |
Type the following URL in your browser address bar and press Enter: |
|
|
http://localhost/cgi-bin/windows_test.cgi |
|
8. |
You should see “Yes, it really works!” in your browser window, confirming that CGI |
|
|
is up and running. |
|
Installing MySQL on Windows
MySQL comes in a range of versions, but the one you should choose is Windows Essentials. It contains all the important stuff, and certainly everything you need for this book. These instructions assume that you have never installed MySQL on your computer before. If you have a version older than MySQL 4.1.5, you must uninstall the old version first.
The instructions are based on the 5.0 series of MySQL, which is installed in C:\Program Files\MySQL\MySQL Server 5.0. This location is different from the default location for the Windows Essentials version of MySQL 4.1, and Windows treats the two series as completely different programs. If you upgrade from MySQL 4.1 to MySQL 5.0, any existing databases need to be transferred to the new version as if it were a different server (see the section titled “Backing up and transferring your blog to another server” at the end of this chapter).
Installing the Windows Essentials version of MySQL
.com/downloads. Select the
of MySQL database server
the section marked Windows click the download link.
. It will have a name like represents the version number.
0e197eab08414336a67d4228a6088055 |
41 |
|
B L O G D E S I G N S O L U T I O N S
4.Exit all other Windows programs, and double-click the icon of the file you have just downloaded, as shown alongside. This is a self-extracting Windows Installer package.
5.Windows Installer will begin the installation process and open a welcome dialog box. If you are upgrading an existing version of the same series of Windows Essentials to a more recent one, the dialog box will inform you that it has detected your current installation and will remove it before installing the new one. However, all your databases will remain intact. Click Next to continue.
6.The next dialog box gives you the opportunity to change the installation destination. Accept the default and click Next.
7.In the next dialog box, accept the default setup (Typical) and click Next.
8.If you’re happy to go ahead with installation, click Install in the next dialog box. Otherwise, click Back and make any necessary changes.
9.Before launching into the actual installation, MySQL invites you to sign up for a free MySQL.com account. I suggest that you select Skip Sign-Up (see screenshot) and click Next. After you finish setting everything up, visit www.mysql.com/ register.php to see if you’re interested in the benefits offered. The main advantage is that you get automatic e-mails advising about new versions and links to helpful background articles about new features of MySQL. Signing up is quick and hassle-free.
42
C R E AT I N G A L O C A L T E S T E N V I R O N M E N T F O R Y O U R B L O G
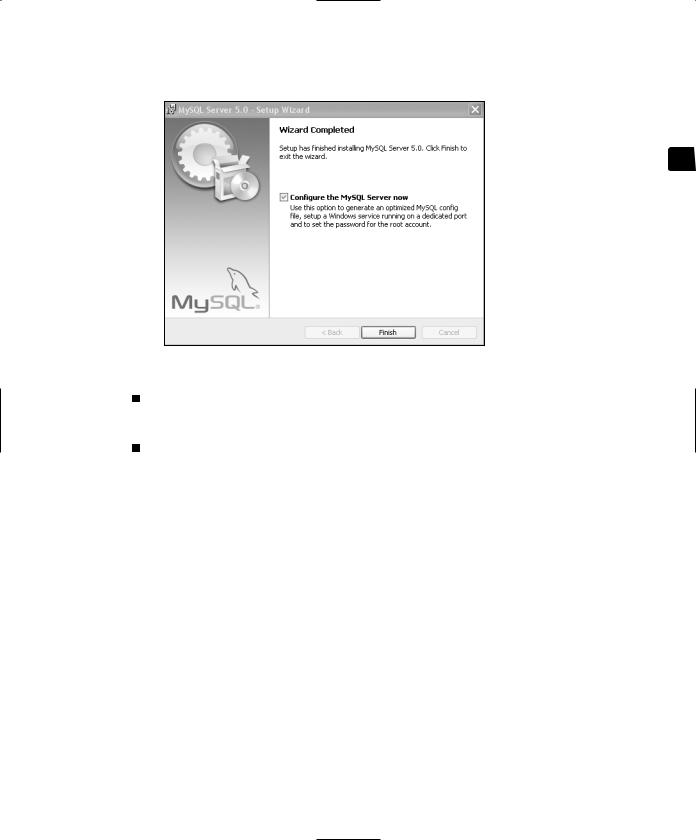
10.The actual installation now takes place and is normally very quick. When everything’s finished, you’re presented with a final dialog box, as shown.
2
The Configure the MySQL Server now check box is selected by default.
If this is a new installation or if you are upgrading from one series to another, leave the check box selected. Click Finish, and then move on to the next section.
If you are simply upgrading to a later version of the same series (such as from 5.0.10 to 5.0.16), deselect the check box before clicking Finish. Your version of MySQL should be ready to use, but will need to be restarted manually (see “Starting and stopping MySQL manually on Windows” later in the chapter). If you have a software firewall, such as Norton Internet Security, you might also be prompted to allow connections to and from MySQL.
43

B L O G D E S I G N S O L U T I O N S
Configuring MySQL Windows Essentials
There are quite a lot of dialog boxes to go through, although all you usually need to do is accept the default setting. These instructions are based on version 1.0.8 of the Configuration Wizard.
1.The Configuration Wizard opens with a welcome screen. Click Next to proceed.
2.The first dialog box asks whether you want a detailed or standard configuration. Choose the default Detailed Configuration option and click Next.
3.The three options on the next screen affect the amount of computer resources devoted to MySQL. Accept the default Developer Machine and click Next. If you choose either of the other options, be prepared for all your other programs to slow down to a crawl.
4.The next dialog box asks you to select from the following three types of database, as shown in the screenshot:
Multifunctional Database: Allows you to use both InnoDB and MyISAM tables.
Transactional Database Only: InnoDB tables only. MyISAM is disabled.
Non-Transactional Database Only: MyISAM tables only. InnoDB is disabled.
Most hosting companies support only MyISAM tables, so choose the final option: Non-Transactional Database Only. Unless you plan to learn MySQL in depth, there is little advantage in choosing the Multifunctional Database option, which requires an extra 30MB of disk space.
If you choose Multifunctional Database, you will need to make a simple text edit to the MySQL configuration file later, as described in “Changing the default table type on Windows Essentials.”
44
C R E AT I N G A L O C A L T E S T E N V I R O N M E N T F O R Y O U R B L O G
5.The next dialog box will be grayed-out if you are upgrading or if you chose Non-Transactional Database Only in the preceding step. Skip to step 6.
If you chose Multifunctional Database, you need to tell MySQL where to create the files for the InnoDB engine. InnoDB stores data in a single tablespace that acts as
a sort of virtual file system. InnoDB files, once created, cannot be made smaller. |
|
The default location for the tablespace is C:\Program Files\MySQL\MySQL Server |
2 |
5.0\data. If you want to locate the tablespace elsewhere, the drop-down menu |
|
offers some suggested alternatives. When you have made your choice, click Next. |
|
6.Leave the next dialog box at its default setting of Decision Support (DSS)/OLAP and click Next.
7.The next dialog box sets the networking options and SQL mode. The important settings are in the top half. Make sure that Enable TCP/IP Networking is checked and leave Port Number at the default setting of 3306. The lower half of the dialog box lets you choose whether to run MySQL in strict mode. This option is new to MySQL 5.0 and is unlikely to affect the vast majority of users. Strict mode is the default and should be accepted unless you have strong reasons not to do so. Click Next.
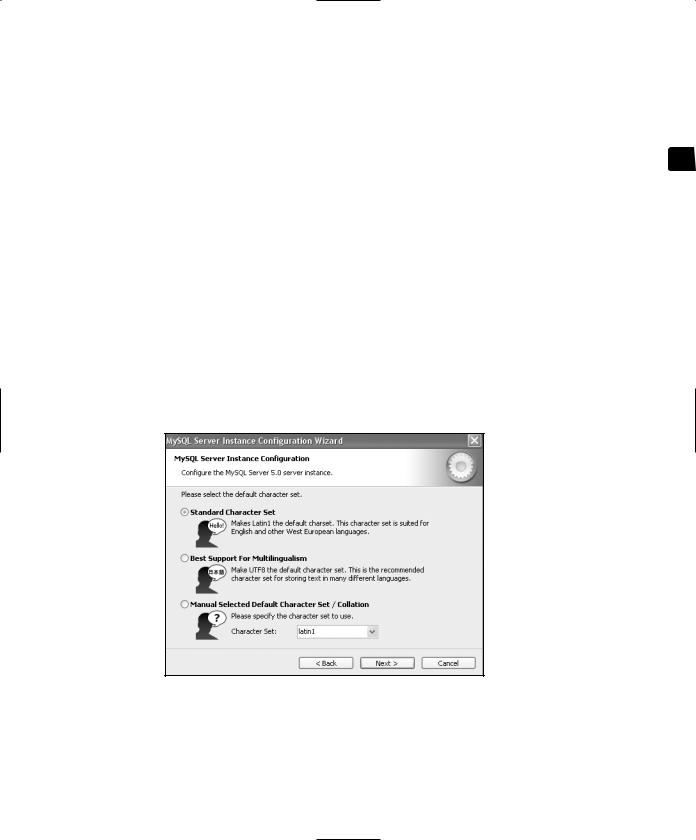
8.MySQL has impressive support for most of the world’s languages. The next dialog box invites you to choose a default character set. In spite of what you might think, this has no bearing on the range of languages supported—all are supported by default. The character set mainly determines the order in which data is sorted. Unless you have a specific reason for choosing anything other than the default Standard Character Set, I suggest that you accept it without making any changes, as shown. You can always change it later. Click Next.
45