

Beginning ASP.NET 2
.0.pdfStyling with Themes
Figure 5-16
4.Time to build some content pages. In this example, you should create three very simple pages. The first one is called ThemeDefault.aspx. Start by right-clicking the Chapter05 folder and select Add New Item. Make sure you check the box to specify a master page for the new page and select the master page you just created when prompted (see Figure 5-17).
Figure 5-17
159
Chapter 5
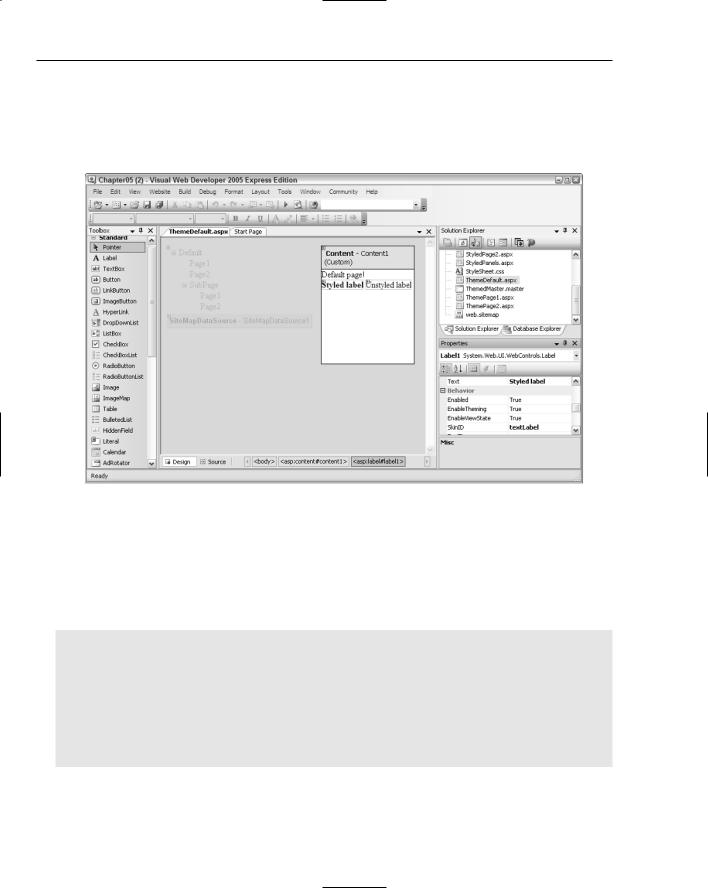
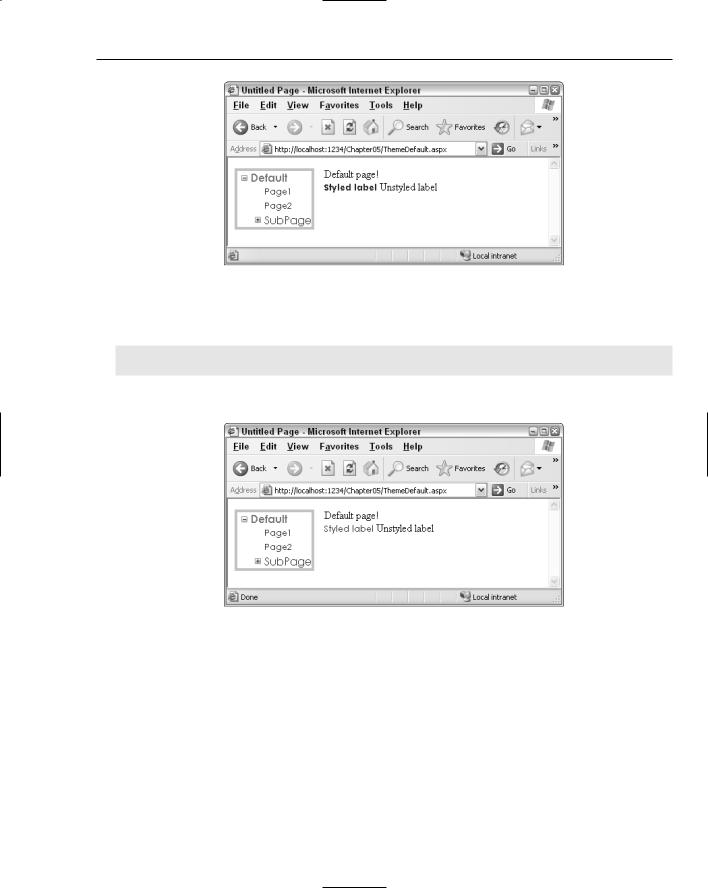
5.In the Content placeholder on this new page, type in some plain text: “Default page!”, and then drag two Label controls onto the page. Set the first Label control’s text property to “Styled label” and the second Label control’s text property to “Unstyled label”. Finally, set the first Label control’s SkinID property to textLabel. This will link up the Label control to use the skinned label’s styling. Your page should look like Figure 5-18.
Figure 5-18
6.Last, you need to specify which theme to use for this page. Let’s use the blue theme. If you are in Design View, click the gray area and view the properties for the Document: In this properties list, you should set the Theme property to Blue. Save the page and that’s the first one out of the way.
If you prefer to use Source View and work with HTML directly, your code should be similar to the following — notice the MasterPageFile and Theme attributes (in bold) on the @Page directive at the top of the page that control the layout and style for this page:
<%@ Page Language=”VB” MasterPageFile=”~/ThemedMaster.master” Title=”Untitled Page”
Theme=”Blue” %>
<asp:Content ID=”Content1” ContentPlaceHolderID=”ContentPlaceHolder1” Runat=”Server”>
Default page!<br />
<asp:Label ID=”Label1” SkinID=”textLabel” runat=”server” Text=”Label”> Styled label</asp:Label>
<asp:Label ID=”Label2” runat=”server” Text=”Label”> Unstyled label</asp:Label>
</asp:Content>
160
Styling with Themes
7.Now you need to add two more pages in the same way. Call them ThemePage1.aspx and ThemePage2.aspx. Make sure that you specify the same master page for these content pages.
8.In ThemePage1.aspx, enter the text “Page 1” and add a Calendar control onto the Content area of the page. Set the page’s Theme property to Blue. The source code for this page should look as follows:
<%@ Page Language=”VB” MasterPageFile=”~/ThemedMaster.master” Title=”Untitled Page” Theme=”Blue” %>
<asp:Content ID=”Content1” ContentPlaceHolderID=”ContentPlaceHolder1” Runat=”Server”>
Page 1<br />
<asp:Calendar ID=”Calendar1” runat=”server”></asp:Calendar> </asp:Content>
9.In ThemePage2.aspx, enter the text “Page 2” and add an ImageButton control to the page. Set its SkinID property to be homeImage and the PostBackUrl property to be ThemeDefault.aspx. This will mean that if a user clicks the image, she will be taken back to the ThemeDefault.aspx page. Finally, set the page’s Theme property to Red. The source code for this page should look as follows:
<%@ Page Language=”VB” MasterPageFile=”~/ThemedMaster.master” Title=”Untitled Page” Theme=”Red” %>
<asp:Content ID=”Content1” ContentPlaceHolderID=”ContentPlaceHolder1” Runat=”Server”>
Page 2<br />
<asp:ImageButton ID=”ImageButton1” SkinID=”homeImage” runat=”server” PostBackUrl=”ThemeDefault.aspx” />
</asp:Content>
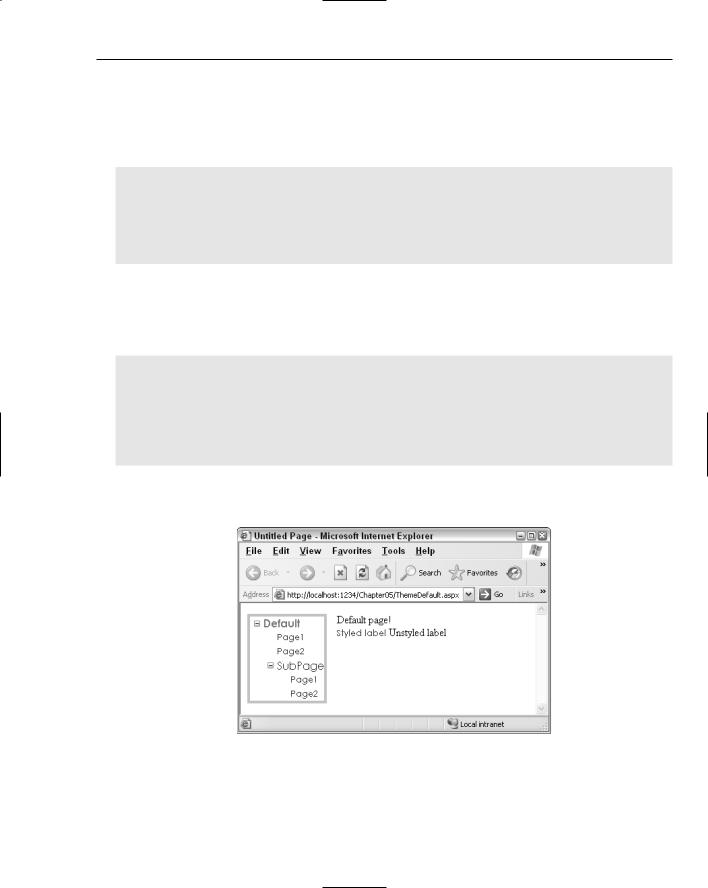
10.Right — you’ve finished the groundwork, so it’s time to see the results of your hard work! Click the ThemeDefault.aspx in the Solution Explorer and press Ctrl+F5 to run the page (see Figure 5-19).
Figure 5-19
161
Chapter 5
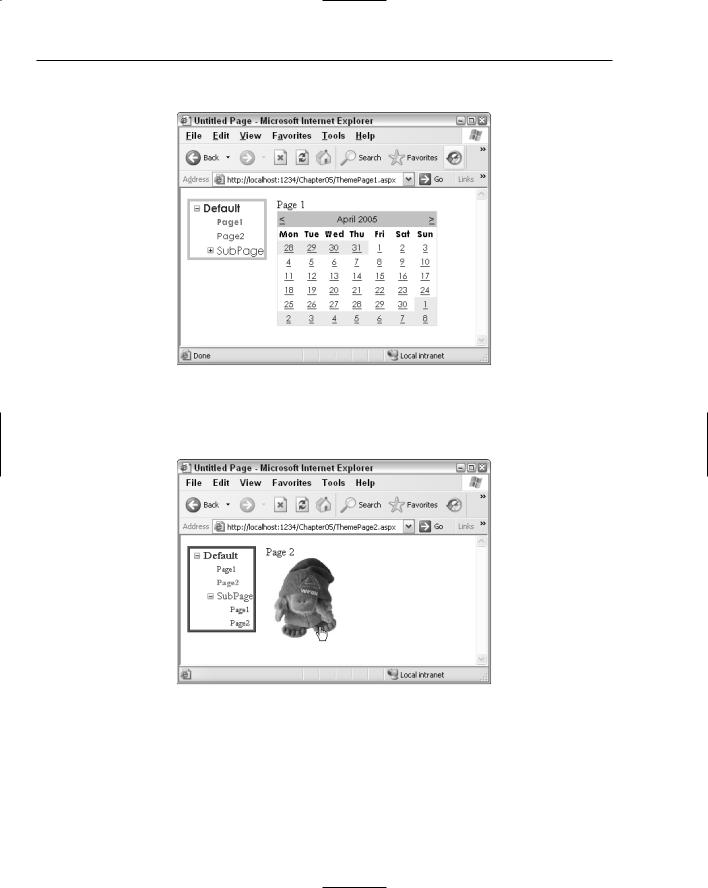
Click through to Page 1 to see the Calendar control, shown in Figure 5-20.
Figure 5-20
And finally, Page 2 (see Figure 5-21) includes the ImageButton control, and will use the red theme.
Figure 5-21
162
Styling with Themes
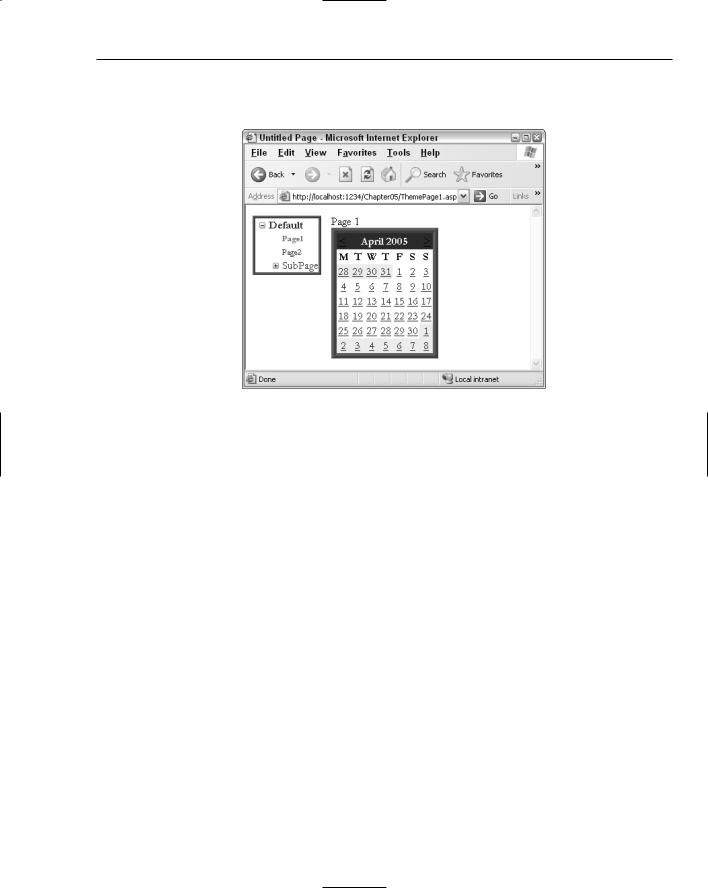
11.Change the Theme attribute on Page 1 to use the red theme. Save the page and view it again. It should look like Figure 5-22.
Figure 5-22
How It Works
In this example, the themes built in the previous Try It Out example have been applied to a simple collection of pages. You’ll recall that master pages were first discussed way back in Chapter 2, and in this chapter you’ve seen that when you have a page that uses a master page, the entire rendered page is treated as a single entity. Remember how you set the ThemeDefault.aspx page to use the Blue theme, but you didn’t specify any Theme property on the master page? The truth is that you can’t actually specify a theme directly on a master page in any case. Your pages in this example have shown how changing the Theme property on each page individually has styled the entire page (including the TreeView control added to the master page) with the same consistent look and feel. That style can easily be switched on different pages, as you saw with Page 1 in this Try It Out.
The main pieces of code that you need to be aware of are the Theme property in the Page directive and the SkinID attribute on server controls. Adding just these two pieces of information to a page resulted in the finished pages. Take ThemePage2.aspx as an example:
<%@ Page Language=”VB” MasterPageFile=”~/ThemedMaster.master” Title=”Untitled Page”
Theme=”Red” %>
<asp:Content ID=”Content1” ContentPlaceHolderID=”ContentPlaceHolder1” Runat=”Server”>
Page 2<br />
<asp:ImageButton ID=”ImageButton1” SkinID=”homeImage” runat=”server” PostBackUrl=”ThemeDefault.aspx” />
</asp:Content>
163

Chapter 5
The Theme attribute at the top of the page specifies which theme should be applied to the entire page, including the contents of the master page that it’s connected to. The SkinID property specifies which skin of an ImageButton control to apply to the ImageButton on the page, so if you had many different ImageButton control styles defined in your skin file, this attribute would specify which one to use on your page.
In the preceding example, you used the Theme attribute specified at the top of each page to indicate which theme to use to style a page. There is another attribute that you can use to style the elements on a page: the StyleSheetTheme attribute. Both the Theme attribute and the StyleSheetTheme attribute take the name of the theme to apply as the value, and both are used to style pages using themes, but the attribute you choose to use can result in slightly differently rendered pages. Here’s why.
Customization Themes — You Have Control!
The pages in the previous example used the Theme attribute, which means that you have just used Customization themes to style each of the pages in the example. A Customization theme has total control over the styling of elements on a page. If you manually style elements on a page controlled by a Customization theme, those styles will only be applied if the elements to which they are added are not already styled by the theme.
Stylesheet Themes — CSS for Server Controls
If you’d prefer to use your themes like a style sheet, you can easily choose to do so by using the StyleSheetTheme attribute at the top of a page. This change in attribute means that you can still give developers the freedom to add some small amounts of styling to controls using style attributes on each tag, while providing a common look and feel for a site in the theme itself.
The best way to see the differences between Stylesheet themes and Customization themes is to have a play, so in this Try It Out you modify the previous example to see the differences.
Try It Out |
Customization and Stylesheet Themes |
1.Open up ThemeDefault.aspx and add a Font-Bold=”true” to the code for the Styled label. Alternatively, switch to Design View, select the Styled label and select the Font node from the Properties tab and specify that the font should be bold:
<asp:Label ID=”Label1” SkinID=”textLabel” runat=”server”
Text=”Styled label” Font-Bold=”True”></asp:Label>
2.Run the page now and you’ll see a bold label, as depicted in Figure 5-23.
164
Styling with Themes
Figure 5-23
3.Now edit the label declared with the SkinId=”textLabel” in the BlueBits.skin file and add the following bolded declaration:
<asp:Label SkinId=”textLabel” runat=”server” Font-Names=”Century Gothic”
Font-Size=”10pt” ForeColor=”MidnightBlue” Font-Bold=”False”></asp:Label>
4.Run the page again and the label will no longer be bold, evidenced in Figure 5-24.
Figure 5-24
5.Change the Theme attribute at the top of the ThemeDefault.aspx page to read StyleSheetTheme instead of Theme. Alternatively, in Design View, edit the properties for the page and specify that the page’s StyleSheetTheme should be Blue, and delete the Theme property. Run the page again and you’ll see that the label is now bold once more.
How It Works
The first step in this exercise was to add a Font-Bold=”True” attribute to the label. Because the bold attribute hadn’t been specified in the Customization theme, the style in the page was applied successfully and the control was rendered with bold blue text.
165

Chapter 5
However, adding a Font-Bold=”False” to the skin’s textLabel control overrides the style in the page because the page is still using the Customization theme (the Theme attribute at the top of the page). As a result, the second time you ran the page, you saw that the page now has a non-bold blue label.
The last step was to change to using a StyleSheetTheme instead of a Theme attribute at the top of the page. This enabled the page’s styles to once more take priority, and so the bold blue label returned the third time the page was run.
Using a Stylesheet theme or a Customization theme is completely up to you. Choosing a Customization theme gives your designer a bit more control over the look and feel of a site, whereas the Stylesheet theme lets you play with control rendering yourself. Bear in mind, though, that if you start adding your own style attributes to controls, you may find that your site appears somewhat strangely if you ever decide to change the contents of the theme, or switch to a completely different theme.
Using Both Stylesheet Themes and Customization Themes
No rules in ASP.NET specify that you can only use a Stylesheet theme or a Customization theme in your pages. If you want to have two levels of styling available to your pages, some mandatory, some optional, you can use both types of theme on your site.
For example, you may specify that major page elements must stay consistent from page to page. The <body> tag of a page must always be in a certain font, and the Menu control must always contain a certain style of node, but you may want to only use styling on Label controls as a guideline or default style. You can therefore create one theme that defines rules for main page elements and Menu controls and specify that theme to be used as the Customization theme. You can then create a different theme with some other style information in it that you can apply to a site as you create it and override certain element styles, and then apply the second theme as a Stylesheet theme. The following list is the order of application when it comes to styling:
1.
2.
3.
4.
Stylesheet theme
CSS styles
Element styles
Customization theme
Styles specified in a Customization theme will always override all other settings.
Themes and CSS Together
CSS is a great way to style a site, so it’s great that there’s a really simple way to integrate style sheets in your themes. All you need to do is add a style sheet file to the theme’s directory and slot it in right next to your skin files. Your non-ASP.NET designer will certainly be pleased that you can easily integrate his designs in your server-side pages!
Because this isn’t a tough concept, you can jump straight in with a quick example to show how this works.
166
Styling with Themes
Try It Out |
Integrating CSS and Themes |
1.Head straight back into VWD, right-click the Blue theme folder, and select Add New Item. In the dialog that pops up, add a new style sheet and call it BlueStyleSheet.css.
2.In the newly created style sheet, add the following code:
body
{
font-family:Arial;
}
.bigtext
{
font-size:xx-large;
}
3.Now flip back into ThemeDefault.aspx and add a CssClass attribute to the unstyled label, with a value of “bigtext”:
<asp:Label ID=”Label2” CssClass=”bigtext” runat=”server” Text=”Unstyled label”>
</asp:Label>
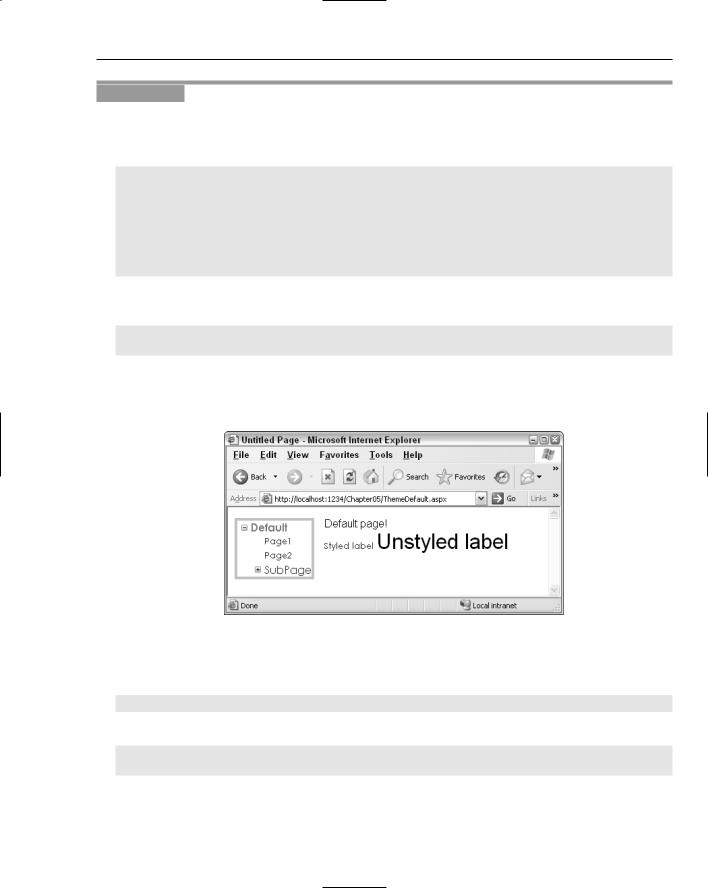
4.Run the page now and you’ll see that the label now has xx-large text style applied (see the CSS style sheet definition), and the default font for the page (everything within the <body> tag) is now formatted using Arial as the font face, as shown in Figure 5-25.
Figure 5-25
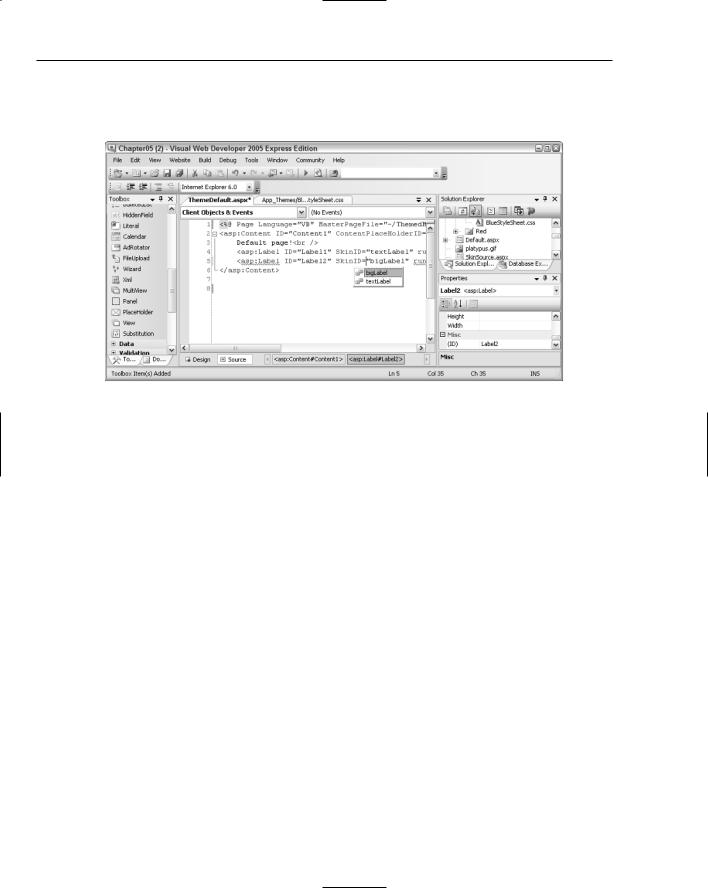
5.Flip to the BlueBits.skin file and add another Label control definition. Set its SkinID to be “bigLabel” and give it a CssClass attribute of “bigtext” and save the file:
<asp:Label SkinId=”bigLabel” runat=”server” CssClass=”bigtext”></asp:Label>
6.Remove the CssClass attribute from the label and set its SkinID attribute to “bigLabel”:
<asp:Label ID=”Label2” SkinID=”bigLabel” runat=”server” Text=”Unstyled label”>
</asp:Label>
167
Chapter 5
Notice that the IntelliSense in VWD kicks in here and helps out by giving you the option of specifying which label style to use (see Figure 5-26), because you now have more than one available in your selected theme.
Figure 5-26
Note that you will get the IntelliSense support here only if you have saved the skin file before going back into the ThemeDefault.aspx page.
Running the page once more will render the same result; the only differences are whether the skin file or the page contains the styling information.
How It Works
By adding a CSS style sheet to a theme folder, that style sheet is now available to all pages that use that theme. Once the theme has been applied, whether it’s a Customization theme or a Stylesheet theme, the styles in the style sheet are available both to the skin files within the theme’s folder, and within the page itself.
The same rules apply to CSS-styled server controls from a Customization versus Stylesheet theme perspective — if you apply a CSS style to an element in a theme and apply a different style to an element on a page, the result will vary according to which type of theme you have applied. If you apply a Customization theme, the theme defined in the skin file will overrule any styles or CSS classes specified in the .aspx page, whereas the opposite is true if you specify that your theme be used as a Stylesheet theme.
Applying Styling to a Site
In most situations, you will likely want to apply a consistent look and feel to all pages within a site. Although you could just specify that all of your pages in the site use the same theme, it’s quicker and easier to specify the default theme for the site in a central location. In ASP.NET 2.0, you can add a value to the Web.config file for your site to specify the default theme for your pages. You will remember that
168